34 (93) TX3 Touch Screen Installation Manual Version 3.4
Copyright 2015 LT-996
Enclosure Installation
You need:
6 fasteners appropriate for the wall that you are mounting the enclosure on.
To flush mount the enclosure
1. Find a suitable location for the flush mount enclosure beside a wall stud.
Attention: To comply with ADA regulations, the bottom of the enclosure must
be no more than 36 inches from the ground.
2. Using the enclosure as a template, trace an opening in the wall for the cut
out with one side aligned with the side of the wall stud.
3. Cut an opening in the wall 0.1 inch larger than the trace ensuring that one
side is aligned with the wall stud or supporting structure.
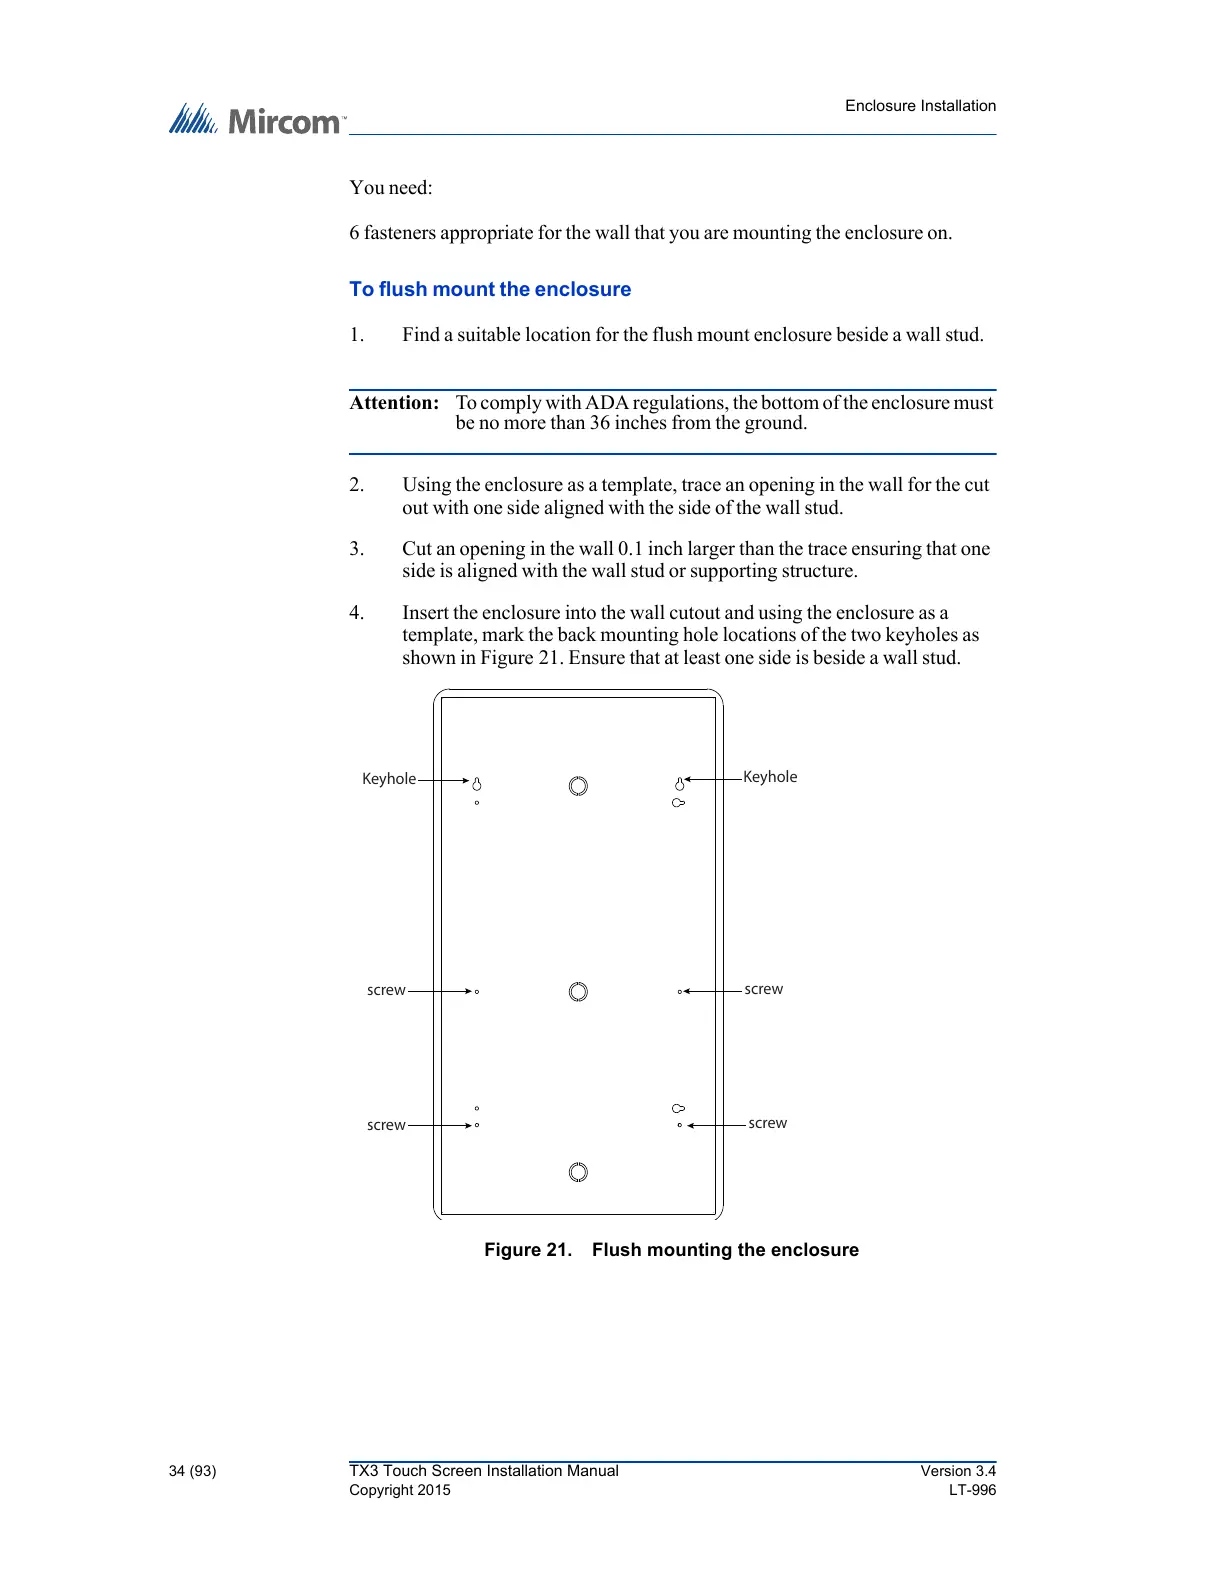
4. Insert the enclosure into the wall cutout and using the enclosure as a
template, mark the back mounting hole locations of the two keyholes as
shown in Figure 21. Ensure that at least one side is beside a wall stud.
Figure 21. Flush mounting the enclosure