– 5.8 –
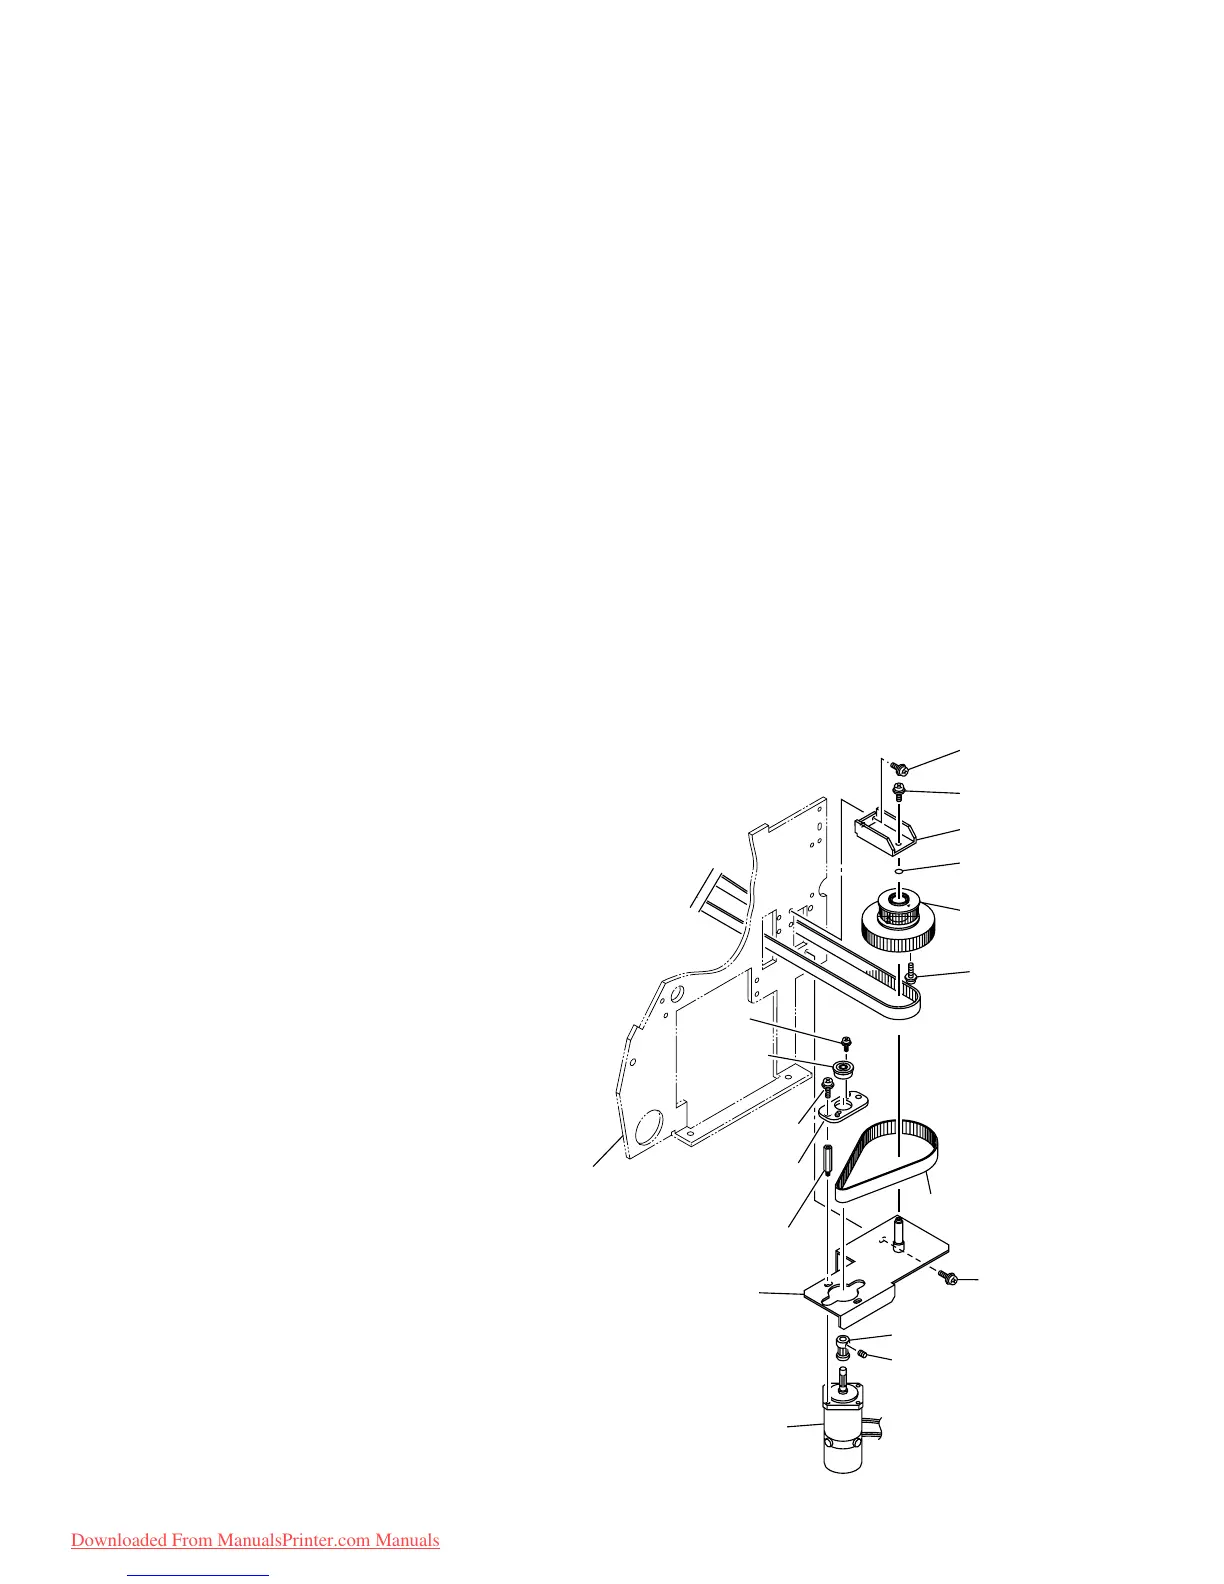
5-1-6. Y-motor assy., Y-timing long belt and Y-timing belt
[Tools to be used]
• Phillips screwdriver (No.2 for M3 to M5)
[Disassembling procedure]
1) Remove the front cover , Y cover, SR cover, YR cover and the right cover.
2) Remove the screw (B3 x 6Ni), then remove the SL cover.
3) Remove the screw (B3 x 6Ni), then remove the YL cover.
4) Remove the left cover.
5) Remove the screw (P4 x 10SMW) , then remove the YM-top plate assy.
6) Remove the electrical unit cover and then remove the harness
7) Remove the screw (P4 x 10SMW) , then remove the screw from the Y-motor assy.
8) Remove two YM-spacers and replace the Y-motor assy.
Follow the procedure given below to replace the Y-timing belt and the Y-timing long belt.
1) Remove the screw (B3 x 6Bk,P4 x 8SMW), then remove the head cover assy.and the head
UD BKT assy.
2) Remove the left cover, loosen the tension screw until there is no tension, then remove the
Y-tension pulley assy.
3) Remove the screw (P4 x 2SMW) on
the slider from belt holder, then pull
the belt holder assy.
4) Remove the Y-timing long belt assy.
from the Y bar and then replace it.
Follow the procedure given below to
replace the Y-timing belt.
1) Remove the screw (P4 x 10SMW) ,
then remove the D BKT U from the
right-side plate.
2) Replace the Y-timing belt.
* Adjust Y-timing belt :
Refer to [6-2-4. Adjustment of the
Y-motor belt tension] P.6-10
[Assembling procedure]
• Assembly is reverse of disassembly.
to Main PCB assy.
CN8,9
Y-axis motor assy.
SSWP4
P4 x10SMW
DM-pulley
D-BKT
YM-spacer
YM-top plate
Belt
Bearing
Right-side plate
Y-drive pulley
O-ring
D-bracket U
P4 x10SMW
P4 x8SMW
P4 x10SMW
P4 x10SMW
P3 x6SMW
Downloaded From ManualsPrinter.com Manuals
 Loading...


