Body Marks (Pictograms)
15-4
2
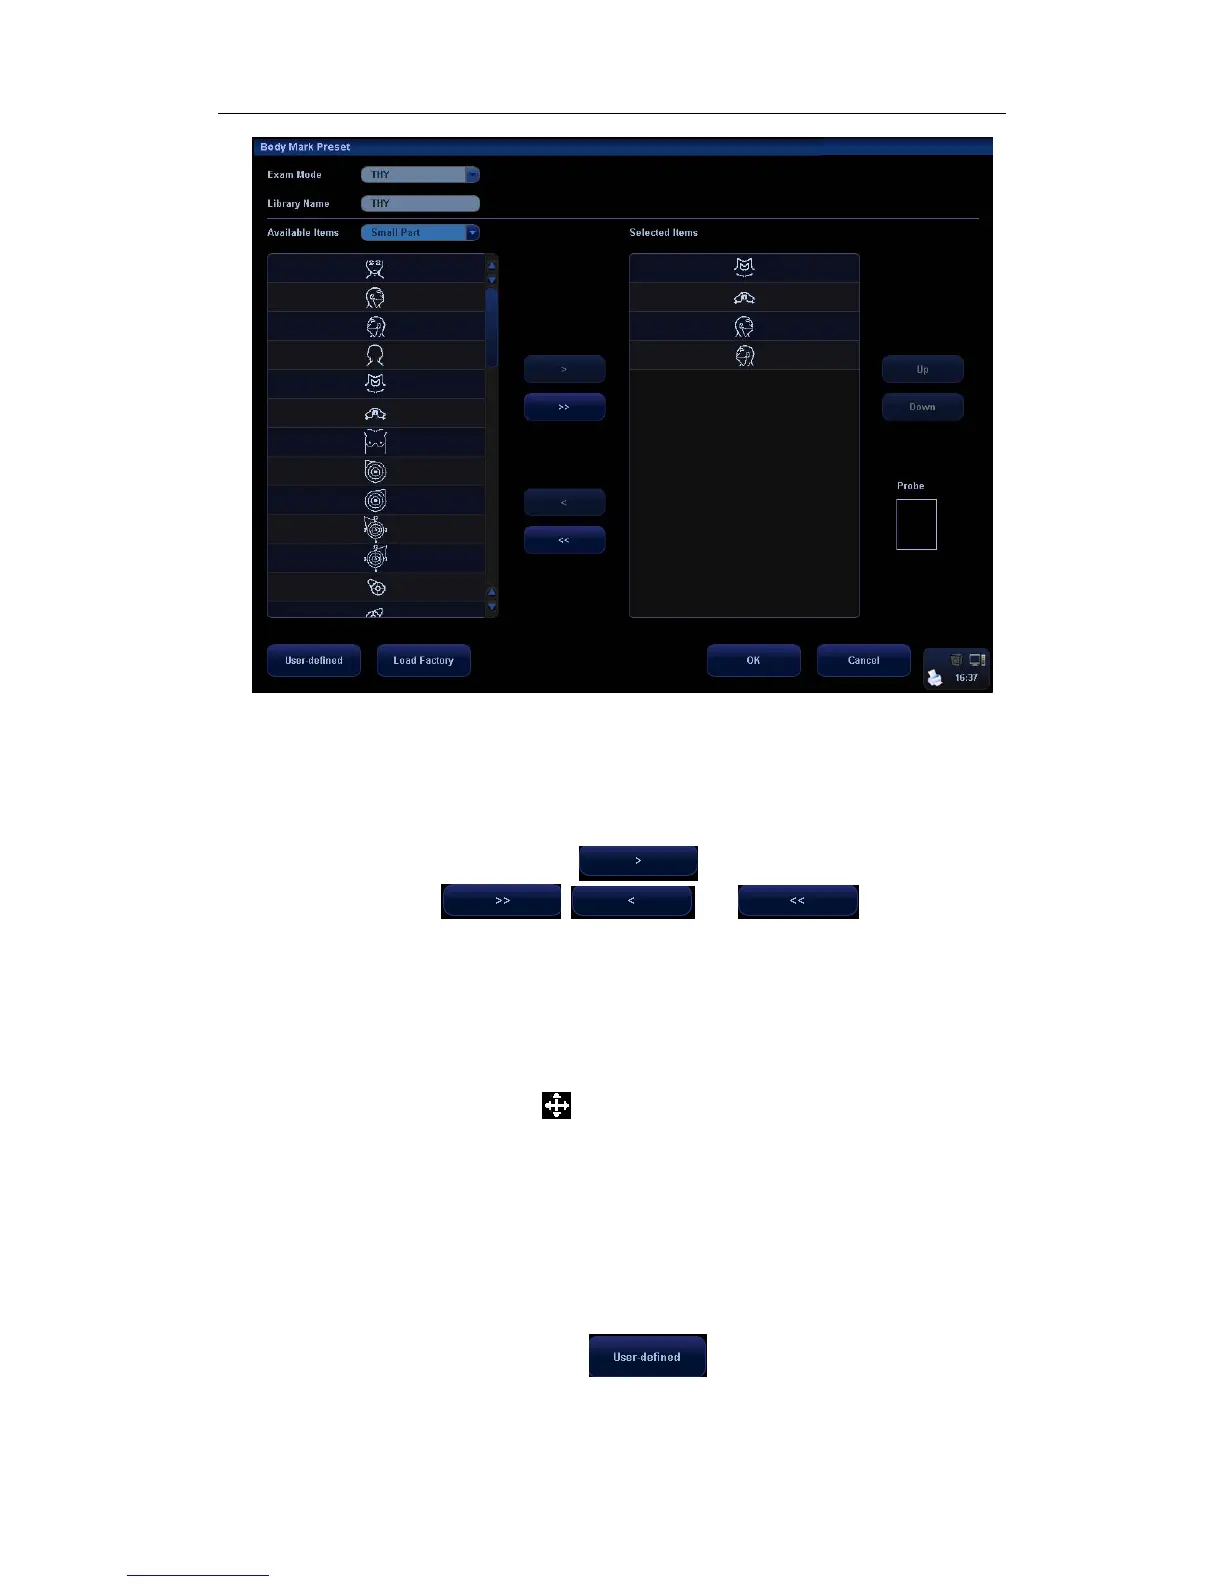
Select the exam type that you will preset the Body Mark presets from Exam Mode drop
down menu.
3
Set library name: enter the name for the setting body mark library.
4
Select the target library where the body mark is applied through the Available Items
drop-down list.
5
Select the desired pictogram, and click to add it to the column on the right
side.
The functions of , and are the same as
those described in the “Comment Preset”.
6
You can arrange the order of the selected pictograms in the column on the right side, by
using either the [Up] or [Down] button.
7
To preset the probe location and orientation on the body mark:
z Select a body mark in the Selected Items box;
z Move the cursor onto the body mark in the Probe Info box;
z After the cursor becomes
, press [Set]and a green probe appears;
z Moving the trackball can change location of the green probe; rotating the
[Multifunction] knob can change the orientation.
z Press [Set] to confirm the new location and orientation and the probe becomes
yellow.
User-defined Body Marks
If there is no Body Mark pictogram from the Body Mark library, you can create a graphic of
your own.
In the body mark preset screen above, click
to enter the user-defined body
mark screen (as shown in the figure below).