Special Imaging Modes
11-8
To setting the ROI, make sure:
z
Set ROI on the 2D image with the largest section area of the fetal face.
z Set ROI a little larger than the fetal head.
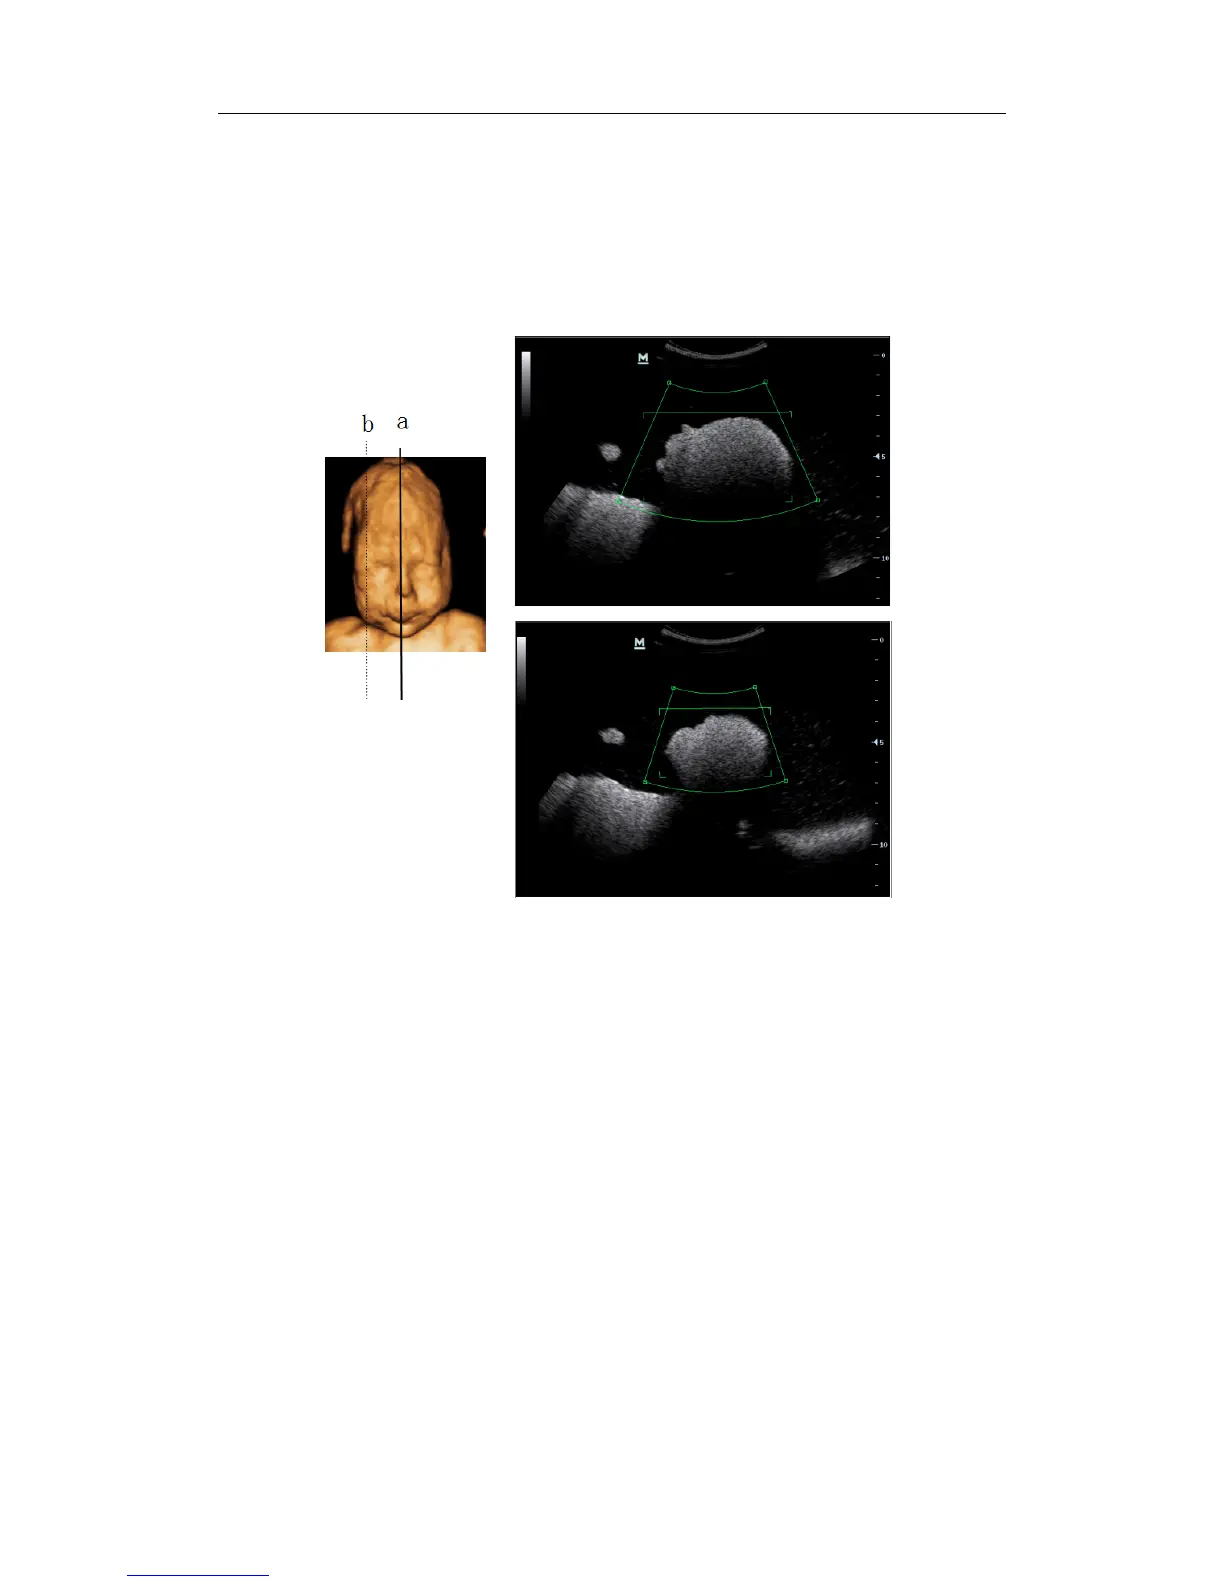
Take scanning the fetal face sagittally as an example, the largest ROI is set on the 2D image
acquired from the sagittally section across the center of the face (with the largest face section
area), as shown in the figure a below. If not, a smaller face section appears and results in a
smaller ROI, as shown in the figure b below. (The left figure below takes a 3D restructured fetal
face to indicate the fetal under exam.)
A small ROI results in an incomplete 3D image, which can be corrected by Resetting ROI after
acquisition. Refer to “11.1.7 Reset ROI” for details.
3. Press the [Update] key or use the soft menu control to click [Start] to start the capture.
4. Perform the capturing according to the scanning technique stated above. (Take the fan
scanning as an example).
5. After 3D image is captured, the system enters 3D image viewing status automatically; or,
press <Freeze> or click [Stop] in the menu to stop image acquisition to enter 3D image
review screen.
6. Browsing and adjusting 3D image.
In image view status, you can adjust the VOI and image parameters to optimize the 3D image,
refer to “11.1.6 3D Image Browsing” for details.
11.1.6 3D Image Browsing
Entering/ Exiting Image Browsing
You can finish the 3D capture and enter image browsing by:
Press the [Update] or [Freeze] key, or click [Stop Capture] on the soft menu.
Or, wait until the 3D capture automatically completed.
You can exit the image browsing and start the capture again by: