Batteries
21-3
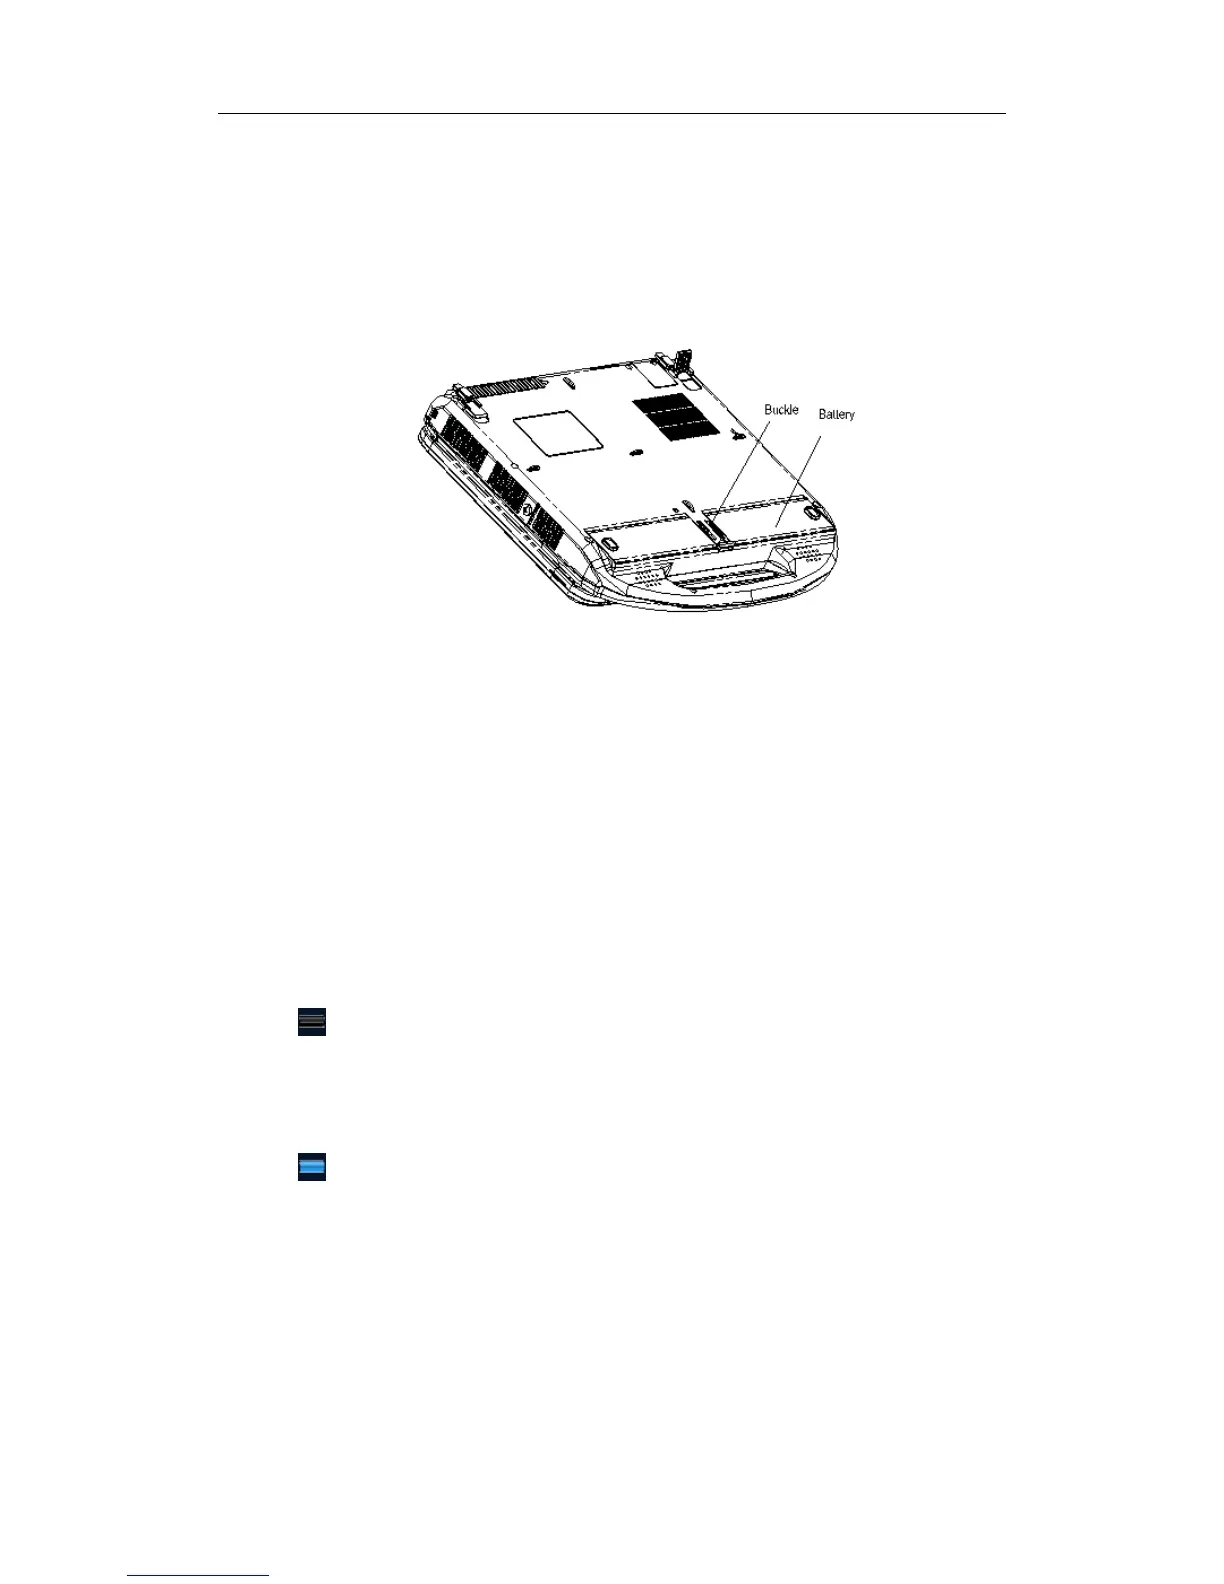
To install the batteries:
1 Turn off the system, and disconnect the adapter from the main unit.
2 Close the monitor, turn the system upside down and put it on the table.
3 You can see two battery bays at the bottom of the system (Note that the batteries
shall be put in correct direction; if not, the batteries do not fit). Press the batteries
gently until they click. Now the batteries are clocked in the bays.
To remove the batteries:
1 Turn off the system, and disconnect the adapter from the main unit.
2 Close the monitor, turn the system upside down and put it on the table.
3 Push the buckles located between the two bays to the end to unlock the batteries.
4 Take out the batteries from the bays.
21.4 Battery Status Indicator
The battery status indicator is located in the lower right corner of the screen, indicating the
battery capacity.
The icon indicates the battery capacity is empty.
When the power capacity is not enough, the system will pop up a prompt: Warning!
Battery is out of power! Please insert the Adapter or system will be shut down in one
minute.
Please follow the instruction to maintain the normal operation of the system.
The icon indicates the battery capacity is full.
The battery icons other than the two icons above-mentioned indicate the capacity is
between empty and full.
21.5 One Full Discharge / Charge Cycle
Upon receipt of the system and before first time usage, it is recommended that you
perform one full discharge / charge cycle. If the battery has not been used for over 2
months, you are recommended to perform one full discharge / charge cycle. It is also