2-1
v1.0, April 2010
Chapter 2
Connecting the VPN Firewall to the Internet
This chapter contains the following sections:
• “Understanding the Internet and WAN Configuration Tasks” on this page
• “Logging In to the VPN Firewall” on page 2-3
• “Configuring the Internet Connections” on page 2-7
• “Configuring the WAN Mode” on page 2-16
• “Configuring Secondary WAN Addresses” on page 2-25
• “Configuring Dynamic DNS” on page 2-27
• “Configuring Advanced WAN Options” on page 2-31
• “What to Do Next” on page 2-35
Understanding the Internet and WAN Configuration Tasks
Typically, the VPN firewall is installed as a network gateway to function as a combined LAN
switch and firewall in order to protect the network from incoming threats and provide secure
connections. To complement the firewall protection, NETGEAR advises that you use a gateway
security appliance such as a NETGEAR ProSecure STM appliance.
Generally, seven steps are required to complete the Internet connection of your VPN firewall:
1. Connect the VPN firewall physically to your network. Connect the cables and restart your
network according to the instructions in the installation guide. See the ProSafe Gigabit Quad
WAN SSL VPN Firewall SRX5308 Installation Guide for complete steps. A PDF of the
Installation Guide is on the NETGEAR website at
http://kbserver.netgear.com/products/SRX5308.asp.
2. Log in to the VPN firewall. After logging in, you are ready to set up and configure your VPN
firewall. See “Logging In to the VPN Firewall” on page 2-3.
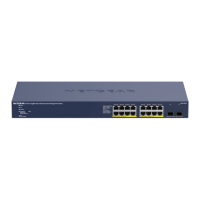
Note: In this chapter and all following chapters and appendixes, the ProSafe Gigabit
Quad WAN SSL VPN Firewall SRX5308 is referred to as the VPN firewall.
 Loading...