www.nordsonefd.com info@nordsonefd.com 800-556-3484 Sales and service of Nordson EFD dispensing systems are available worldwide.
EV Series Automated Dispensing Systems
95
Appendix D, Multi-Needle Setup and Use (continued)
To Use the Multi Needle Command in a Program
PREREQUISITES
The system is properly set up. Refer to “Setting Up and Calibrating the System (Required)” on page 37.
The additional dispensers are installed and set up and the Multi Needle capability is enabled. Refer to “To Enable
Multi-Needles Dispensing” on page 92 and to “To Set the Camera-to-Tip Offsets for Multiple Dispensers” on
page 92.
A test workpiece is positioned on the xture plate or work surface.
NOTE: This procedure explains the programming process for two dispensers. Repeat steps as needed to add
commands for additional dispensers (up to ve dispensers can be installed).
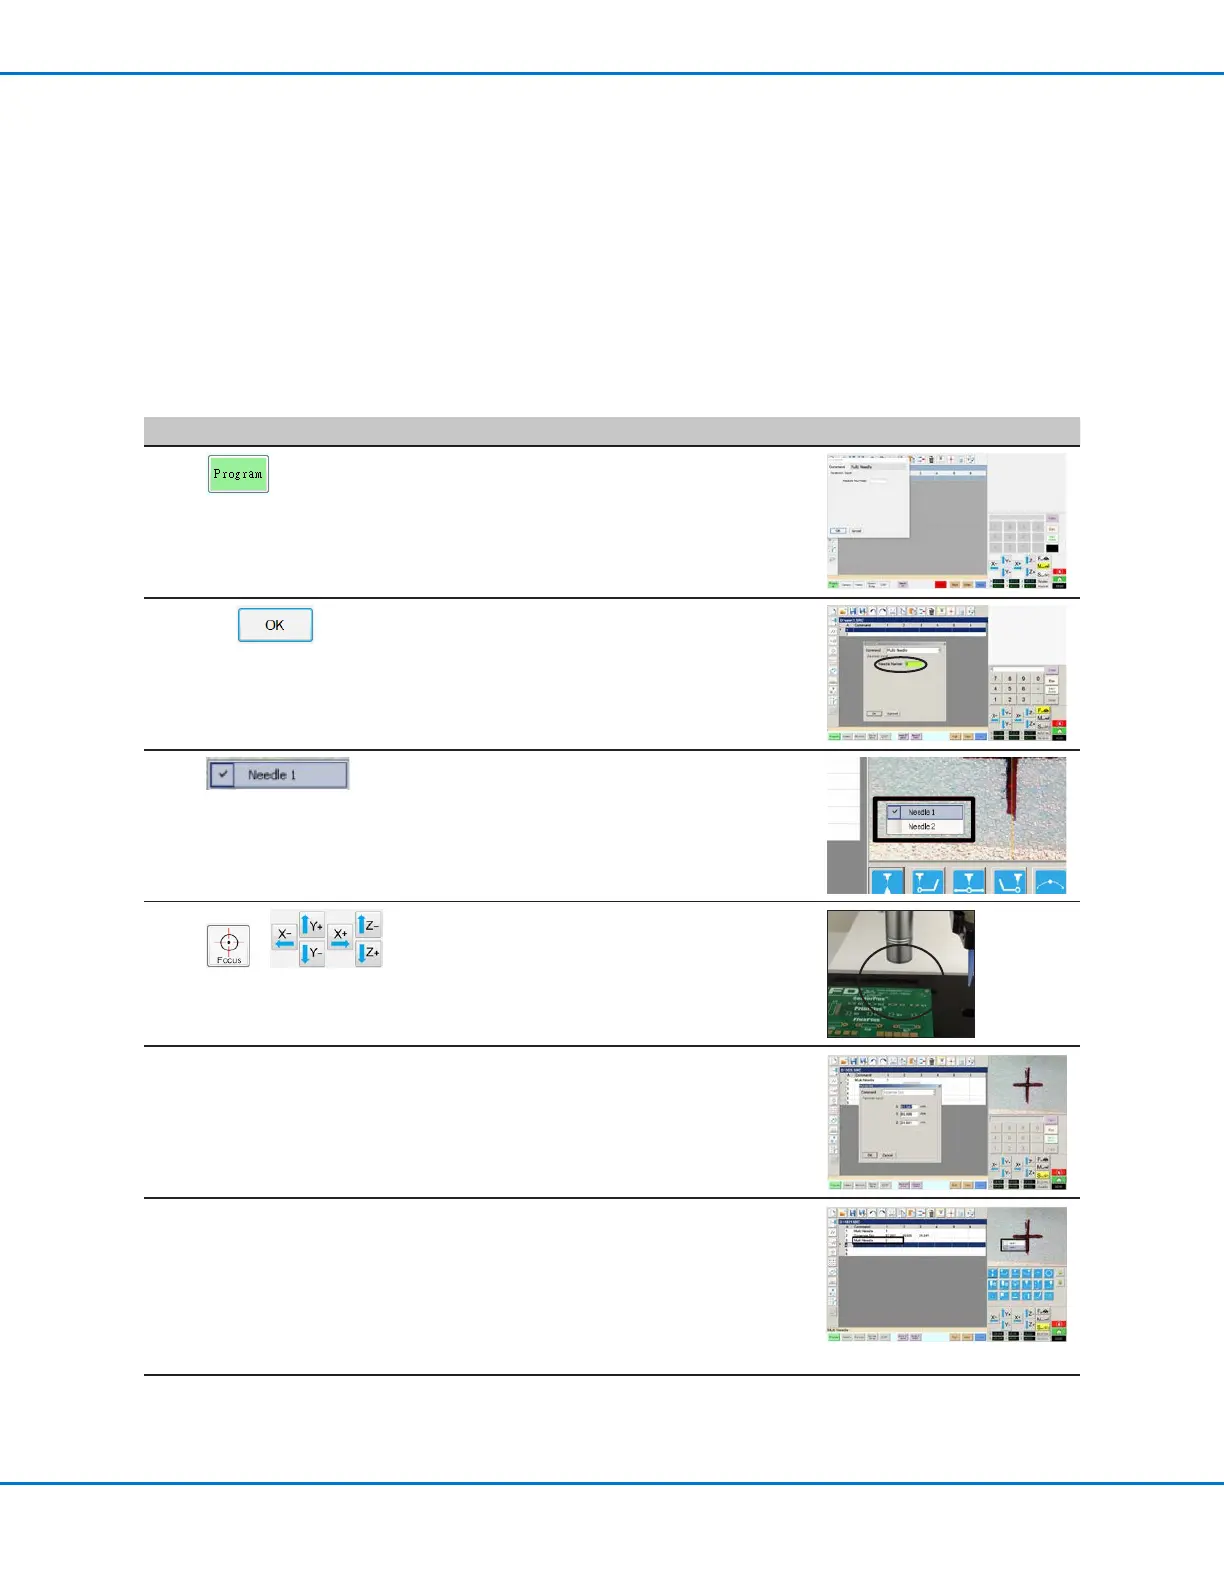
# Click Step Reference Image
1
> MULTI NEEDLE
• Click the PROGRAM tab
• Double-click the address row where you
want to insert a Multi Needle command and
select MULTI NEEDLE.
2
1 >
• Enter the number of the dispenser to
dispense from at this point in the program (in
this example, Dispenser 1).
• Click OK to save.
3
• In the Secondary View screen, right click and
check the NEEDLE 1 checkbox.
4
>
• Click the FOCUS icon to focus the camera.
• Jog the camera until the camera crosshairs
are centered over the desired target on the
workpiece.
5
• Enter the required commands for
Dispenser1 (for example, create dispense
dots or lines).
6
MULTI NEEDLE • Double-click the address row where you
want to insert the second Multi Needle
command and select MULTI NEEDLE.
Continued on next page