108
Setting Inspection Conditions
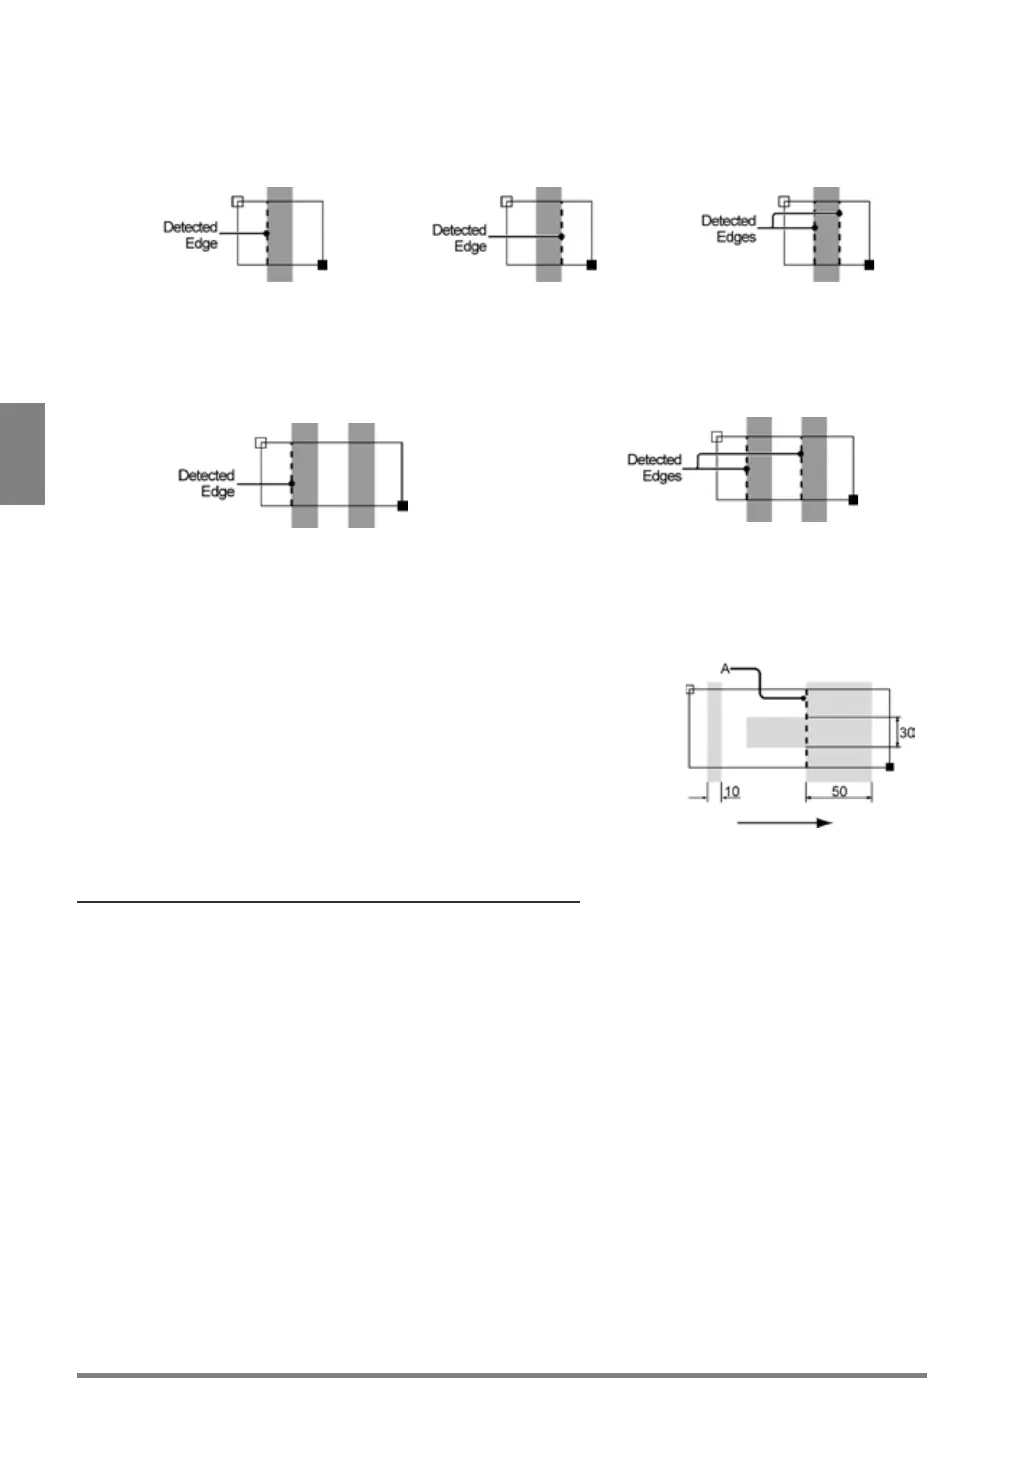
Edge Condition (White -> Black(-) / Black -> White(+) / Both)
White -> Black(-)
Detects a point changing from
white to black as an edge.
Black -> White(+)
Detects a point changing from
black to white as an edge.
Both
Detects both point from white to
black and from black to white.
Detected Position (Front / All)
Front
Scans from the start point and detects the first
All
Detects all edges which meet the condition in the
area. Use this to count the number of edges.
No. of Objects = 2
Filter/Width
These are conditions of object size. The function prevent from detecting undesired part such as noise within the
area. Adjust them when desired edge cannot be detected after testing.
Condition of length in scan direction.
Width:
Condition of length in the direction at right angle to
Example:
When you want to detect “A” in the right figure as an edge, set
Filter to 20 and Width to 40.
The first object with length in scan direction 10 and the nose
with width 30 are not detected. And only “A” meets the
condition and is detected.
Dilation and Erosion on Binary Image (Filter)
This is the function that dilates or erodes the pixels of color selected in “Edge Condition”. Use this function
mainly when you delete a slight noise or enhance a detected area. If applying this function is not necessary,
proceed to the next step.
1.
Select “Inspection Condition” > "Filter".
The list of settable filters is displayed.
2.
Select "Filter" to process the image to be a desired image.
Changing filters updates the displayed image. Confirm it and set.


 To Next Page