262
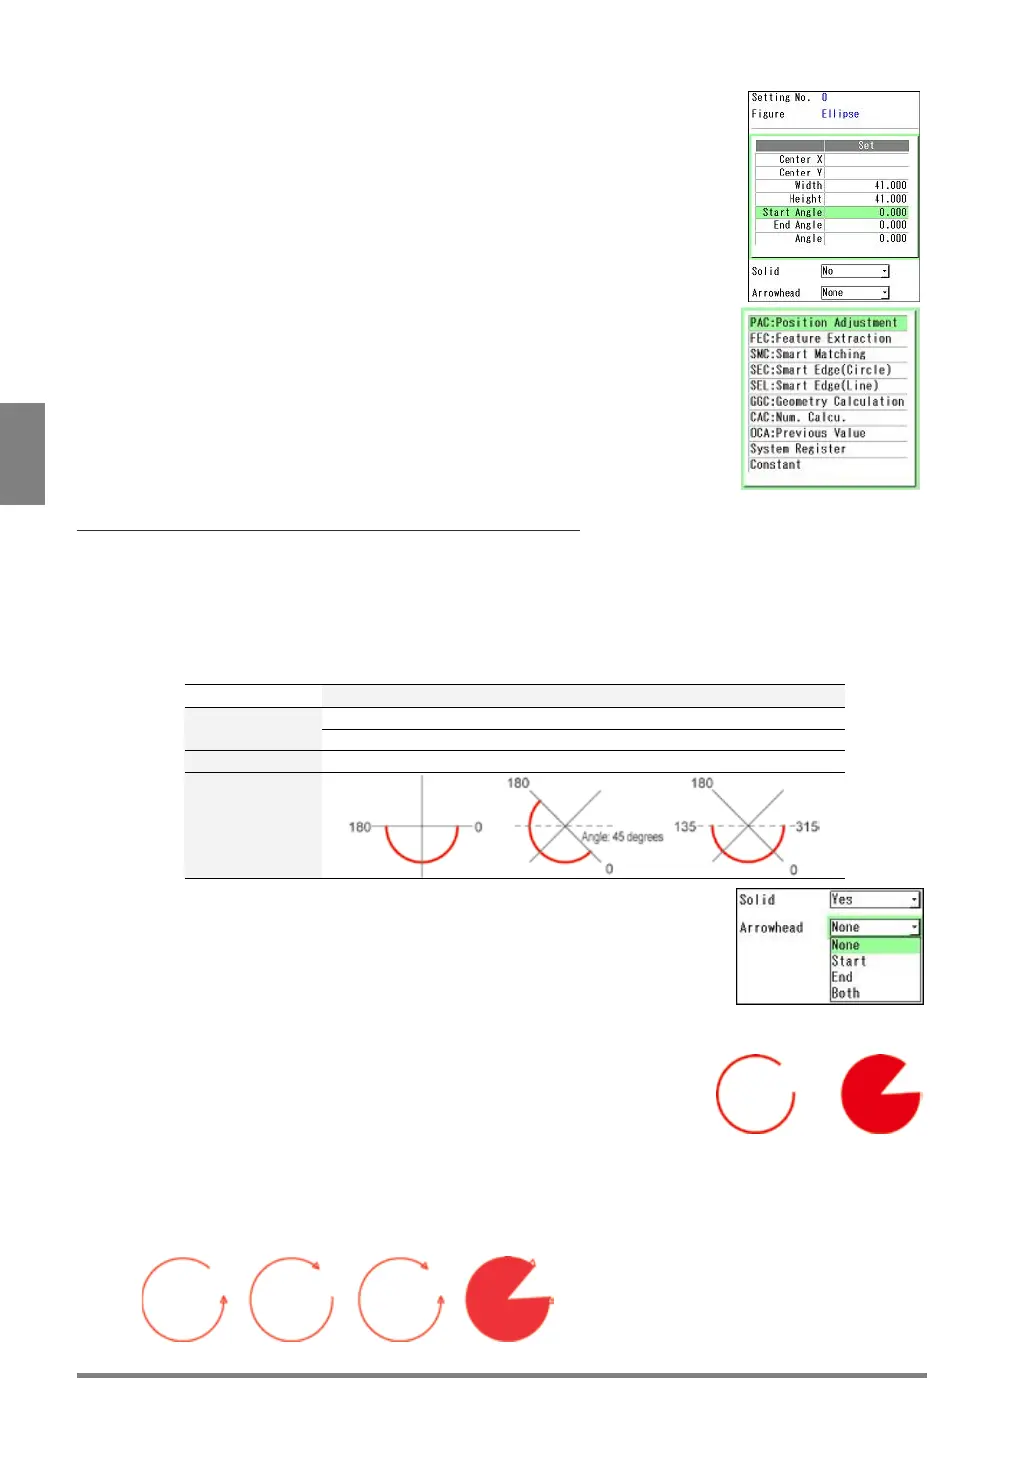
Setting Inspection Conditions
1.
Move the cursor onto "Start Angle" and press the ENTER key.
A list of available items is displayed. (The checkers displayed in gray
indicates that they are not unset.)
2.
Select the item to input in Start Angle from the list of the selectable
items.
3.
In the same way, set End Angle.
About 0-degree Position
The position of "0 degree" for the start and end angles is at three o'clock as mentioned above. However, if
the ellipse is rotated (when the angle specified in the previous section is other than 0), the specified angle
is at the position of 0 degree.
Note that the position of the displayed arc varies when the (rotation) angle of each ellipse differs even if the
same values are set to the start and end angles as shown in the example below.
Example)
Optional Settings
"Solid" and "Arrowhead" is provided for the options of "Ellipse".
1.
Set "Solid".
When filling an arc, the area from the start angle to the end angle is
filled as shown in the right figure.
2.
Set "Arrowhead".
Select one from the following three types to add the arrowhead.
arrowhead to
the start angle
arrowhead to
the end angle
Add arrowheads to the both start and end angle sides.
The right figure shows the example of the solid figure.