51
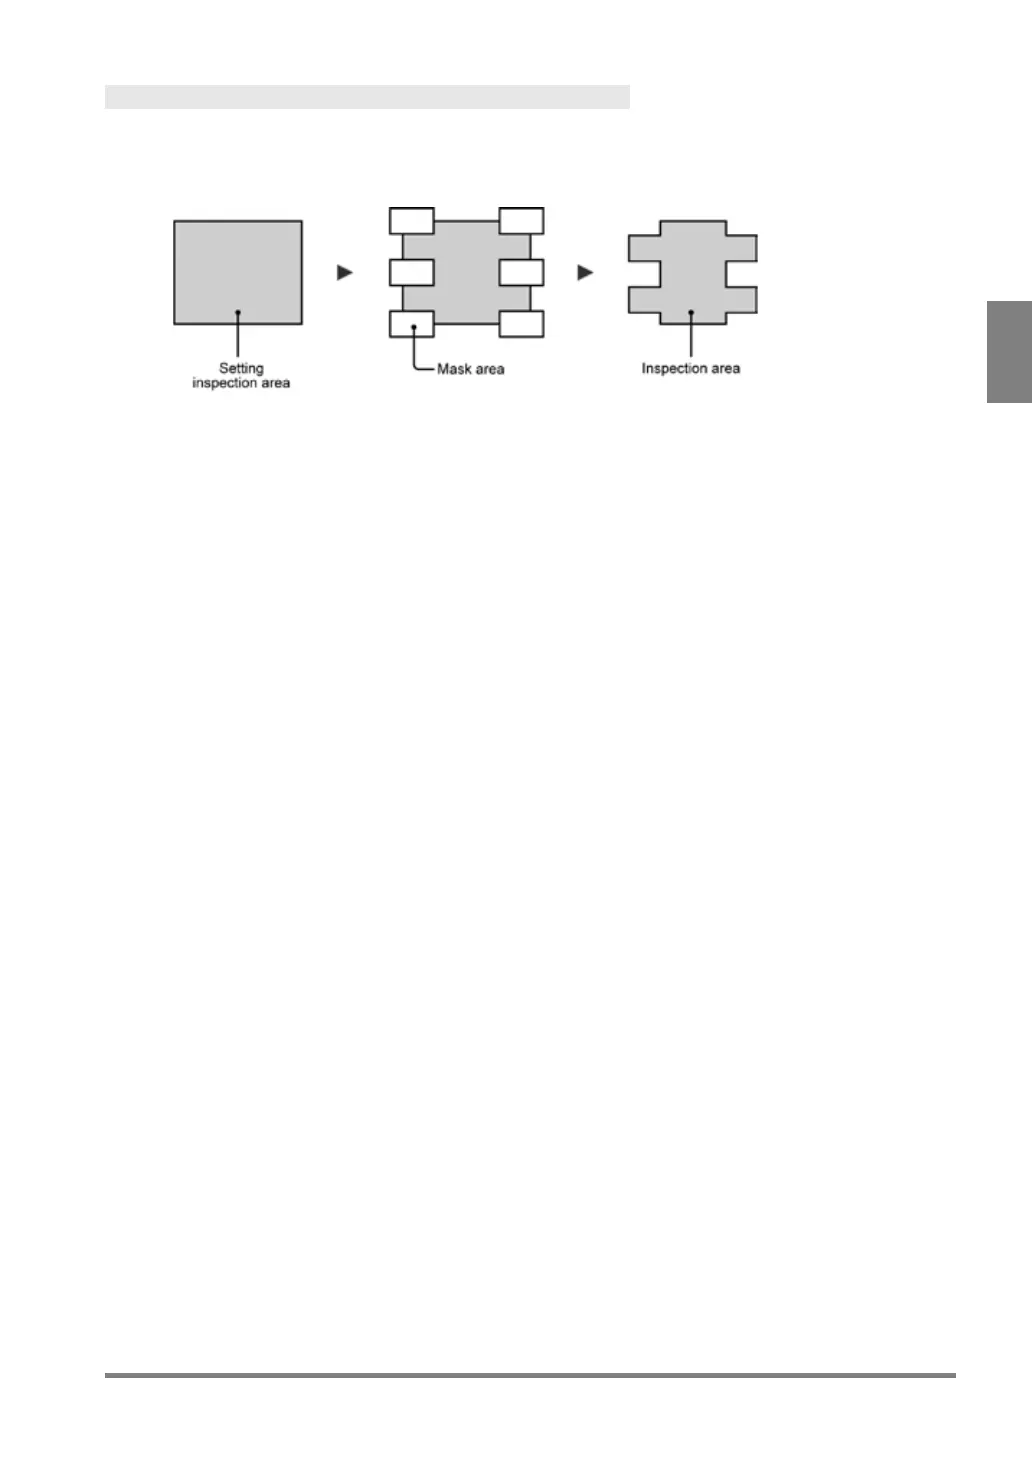
Setting a Mask Area
Up to 16 mask areas, where checker does no inspection, can be set in an inspection area. (Some checkers
cannot set a mask area. For details, see the descriptions of each checker.)
Setting a Mask Area
Inside mask area is
excluded from inspection.
Adding a Mask Area
1.
Select "Add Mask" in “Area Setting”.
2.
Select a mask shape to add.
3.
Select "Change".
The inspection area is displayed in orange.
4.
Tilt the ENTER key upward/downward to display the area in orange.
5.
Draw a Mask Area
For details, refer to page 47, “Drawing an Inspection Area”.
6.
After drawing is completed, press the CANCEL key.
Editing a Mask Area
1.
Select “Change” in “Area Setting” window.
The inspection area is displayed in orange.
2.
Tilt the ENTER key upward/downward to display the area in orange and press the ENTER key.
3.
Edit a Mask Area.
For details, refer to page 47 “Drawing an Inspection Area”.
4.
After drawing is completed, press the CANCEL key.
Deleting a Mask Area
1.
Select "Delete Mask" in “Area Setting”.
The mask area is displayed in orange.
2.
Tilt the ENTER key upward/downward to display the area to delete in orange.
3.
Press the ENTER key.
The mask area will be deleted. To delete plural mask areas, repeat this operation.