136
3
Taking Pictures
You can choose whether to imprint the date and/or time when taking still
pictures.
1
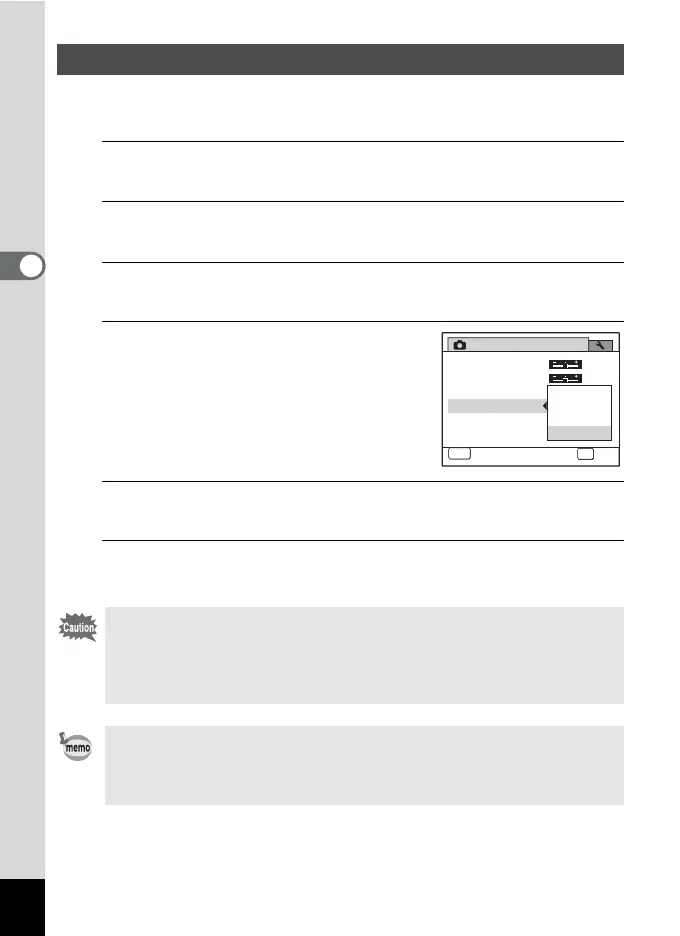
Press the 3 button in A mode.
The [A Rec. Mode] menu appears.
2
Use the four-way controller (23) to select [Date
Imprint].
3
Press the four-way controller (5).
A pull-down menu appears.
4
Use the four-way controller (23)
to select the Date Imprint details.
Choose from [Date], [Date & Time], [Time]
or [Off].
5
Press the 4 button.
The setting is saved.
6
Press the 3 button.
The camera returns to capture status.
Setting the Date Imprint Function
• The date and/or time imprinted with the Date Imprint function cannot
be deleted.
• Note that if the printer or the image editing software is set to print the
date and the images to be printed already have the date and/or time
imprinted, the imprinted dates and/or times may overlap.
• O
appears on the display in
A
mode when [Date Imprint] is set
(
p.21
).
• The date and/or time are imprinted on the picture with the date format
style set with “Setting the Date and Time” (p.47).
Rec. Mode
Contrast
MENU
Cancel
4/4
Saturation
Date Imprint
Sharpness
OK
OK
Date & Time
Date
Time
Off