46
69
TRIO Panel Formwork
Instructions for Assembly and Use – Standard Configuration
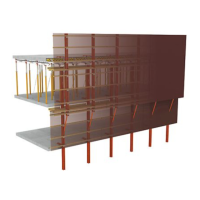
Fig. A13.10
Fig. A13.10a
Fig. A13.10b
Fig. A13.10c
(without crane chain)
Fig. A13.09a Fig. A13.09b
Fig. A13.09
A13 Working and concreting platforms
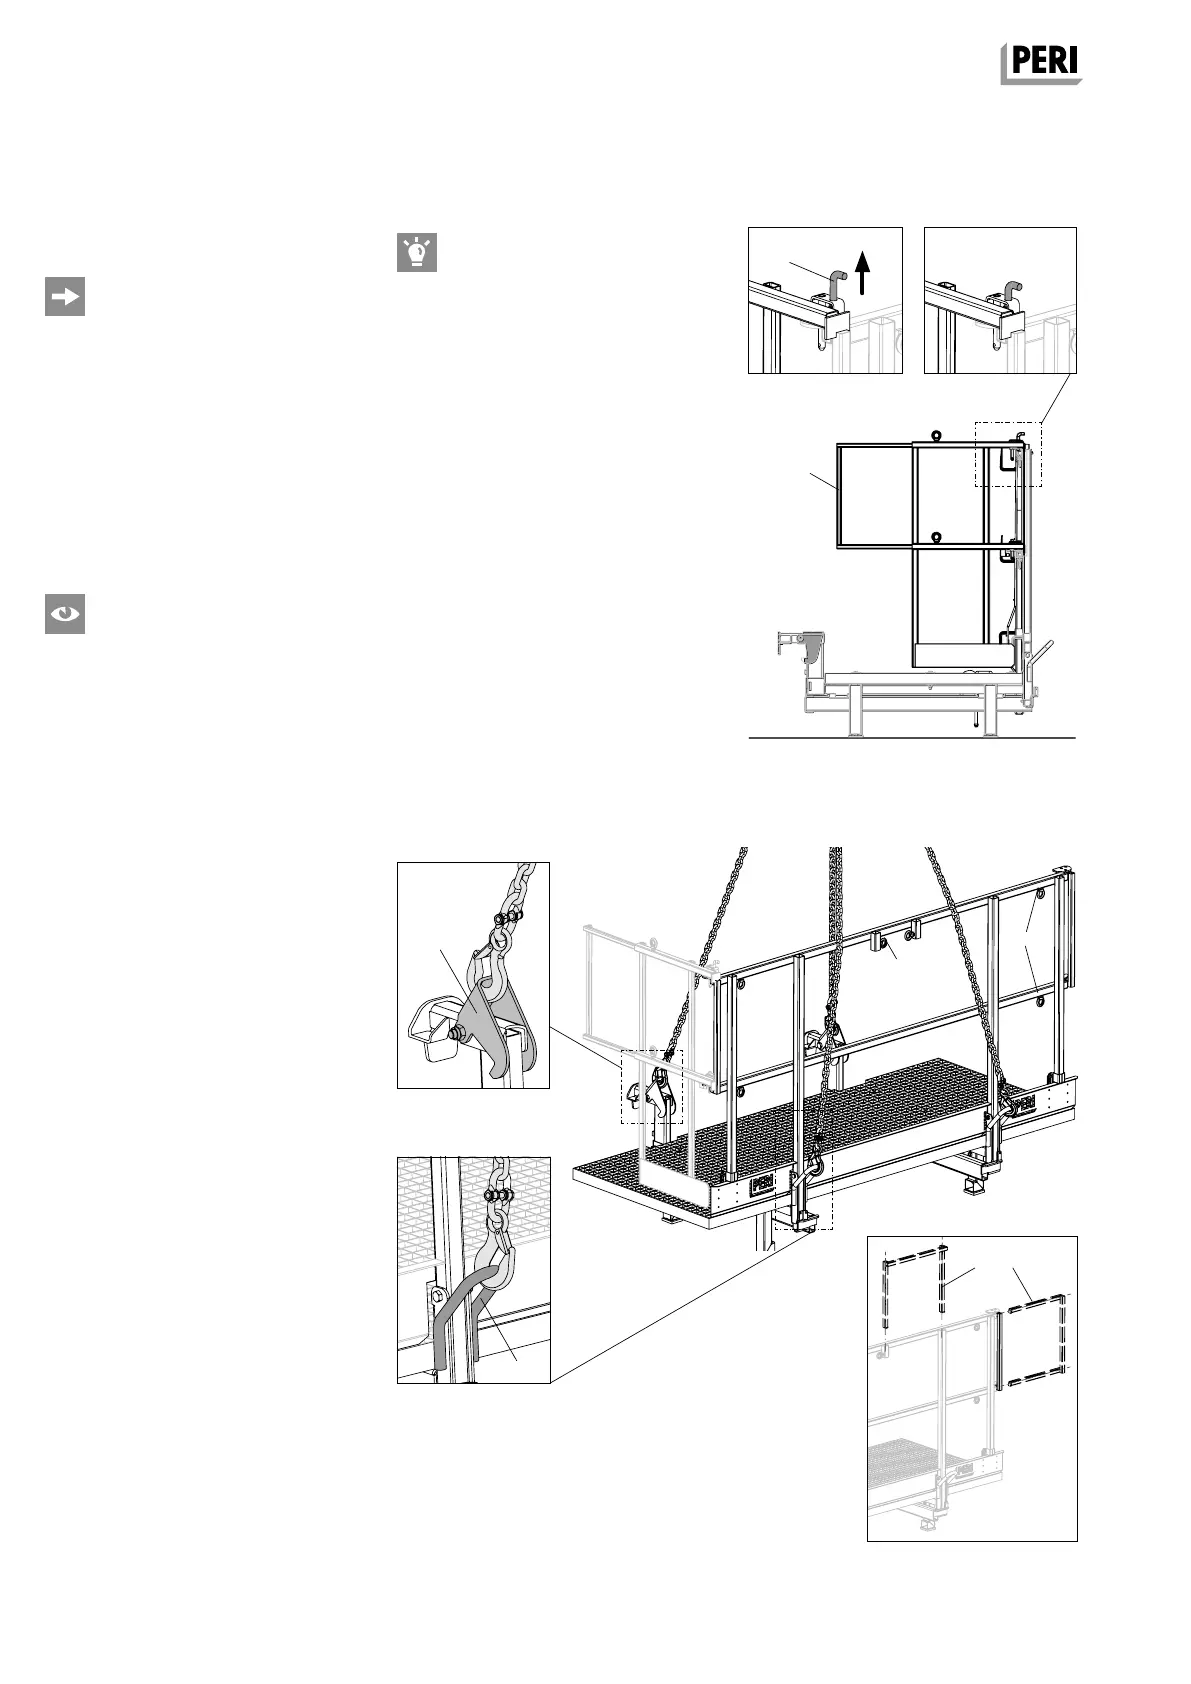
Guardrail installation
– Mount End Guardrail Frames (69) on
all leading edges. (Fig. A13.09)
– Position guardrail extension of the
concreting platform, see Fig. A13.10c.
Assembly
1. Pull bolt (69.1) upwards and hold.
(Fig. A13.09a)
2. Install End Guardrail Frame.
(Fig. A13.09)
3. Release bolt.
Is the bolt engaged? (Fig. A13.09b)
J The guardrail is now secured.
Attaching the Concreting Platform
MX 100 x 240
Attach the concreting platform to the
four load-bearing points (62.6 + 62.7 2x
each) using the 4-sling lifting gear.
Ensure that the two chains which are
attached to the lugs (62.7) are outside
of the guardrail.
(Fig. A13.10 + A13.10a + A13.10b)
In order to position the extension
of the guardrail (62.5), pull out the
extension sideways, turn it 90° and
then insert into the sleeves on the top
guardrail and secure with the eyebolt
(62.4) – right and left is possible.
(Fig. A13.10c)
Gaps between the concreting
platforms: max. 50 cm.
– In order to close any gaps, pull
out the guardrail extension (62.5)
sideways and secure using
eyebolts (62.4). (not shown)
– Fix Toe Board with nails.
– Install scaffold boards and secure.
69.1
62.6
62.4
62.4
62.5
62.7
AuV TRIO EX.indb 46 11.10.17 09:48