Chapter 4 Data Transfer
4-5
4.2 Ethernet Data Transfer
The ST403 unit is equipped with the Ethernet I/F which allows you to setup the ST via an Ethernet network,
as well as transfer ST screen data. (Unlike ST403 the other units are not equipped with the Ethernet I/F.)
After you connect an Ethernet cable to the ST’s Ethernet I/F, the ST will appear on the Ethernet network.
Transferring Data to a Completely New ST
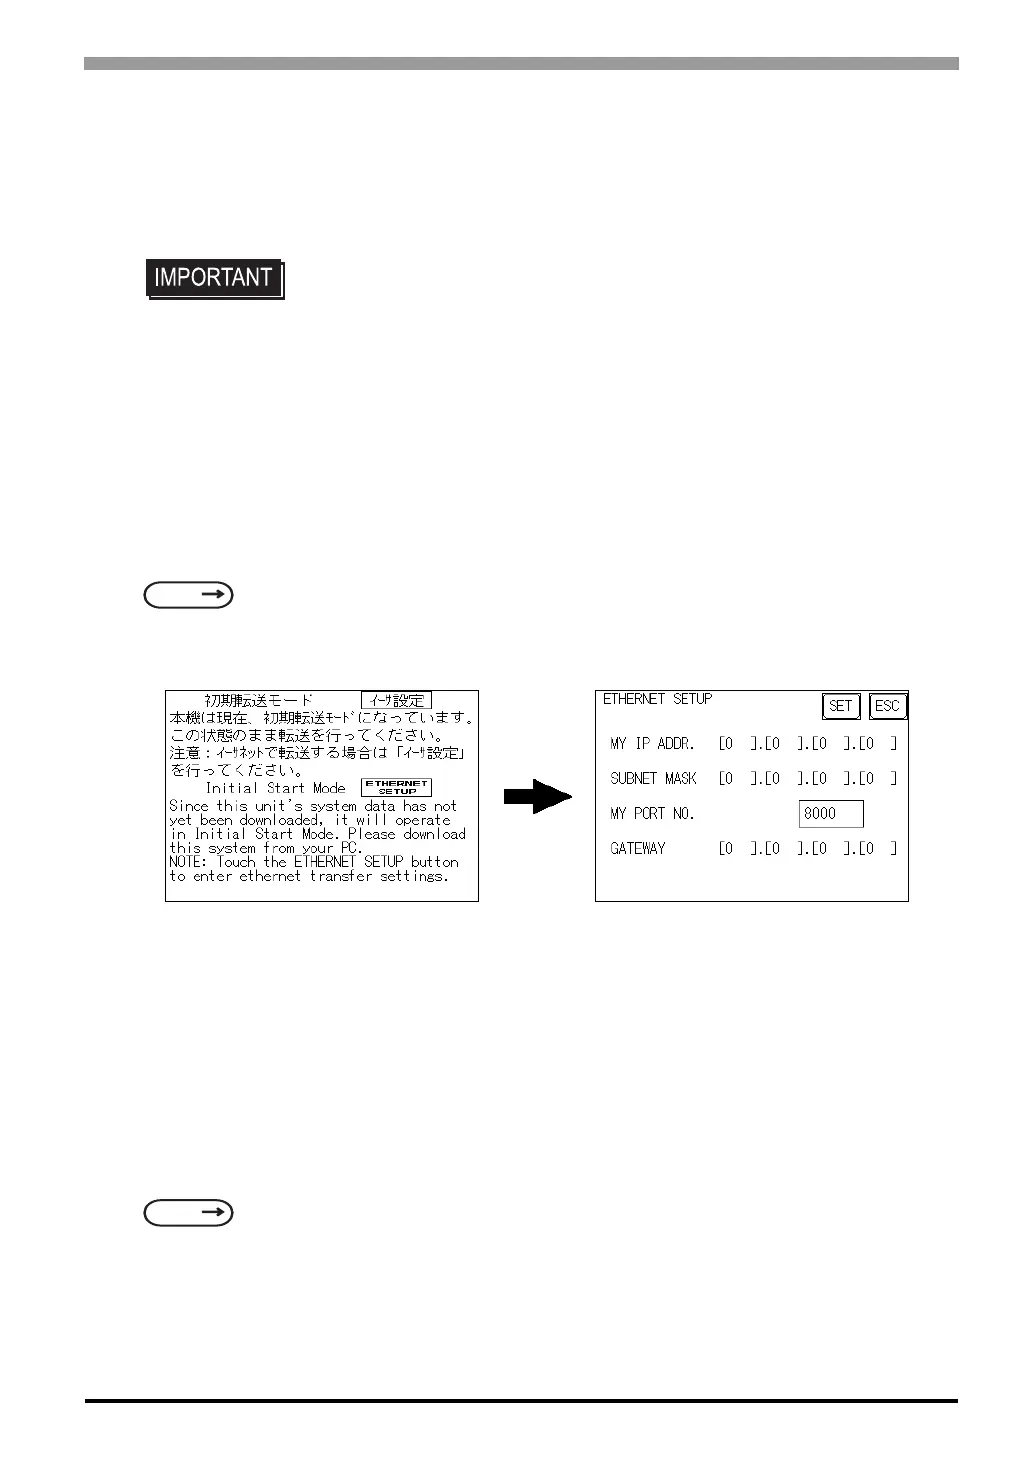
Setting Up the IP Address Manually and sending data to a ST Touch the “Ethernet Setup” button
on the ST403 Initial Start Mode screen.
Use this method if the ST has been previously set up and data transferred to it.
Using a previously set up IP Adrdress to send data
*1
When the settings in the “Ethernet Setup” screen are not specified and data is sent, the ST unit’s factory-set IP
Address settings are used.
If you choose to use the factory-set IP address, be sure to designate the PC’s IP Address from “10.255.255.1”
to “10.255.255.254” and the subnet mask as “255.0.0.0”.
Use the GP-PRO/PBIII for Windows software to transfer the data.
• When using the Ethernet communication protocol, you must specify the port
number for the protocol as +10 or higher than the value specified in this section.
Otherwise, the setup or screen data transfer via Ethernet is disabled.
SEE
6.5.4 Ethernet Setup (page 6-24)
*1 Be sure to use 2-Way2000 version 3.10 or higher. This version data can be seen in the bottom left-hand
corner of the [Initial Start Mode] screen.
SEE
“GP-PRO/PBIII for Windows Operation Manual” (included in the screen editor software pack-
age)