Using ProSoft Configuration Builder PLX32-EIP-MBTCP-UA ♦ Multi-Protocol Gateway
User Manual
Page 28 of 156 ProSoft Technology, Inc.
March 8, 2018
If the Test Connection procedure fails, you will see an error message. To correct
the error, follow these steps.
1 Click OK to dismiss the error message.
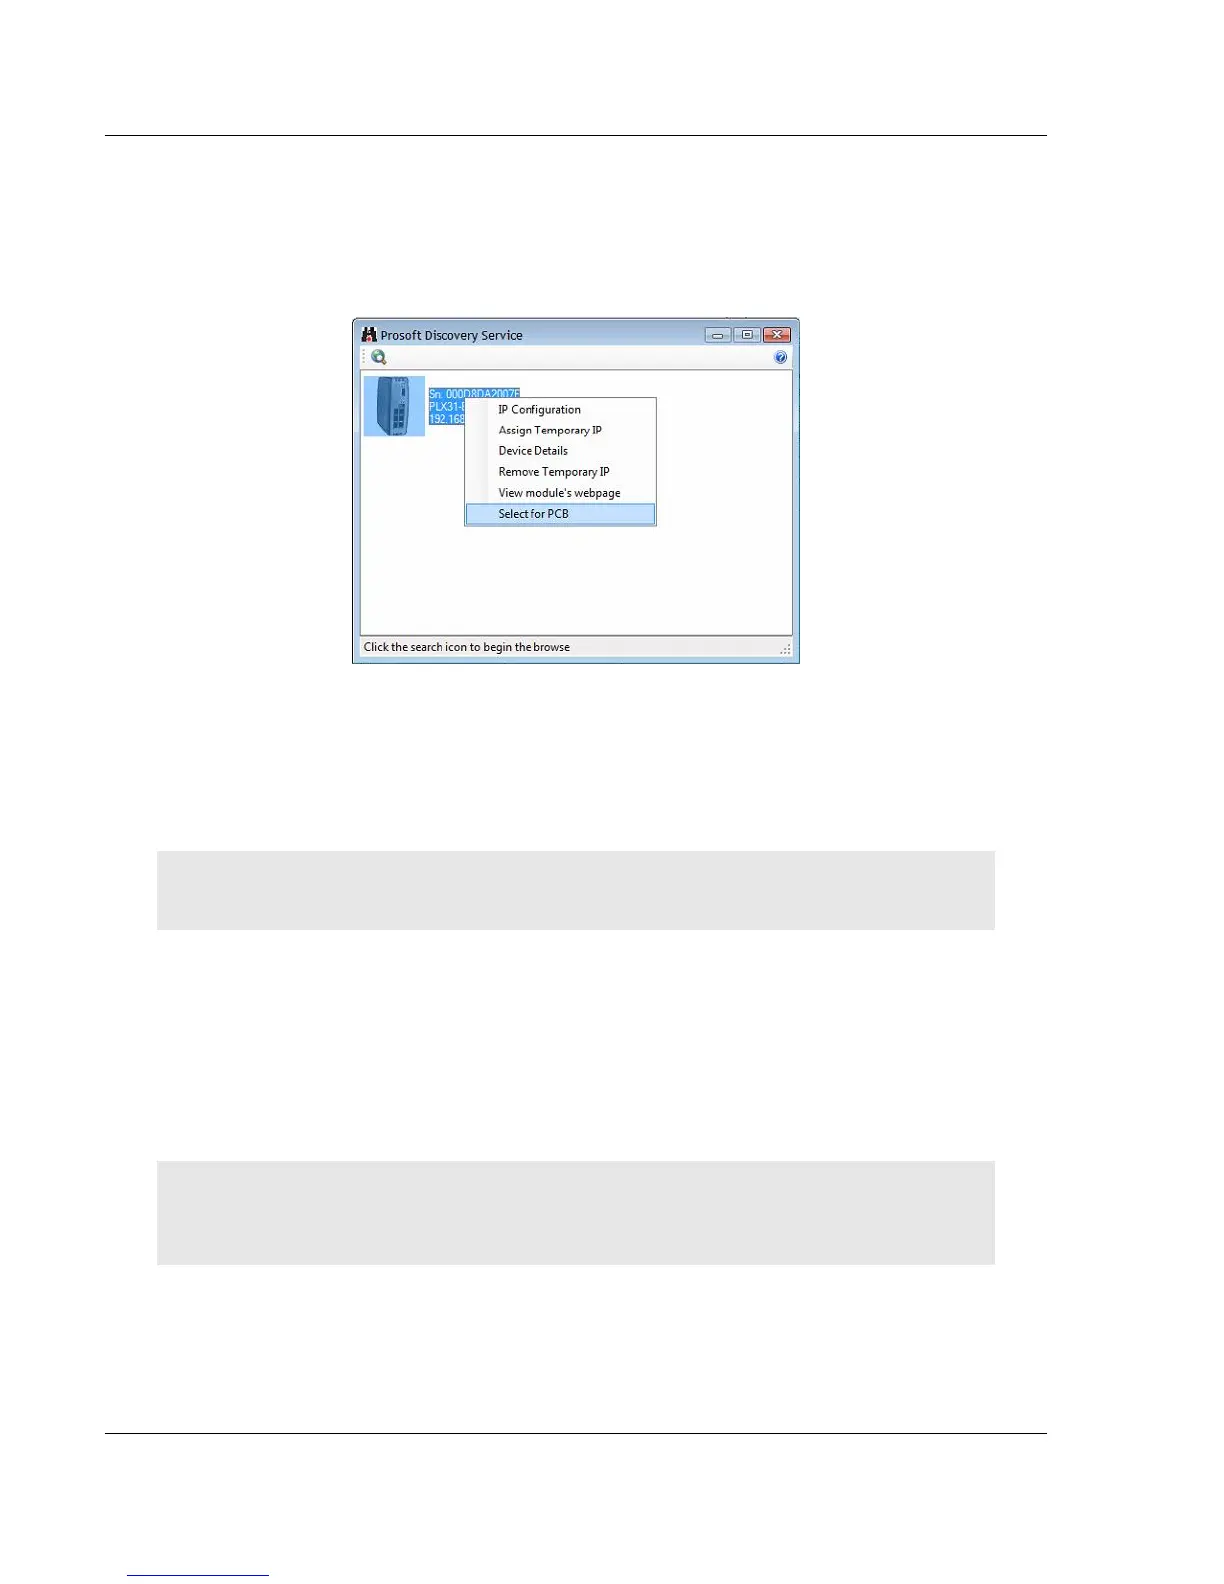
2 In the Download dialog box, click BROWSE DEVICE(S) to open ProSoft
Discovery Service.
3 Right-click the module and then choose SELECT FOR PCB.
4 Close ProSoft Discovery Service.
5 Click DOWNLOAD to transfer the configuration to the module.
2.9 Uploading the Project from the Gateway
Note: For instructions on connecting to the module with your PC, see Connecting the PC to the
Gateway (page 15).
You can upload the project settings from the PLX32-EIP-MBTCP-UA into the
current project in ProSoft Configuration Builder on your PC.
1 In the tree view in ProSoft Configuration Builder, right-click the PLX32-EIP-
MBTCP-UA icon and then choose UPLOAD FROM DEVICE TO PC. This opens
the Upload dialog box.
2 In the Upload dialog box, in the Select Connection Type dropdown box, use
the default ETHERNET setting.
Note: If you connected to the module using a temporary IP address, the Ethernet address field
contains that temporary IP address. ProSoft Configuration Builder uses this temporary IP address
to connect to the module.