RDL-3000 User Manual
70-00158-01-DRAFT Proprietary Redline Communications © 2010 Page 65 of 142 November 25, 2010
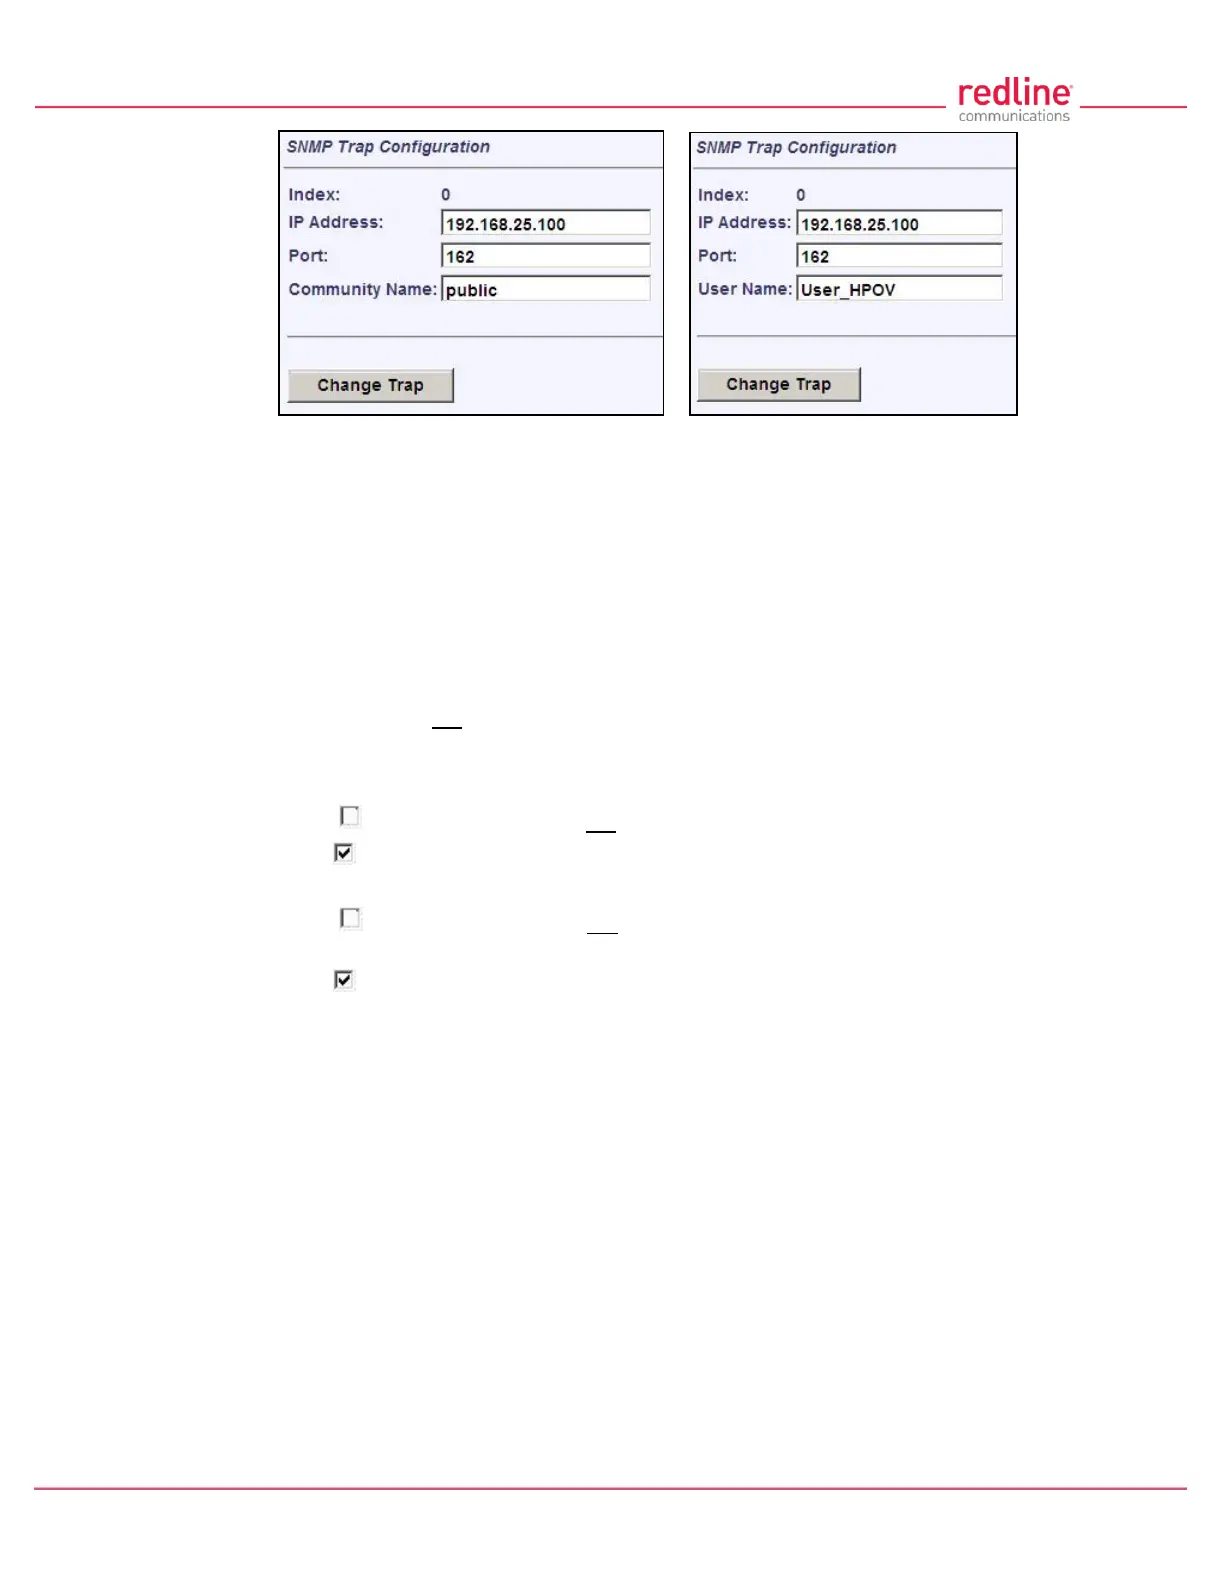
Fig. 43: Web - SNMP Trap Configuration Screen (V2/V3)
Index: Display the unique reference number for this entry. This value is required when
using the CLI interface to modify SNMP trap settings.
IP Address: Enter the IP address (IPv4) associated with this SNMP trap alarm.
Port: Enter the destination port address associated with this SNMP trap alarm.
Community Name: (v2) Enter the community name associated with this trap
destination.
User Name: (v3) Enter the user account associated with this trap destination.
Change Trap: Click to accept these settings and return to the SNMP Configuration
screen. Clicking does not activate changes.
SNMP Trap Settings
SNMP Traps Enabled: Control the SNMP trap message function.
Disabled ( ): The RDL-3000 does not send SNMP trap messages.
Enabled ( ): The RDL-3000 sends SNMP trap messages.
Link Up/Down Trap Enabled: Control SNMP trap messages for the link status.
Disabled ( ): The RDL-3000 does not send SNMP trap messages based on changes
to the wireless link status.
Enabled ( ): A trap message is sent for each change to the wireless link status.
Apply: Click to activate the displayed SNMP Trap Destinations and SNMP Trap
Configuration settings.
Apply & Save All: Click to activate and permanently save the SNMP Trap Destinations
and SNMP Trap Configuration settings displayed on this screen. These settings will be
restored on power-up, reboot, or at the end of a test cycle.
Note: Clicking on another main menu item before clicking Apply or Apply & Save All will
discard any changes made to settings displayed on the current screen.