22
Moving an Event
To move an event to different time location in a phrase:
Select the event in the event list on the Microscope screen.
1
Click F3 (Move) to display the Move Event 2
window.
Select the measure, beat, and tick to which you’d
3
like to move the event.
Click F8 (Execute) to move the event.
4
Copying and Pasting an Event
On the Microscope screen, select the event you want to copy.1
Click F4 (Copy)—“Copy Event” appears momentarily onscreen.2
Click F5 (Place) to display the Place Event screen.3
Enter the location at which you want to paste the 4
copied event, in measures, bars, and beats.
Click F8 (Execute) to paste the event.
5
Step Sequencing
You can sequence by entering notes and chords one-at-a-time on the
keyboard when the sequencer isn’t playing. This is called “step recording,” or,
more accurately, “step sequencing.” Step sequencing can be helpful when
you’re sequencing something hard to play, are looking to create a robotic-
sounding passage, or are entering notes from a written score.
Preparing to Step Sequence
On the Song Play screen, press the LIST/EDIT PATCH button to display 1
the Part Select window.
Select the part you’d like to use for sequencing.
2
If you’d like to assign a different sound to an Internal, EXP 1, or EXP 2 3
part, set Group, Bank, and Patch Number/Name to select the sound.
Click F8 (Close).
4
Click F3 (Phrase List) to show the Phrase List screen.5
Select the phrase you want to work with. You can select an existing 6
or new, empty INIT PHRASE.
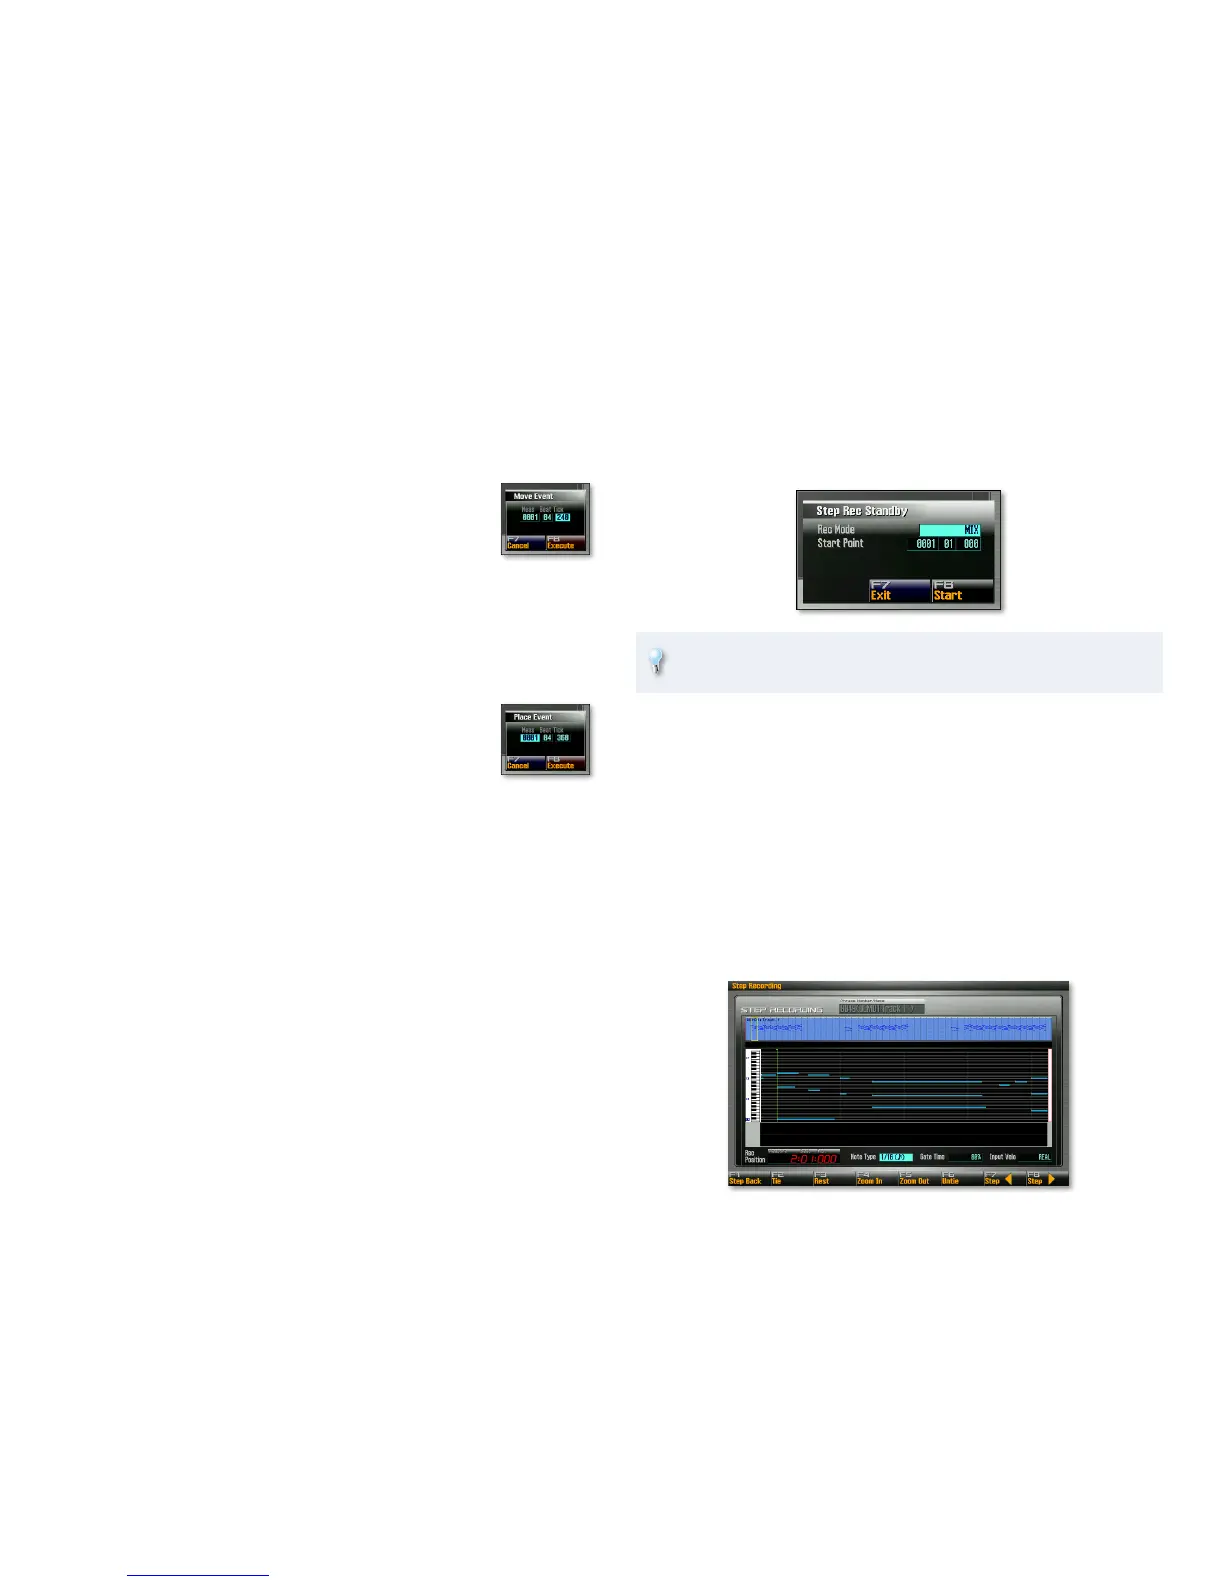
While holding down SHIFT, press REC to display the Step Rec Standby
7
window.
You can also get to the Step Rec Standby window from the Phrase Edit
screen by clicking F5 (Step Rec.)
In the Step Rec Standby window are two parameters:
Rec Mode—
• which sets the way new notes interact with any notes
already sequenced for the selected part. You can set it to:
MIX—
• so new data is combined with anything already sequenced
in the same location.
Replace—
• so new data takes the place of any already-sequenced
data in the same location.
Start Point—
• sets the time location at which step sequencing is to begin
in the phrase when you click F8 (Start), or press REC.
When you’re done with these parameters, click F8 (Start) or press the REC
button to display the Step Recording screen and start step sequencing.
 Loading...