- 5 -
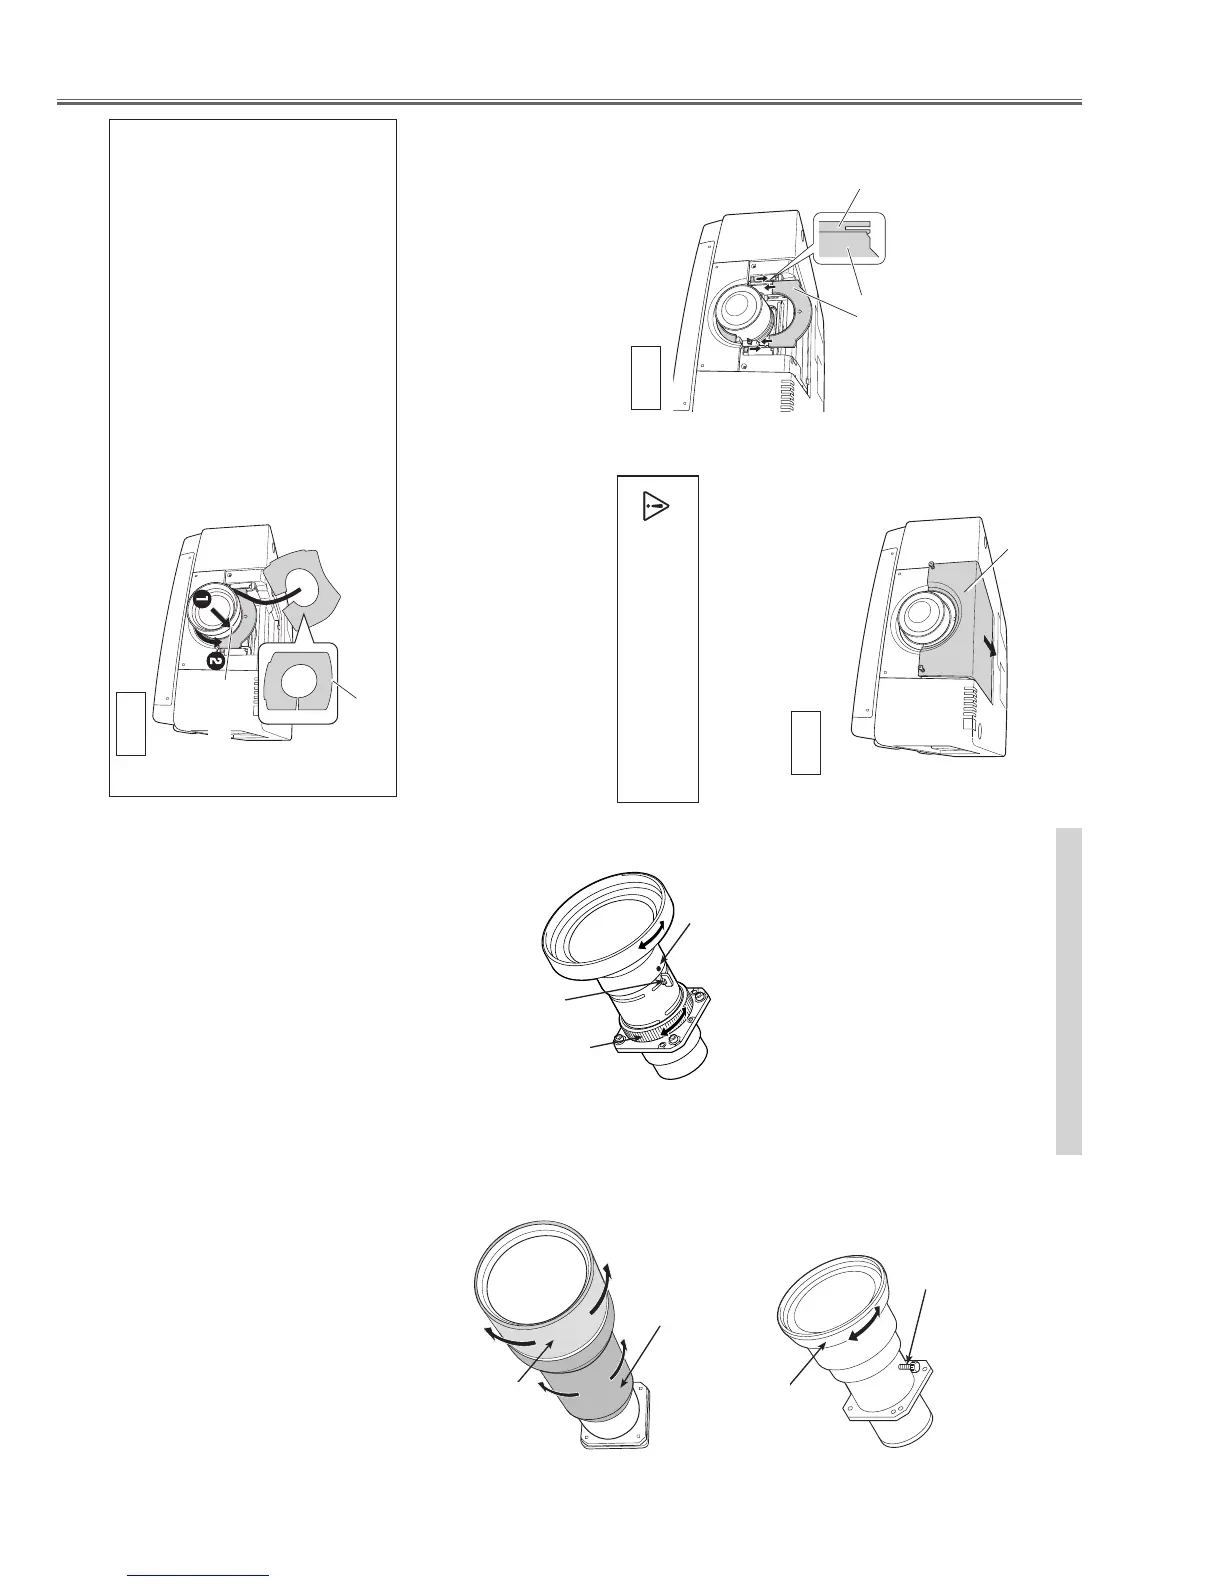
Fig. 10
10
Install the Upper Light-Block Plate into
the guide of Lower Light-Block Plate.
(See Fig. 9)
Note:
L
When installing the Upper Light-Block Plate, the
Lower Light-Block Plate should be lifted upward with
your hand.
L
Make sure the mark (UP/DOWN and FRONT/BACK)
on Light-Block Plate is correct and set them properly.
11
Replace and fix the Top Cover with two (2)
screws A. (See Fig. 10)
When using LNS-W03/LNS-W03E
- When installing LNS-W03/LNS-W03E, use two (2)
Light-Block Plates. Make sure the figure is correct
and put in proper position. (See Fig.11)
7
Before mounting the Light-Block Plate (No. 610
335 4545), turn the projector on and move the
projected image to the most upper left with
the lens shift function. Then turn the projector
off.
<
Insert the Light-Block Plate (No. 610 335 4545)
in the direction shown in the figure to the right.
The Light-Block Plate should encircle the lens.
Rotate the Light Block Plate counter clockwise
until the convex side is in a downward position.
Note: The side with "THIS SIDE BACK" must face backward.
Fig. 9
Fig. 11
NO. 610 335 4545
(On front of FK2B)
TYPE FK2B
Upper PlateLower Plate
12
Turn the projector on and operate Lens
shift, Zoom and Focus fully to check the
Light-Block Plates. If Light-Block Plate
interferes with those operations, check the
Light-Block Plate is set properly.
CAUTION : Do not operate the
projector with Light-Block Plate
removed. Doing so may result in
malfunction of the projector.
A
A
Top Cover
- 6 -
Focus Lock Screw
Focus Lock Ring
L mark (yellow)
FOCUS ADJUSTMENT
Set up the projector and project image on the screen.
1. Loosen the Focus Lock Screw on the lens.
2. Rotate the lens to obtain proper focus on center
area of the screen.
When the distance between the screen and lens is 1
meter, set Lmark (yellow) of the lens on Focus Lock
Screw position.
3. Lock the Focus Lock Screw securely.
When proper focus is not observed at outer area of the
screen, proceed the following adjustments.
4. Loosen the Focus Lock Ring on the lens. (Turn the
Lock Ring counter-clockwise.)
5. Rotate the lens to obtain proper focus on outer area
of the screen.
6. Lock the Focus Lock Ring securely. (Turn the Lock
Ring clockwise.)
If proper focus is not observed over the entire screen,
repeat above adjustments 1~ 6.
LNS-W03 and -W03E
Adjust zoom first and then adjust focus.
LNS-T03
Rotate this part of
the lens to obtain
proper zoom.
Rotate this part of
the lens to obtain
proper focus.
1. Loosen the Focus Lock Screw on the lens.
2. Rotate the lens to obtain proper focus on center
area of the screen.
3. Lock the Focus Lock Screw securely.
Focus Lock Screw
Rotate this part of
the lens to obtain
proper focus.
LNS-W01Z
 Loading...