9 Mega-800 SCINCO
1.2.2 Rear view
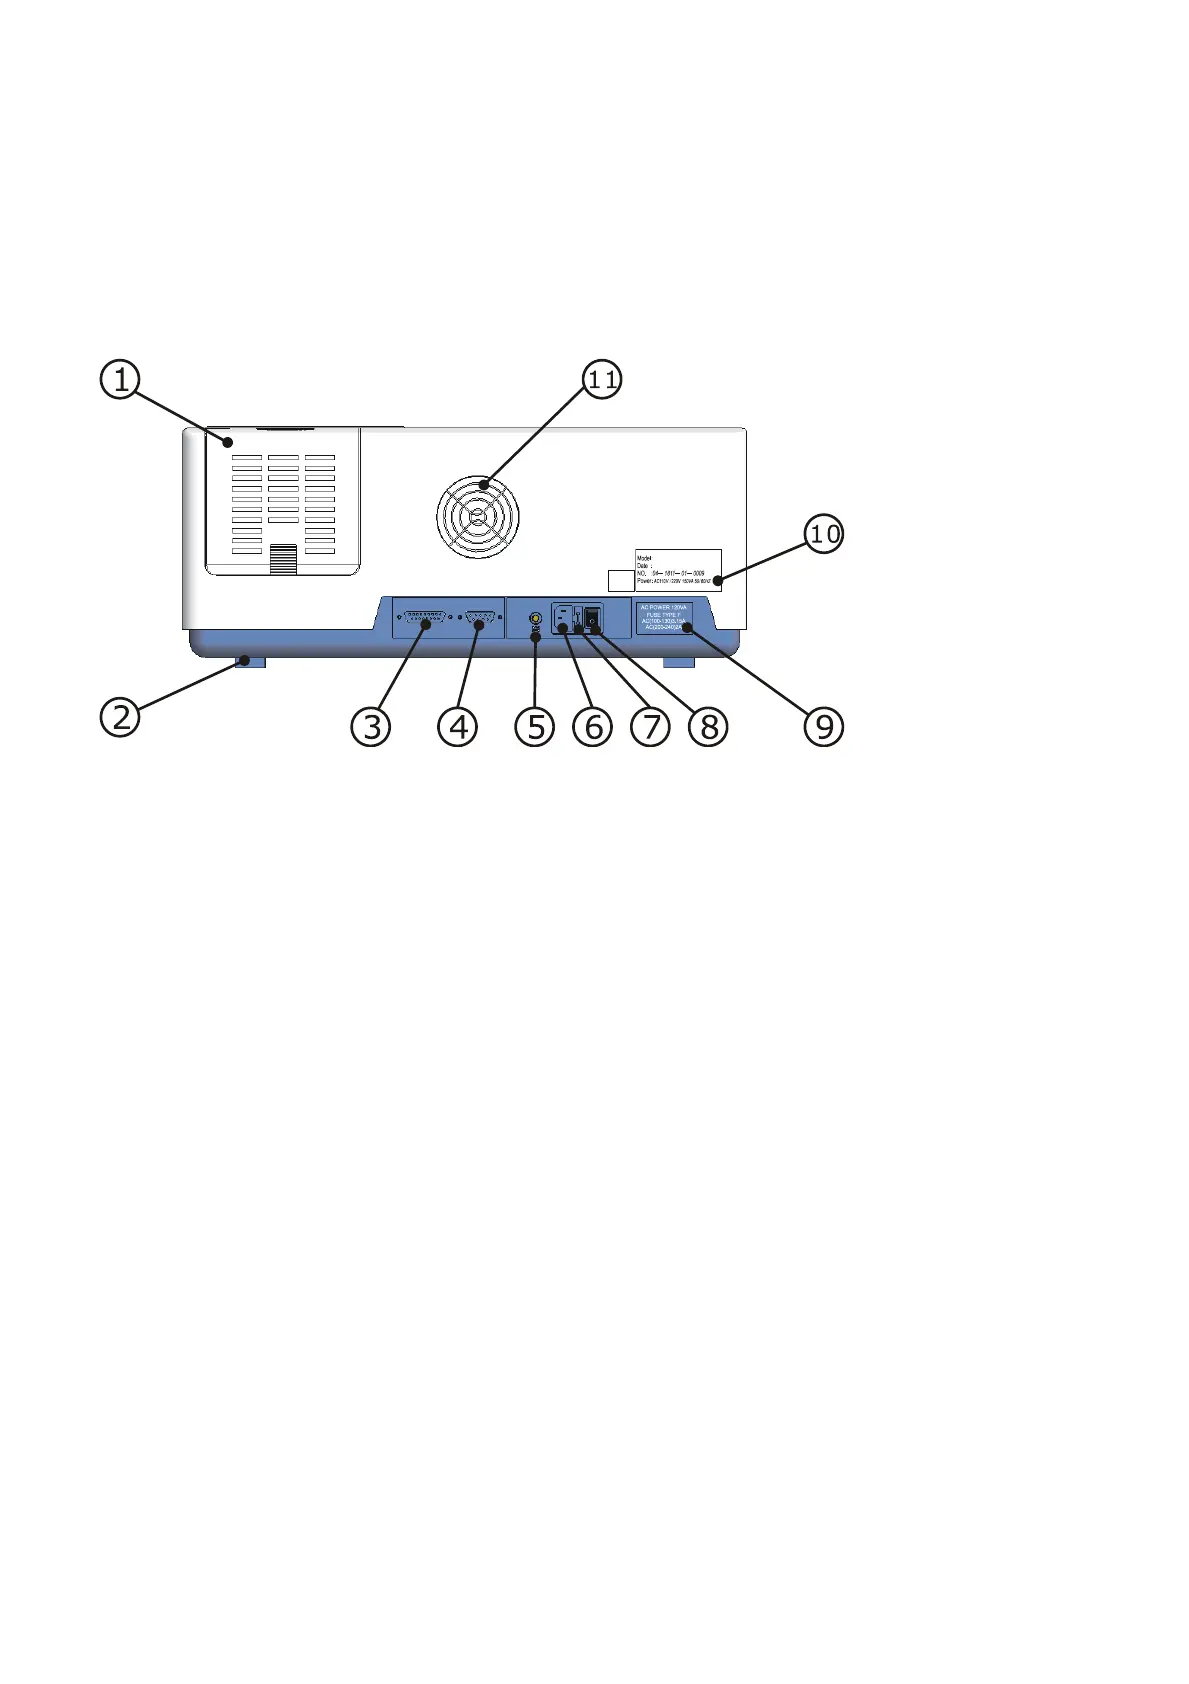
The rear view is shown as Fig.1.3.
Fig. 1.3 Rear view
① Light source house cover—Open the cover to gain access to the light source house, where
you can replace the deuterium lamp and tungsten lamp.
② Foot packing—Shockproof rubber washer is used.
③ Printer interface—Connect to the HP parallel inkjet printers.
④ RS-232 interface—Communicate with PC.
⑤ Wiring terminal—Connect to ground wire.
⑥ Outlet— Connect to power supply: AC 220V, 50Hz.
⑦ Fuse—Can be replaced (refer to “Appendix 3 fuse replacement”).
⑧ Power switch
⑨ Power label—Describe the power requirements.
⑩ Instrument nameplate
⑪ Fan
1.2.3 Side view
Side view is shown as Fig.1.4. There is no other interfaces or labels except the ventilation grills.