Configuring the DVR
3–8 700-0042 R004
\
To change a setting on the sub-menu:
1. Turn the
JOG wheel clockwise or counter clockwise to change the value.
2. Press the
LOCK > button to advance through the fields.
3. Press the
DISPLAY < button to move back through the fields.
The selected menu item is highlighted with a pale blue background.
4. Press the
CLEAR button to reload the default value into a field.
5. To exit the menu, press the
MENU button.
6. Repeat these steps to set the Resolution, Camera 1 to Camera 4 Speed and
Quality, Record Audio, Repeat Record, Record Delay-On Time, Record
Delay-Off Time, and Power Delay-Off Time. See Table 3-4.
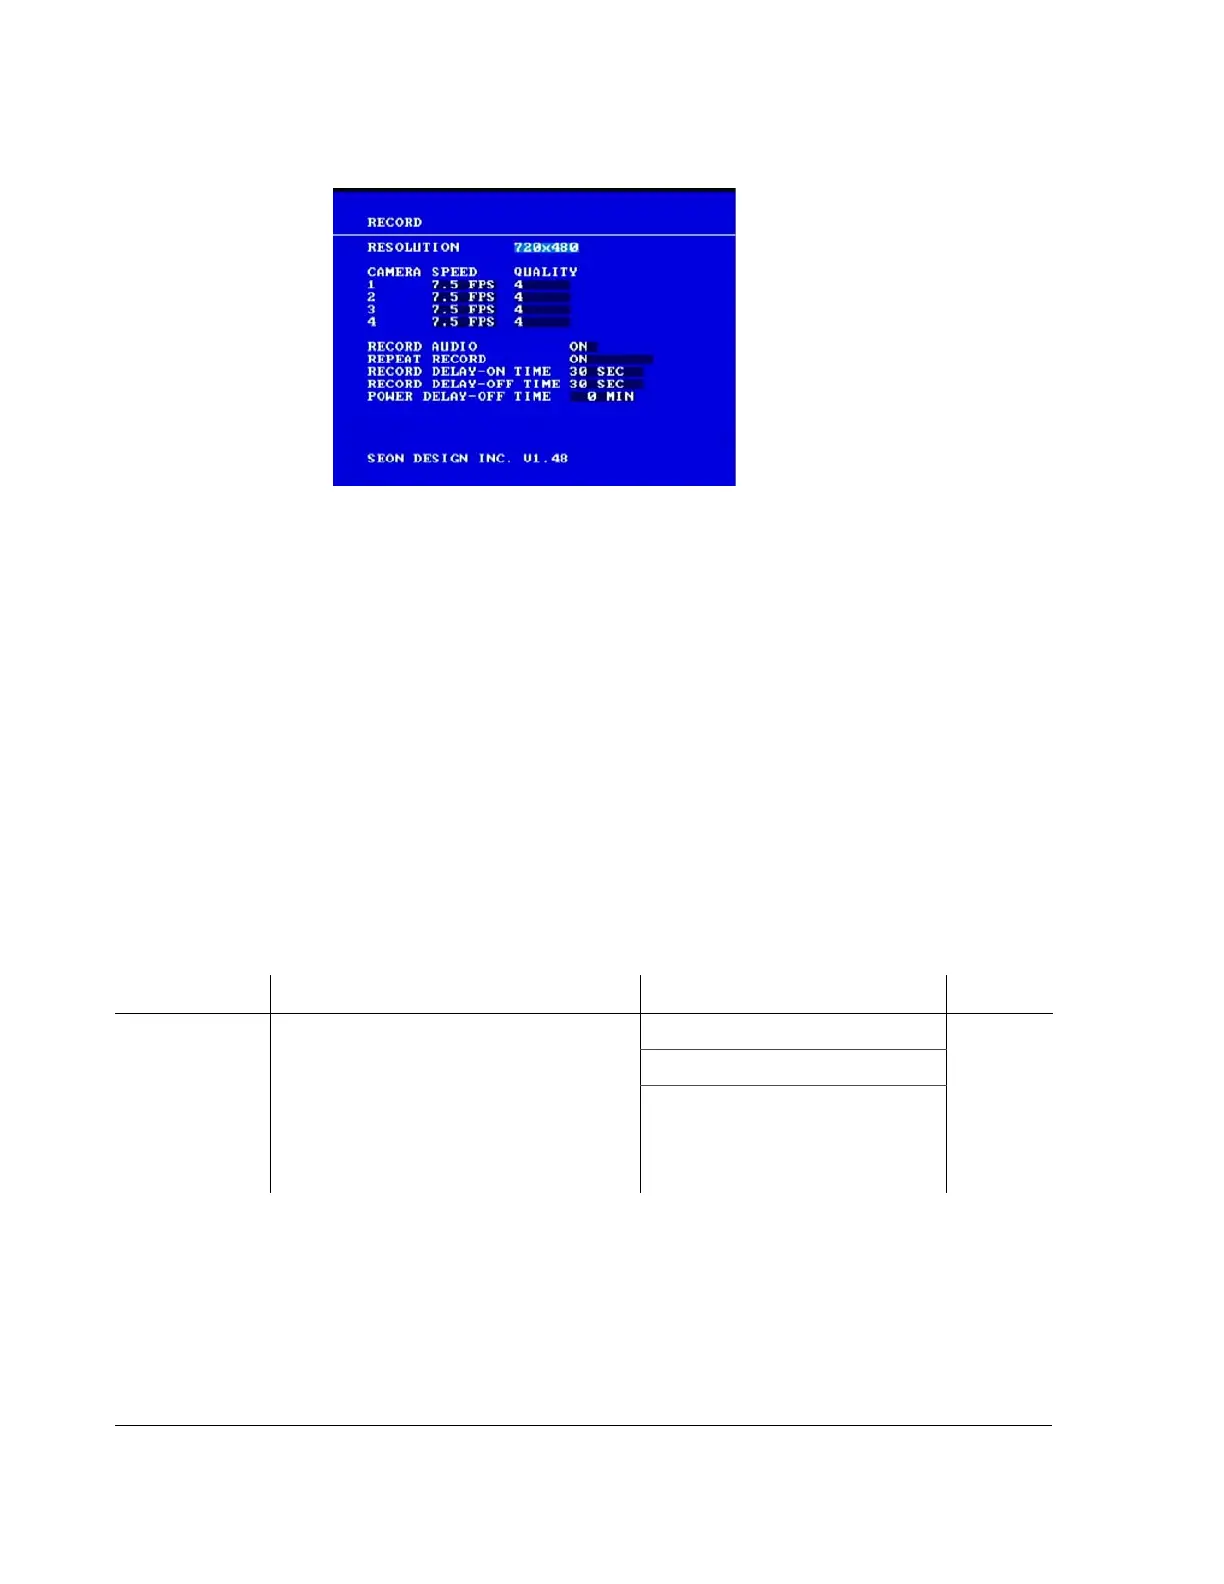
3.2.4.1. Record Configuration Items
Figure 3-5
Record menu
Table 3-4
Record configuration items
Menu Item Description Values Default
RESOLUTION The recording resolution can be set to one of
three different levels. A higher recording
resolution means a shorter recording time
on a hard drive. (See Table 3-6 to Table 3-
9.) The recording resolution is a global
setting and affects all the cameras and the
alarm settings.
720×480 720×240
720×240
360×240