MX-M264U ADJUSTMENTS AND SETTINGS 5 – 13
5) Change the height balance of the scanner rail on the front
frame side.
Remove the lower cabinet of the operation panel. Loosen the
scanner rail fixing screw to change the balance between the
right and the left heights of the scanner rail.
Repeat the procedures 2) - 5) until the difference between the
image distortions (distortion balance) is deleted.
6) Without changing the balance of the scanner rail on the front
frame side, change the overall height.
7) Set the test chart prepared in the procedure 1) on the docu-
ment table, and make a copy on A3 (11" x 17") paper. Check
that the distortion in the main scanning direction is within the
specified range.
Repeat the procedures 6) and 7) until the distortion in the main
scanning direction is in the specified range.
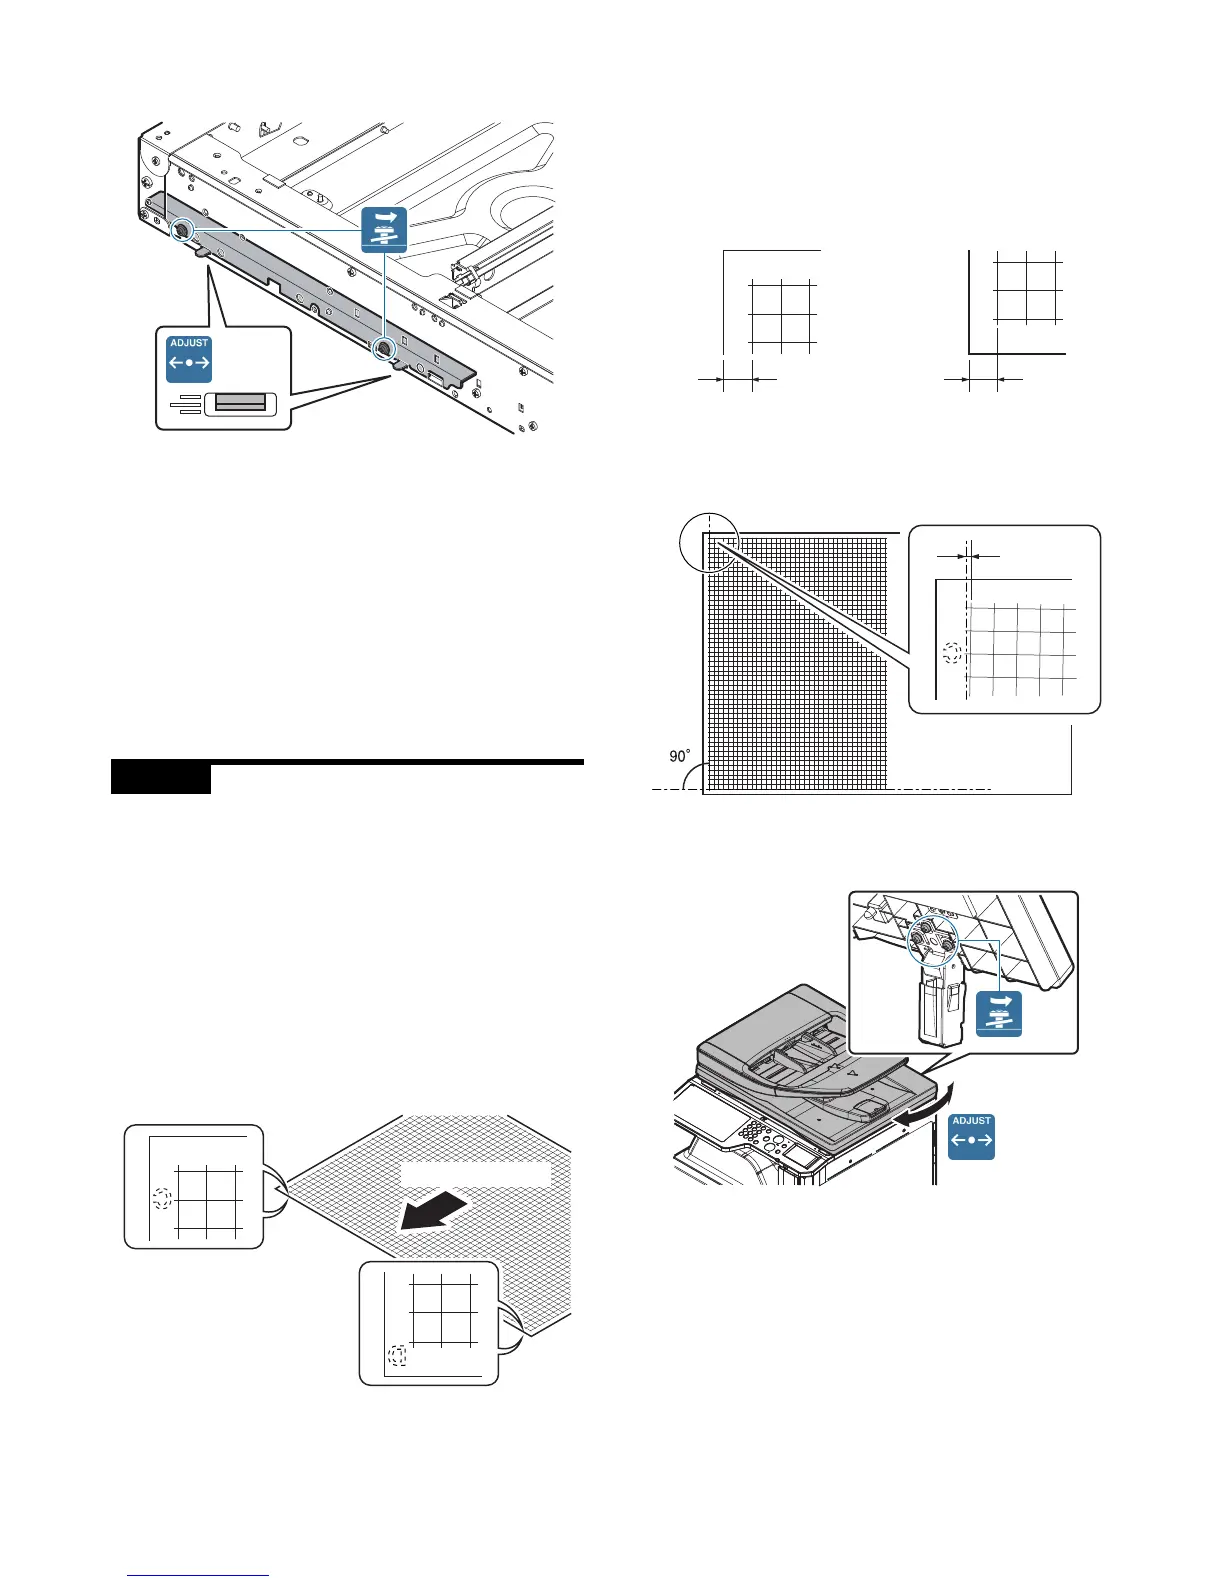
ADJ 5 Scanner image skew
adjustment (RSPF mode)
This adjustment must be performed in the following cases:
* The RSPF section has been disassembled.
* When replacing the RSPF unit.
* The RSPF unit generates skewed scanned images.
1) Create an adjustment chart by printing in duplex mode the self-
print pattern (grid pattern) specified in Simulation 64-2.
SIM 64-2 set values
A = 1, B = 1, C = 254, D = 255
Make sure that the print grid pattern is almost in parallel with
the paper edges, and apply position marks A and B to the
leading and trailing edges of the paper surface lead edge sec-
tion.
2) Copy the adjustment chart (created in step 1) to A3 (11" x 17")
paper in RSPF duplex mode, and then check the image for
skews (Set in the RSPF feed tray so that the mark on the
adjustment chart is at the edge).
• Check with one of the following methods.
Check Method 1
Check Method 2
Check that the squareness of the main scanning direction
print line for the longitudinal direction of paper is within
1.0mm.
If the copy image is not in the above state, perform the pro-
cedure 3).
3) Open the RSPF unit, and loosen the fixing screw of the hinge.
4) Slide the RSPF unit in the arrow direction to make the skew
adjustment.
5) Make a copy again and measure (a) and (b) on the copied test
chart. Repeat procedures 2) to 5) until the condition ((a) - (b) =
1mm or less) is satisfied.
A
B
Paper pass direction
A
B
a
b
(Front side)
Makesure that theoutput satisfies the condition: |a-b| ± 1 mm