MX-M264U ADJUSTMENTS AND SETTINGS 5 – 15
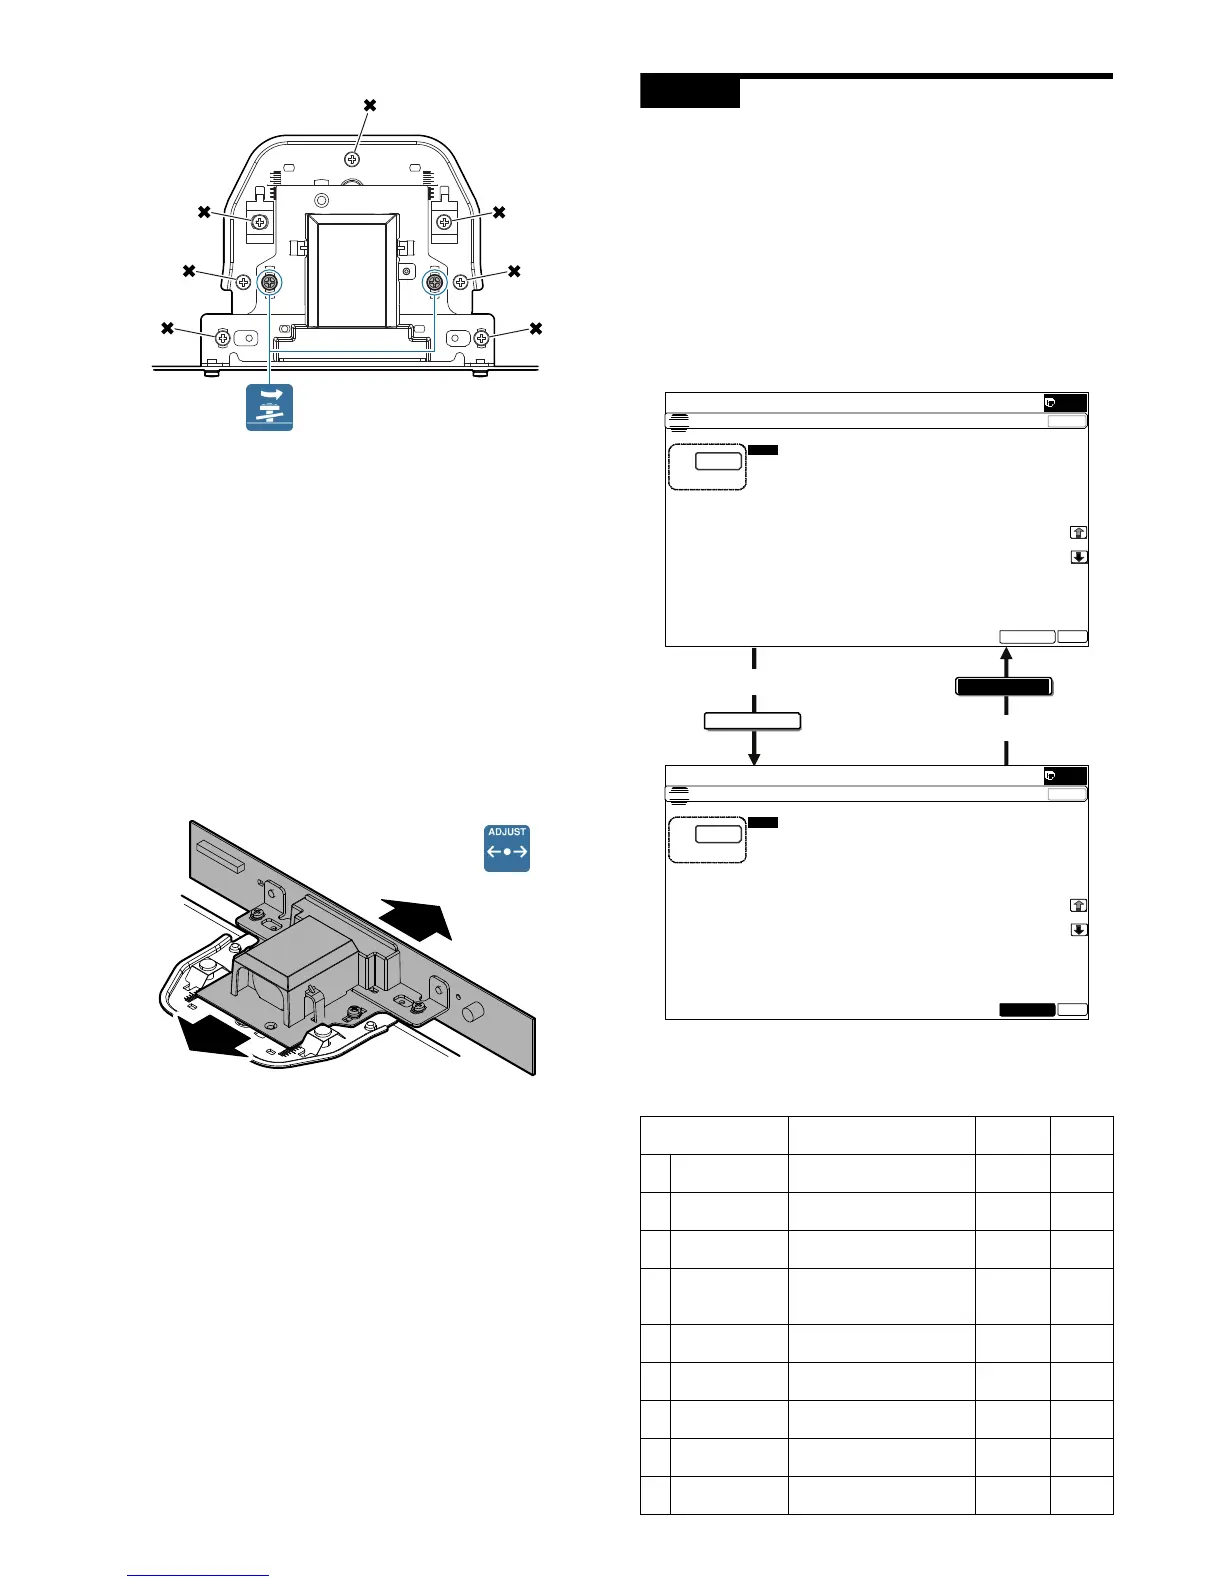
10) Loosen the CCD unit fixing screws.
CAUTION: Never loosen the screws marked with X.
If any one of these screws is loosened, the position and
the angle of the CCD unit base may be changed to
cause a problem, which cannot be adjusted in the mar-
ket. In that case, the whole scanner unit must be
replaced.
11) Slide the CCD unit in the arrow direction (CCD sub scanning
direction) to change the installing position.
When the copy image is longer than the original scale, shift the
CCD unit in the direction B. When the copy image is shorter
than the original scale, shift the CCD unit in the direction A.
One scale of mark-off line corresponds to 0.2%.
At that time, fix the CCD unit so that it is in parallel with the
scale on the front and the rear side of the CCD unit base.
* Fix the CCD unit so that it is in parallel with the line marked
in procedure 9).
12) Make a copy and check the copy magnification ratio again.
If the copy magnification ratio is not in the range of 100 1%,
repeat the procedures of 9) - 11) until the condition is satisfied.
CAUTION: By changing the CCD unit fixing position with the simu-
lation 48-1 adjustment value at 50, the copy magnifica-
tion ratio is adjusted within the specified range (100
1.0%) and the specified resolution is obtained based on
the optical system structure.
ADJ 7 Print lead edge image position
adjustment (Printer mode)
This adjustment must be performed in the following cases:
* When the registration roller section is disassembled.
* When the LSU is replaced or removed.
* U2 trouble has occurred.
* The PCU PWB has been replaced.
* The EEPROM of the PCU PWB has been replaced.
NOTE: This adjustment is performed by the user to increase the
lead edge void area to greater than the standard value
(3mm) in the printer mode.
1) Enter the SIM 50-5 mode.
2) Select the set item L with the scroll key, and enter the value
corresponding to the paper feed tray with A4 (11" x 8.5") paper
in it.
A
B
Display/Item Content
Setting
range
Default
A DEN-C Printer lead edge image
position adjustment
1 - 99 30
B DEN-B Rear edge void area
adjustment
1 - 99 30
C FRONT/REAR FRONT/REAR void area
adjustment
1 - 99 20
D DENB-MFT Manual feed rear edge void
area adjustment correction
value
1 - 99 57
E DENB-CS1 Tray 1 rear edge void area
adjustment correction value
1 - 99 50
F DENB-CS2 Tray 2 rear edge void area
adjustment correction value
1 - 99 57
G DENB-CS3 Tray 3 rear edge void area
adjustment correction value
1 - 99 57
H DENB-CS4 Tray 4 rear edge void area
adjustment correction value
1 - 99 57
I DENB-ADU ADU rear edge void area
adjustment correction value
1 - 99 60
EXECUTE
End of print
EXECUTE
10-key
ǂǂǂ6,08/$7,21ǂǂ12
&/26(
7(67
/($'('*($'-8670(179$/8(35,17(5