EasyManuals Logo

Sharp MX-M264N Service Manual

Sharp MX-M264N
256 pages
To Next Page IconTo Next Page
To Previous Page IconTo Previous Page
Page #196 background imageLoading...
Page #196 background image
MX-M264U DISASSEMBLY AND ASSEMBLY 10 – 9
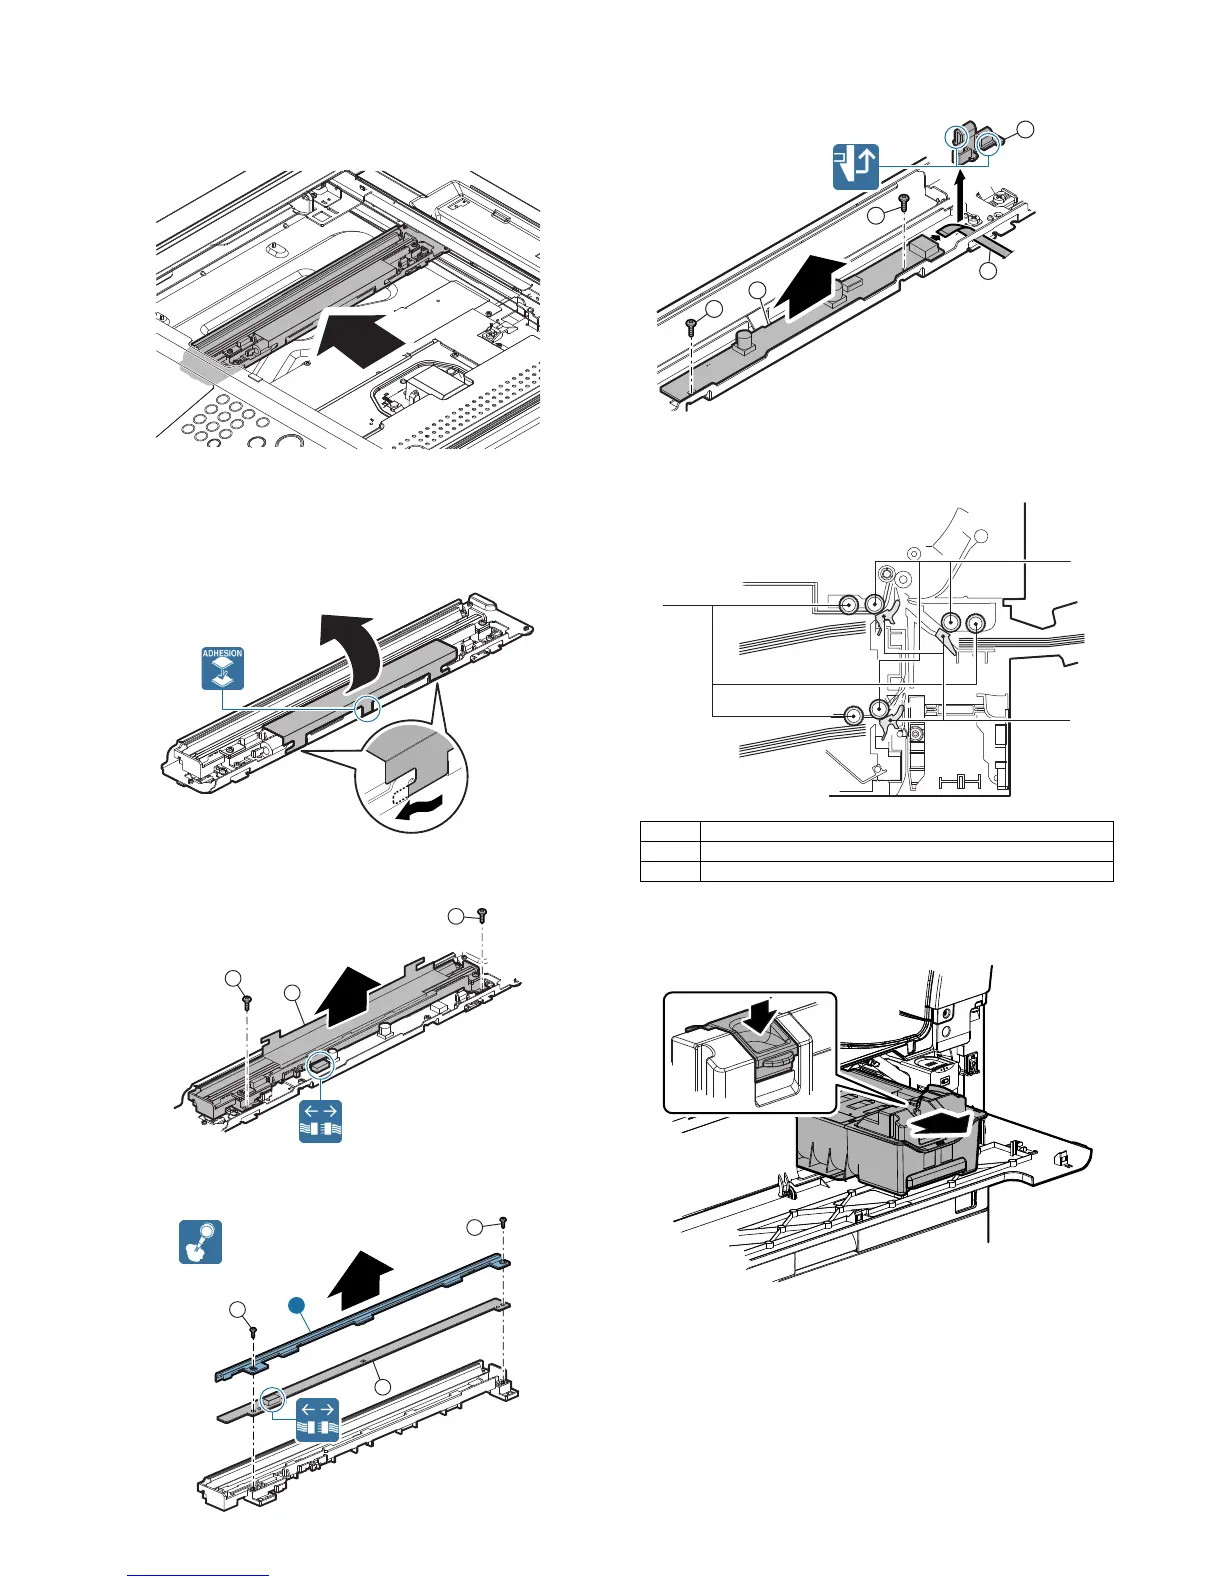
F. LED PWB, LED driver PWB
1) Remove the table glass.
2) Shift the lamp unit to the notch section of the scanner base
plate.
3) Turn over the sheet.
CAUTION: When attaching the sheet to the original position, insert
the L-shape sections into the inside of the metal plate
and attach the center portion to the metal plate with
double-stick tape.
4) Remove the lamp guide. Disconnect the connector from the
LED driver PWB.
5) Remove the scanner lamp, and the LED PWB. Disconnect the
connector from the LED PWB.
6) Remove the harness holder, and remove the flat cable from
the LED driver PWB. Remove the LED driver PWB.
5. Paper feed section
A. Upper 500 sheets tray paper feed
(1) Paper feed roller/pickup roller
1
1
2
2
1
3
1
A Paper feed roller
B Pickup roller
C Separation sheet
1
2
3
3
4
A
C
B

Table of Contents

Other manuals for Sharp MX-M264N

Questions and Answers:

Question and Answer IconNeed help?

Do you have a question about the Sharp MX-M264N and is the answer not in the manual?

Sharp MX-M264N Specifications

General IconGeneral
Print TechnologyLaser
FunctionsPrint, Copy, Scan, Fax
Print Speed26 ppm
Max Print Resolution600 x 600 dpi
Standard Paper Capacity1100 sheets
Max Paper Capacity2100 sheets
Automatic DuplexingYes
ADF Capacity100 sheets
Scan Resolution600 x 600 dpi
Copy Speed26 cpm
Copy Resolution600 x 600 dpi
ConnectivityEthernet, USB

Related product manuals