MX-M264U ADJUSTMENTS AND SETTINGS 5 – 27
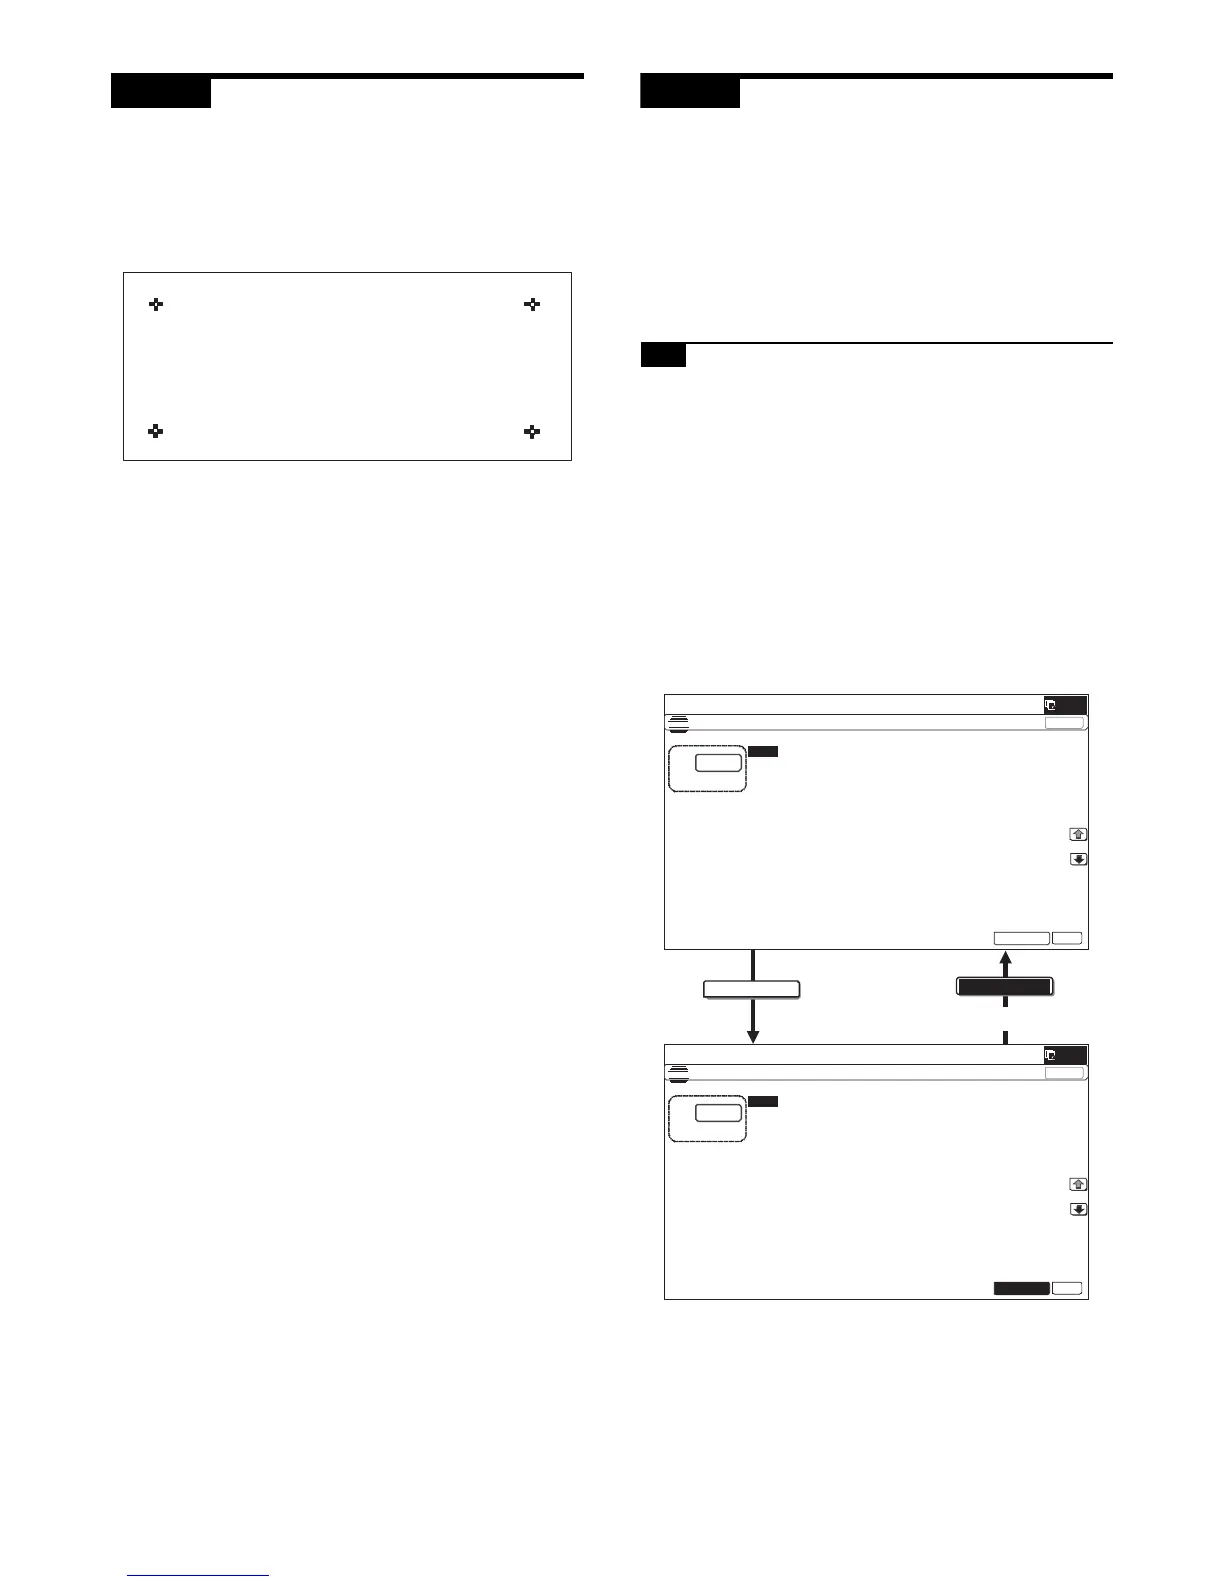
ADJ 11 Touch panel coordinate setting
This adjustment must be performed in the following cases:
* The operation panel has been replaced.
* U2 trouble has occurred.
* The scanner control PWB has been replaced.
* The EEPROM on the scanner control PWB has been replaced.
1) Enter the SIM 65-1 mode.
2) Precisely press the cross mark points (4 positions).
When the cross mark is pressed precisely, a buzzer sounds
and the display is reversed. When all the four points are
pressed and the touch panel adjustment is completed, the dis-
play returns to the simulation sub number entry screen.
In case of an error, the display returns to the entry screen
again.
Check to confirm that there is no shift between the display
frame and the detection position when the touch panel is
pressed.
* When pressing the touch panel, never use a sharp tip (such
as a needle or a pin).
ADJ 12 Print image position, void area,
off-center adjustment (Print
engine) (Manual adjustment)
NOTE: Normally if the adjustment is executed by ADJ 3 (automatic
adjustment), there is no need to execute this adjustment.
Only when the manual adjustment is required, execute this
adjustment.
In other words, this manual adjustment is executed when a
satisfactory result is not obtained from the automatic
adjustment (ADJ 3).
12-A Print image print area adjustment
(Print engine) (Manual adjustment)
This adjustment must be performed in the following cases:
* When the LSU is replaced or removed.
* When a paper tray is replaced.
* When the paper tray section is disassembled.
* When the manual feed tray is replaced.
* When the manual feed tray is disassembled.
* When the duplex mode paper transport section is disassembled.
* When the registration roller section is disassembled.
* U2 trouble has occurred.
* The PCU PWB has been replaced.
* The EEPROM of the PCU PWB has been replaced.
1) Enter the SIM 50-10 mode.
2) Set A4 (11 x 8.5") paper to all the paper feed trays. Select an
adjustment item of the target paper feed tray among items A -
J and enter the adjustment value. Then select item "L" to
select the paper feed tray which is to be used for executing
test printing.
3) Press [EXECUTE] key.
The adjustment pattern is printed.
EXECUTE
End of print
EXECUTE