panel is operating. Do not remove the fuse while powering the fire control panel. Remove AC power at the source
before attempting to remove the fuse of the power supply.
2. Locate the housing containing the fuse.
3. Remove the upper-half of the fuse housing with long nose pliers.
4. Remove the fuse from the upper-half of the fuse housing.
Installing the Replacement Power Supply Fuse
WARNING! This is a high voltage circuit area. An electrical shock hazard exists in this area when the fire control
panel is operating. Do not replace the fuse while powering the fire control panel. Remove AC power at the source
before attempting to replace the fuse of the power supply.
1. Insert and center the replacement fuse in the upper housing.
For the 5.25A power supply, use only a UL listed 250V, 3A, slow blow, 5x20mm fuse.
For the 10.25A power supply, use only a UL listed 250V, 5A, slow blow, 5x20mm fuse.
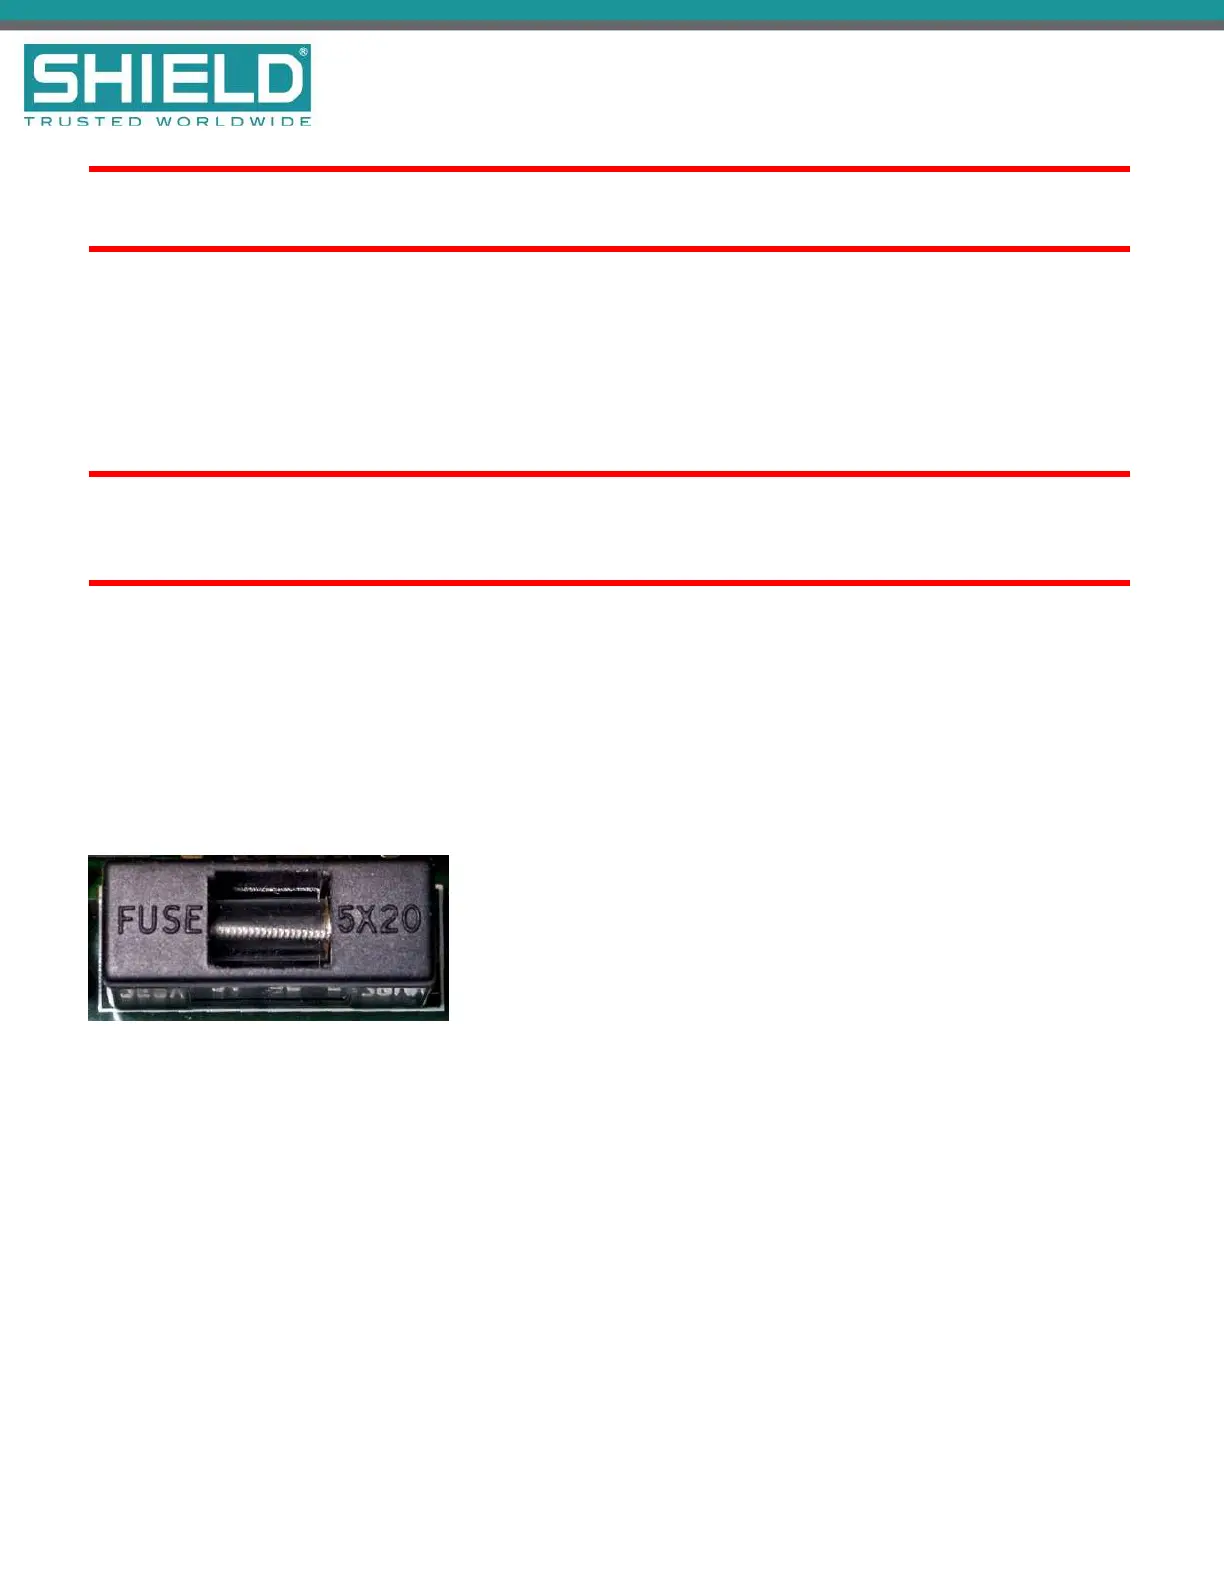
2. Press the upper housing on the lower housing until the halves snap together. The following figure
illustrates the closed fuse housing:
3. Restore AC power.
4. Monitor the AC NORMAL and DCOUTONLED indicators on the power supply of the Aura Fire Alarm
ControlPanel to determine that trouble conditions are not reported following fuse replacement.
SHIELD Fire, Safety & Security Ltd
Aura Fire Alarm Control Panel Installation Manual
Version 1.00 |June 2019 |MAN-1431VS
Page 100
Maintenance and Repair