Instruction Manual for AS380 Series Elevator Integrated Drive Controller
Chapter 8 Elevator Elevator Commissioning Guide
(4)In the actual adjustment, adjust one of the middle floors first until leveled up. Then, take this
floor as parameter to adjust other floors.
By adjusting the curve selection, proportional, integral gain as in the previous section,
ensure that the stop position (that is, the stop position should have an error of ≤ ± 2 ~ 3mm)
should be repeated for the elevator to go both upward and downward to stop in the middle.
2. Adjust leveling accuracy
(1)Confirm the repeat of stop position
By adjusting the curve selection, proportional, integral gain as in the previous section, ensure
that the stop position (that is, the stop position should have an error of ≤ ± 2 ~ 3mm) should
be repeated for the elevator to go both upward and downward to stop in the middle.
(2)Adjust deck board at door area
Have the elevator stop floor by floor, measure and record the deviation △ S between the lift
car sill and the hall door sill (positive when the lift car sill is higher than the hall door sill,
otherwise negative.)
Adjust the position of deck board at door area floor by floor, if △ S> 0, then move the deck
board downward by △ S; if △ S <0, then move the deck board upward by △ S.
◆ After the adjustment of deck board at door area, carry out well self study again.
◆ Check the leveling again. If the leveling accuracy does not meet the requirements, repeat
steps (1) ~ (3).
(3)Adjust parameter menu
If the stop positions of the elevator are repetitive, but not at the same position for upward or,
downward leveling on each floor, such as up higher down lower, or up lower down high,
make leveling adjustment of Parameter F56, F57 in the parameter menu. Its default value is
50mm. decrease this value for up higher down lower, and increase this value for up lower
down higher, by the adjustment amount of half of the leveling difference. For example: the
total difference for up higher down lower is 20mm and then decrease this value by 10mm.
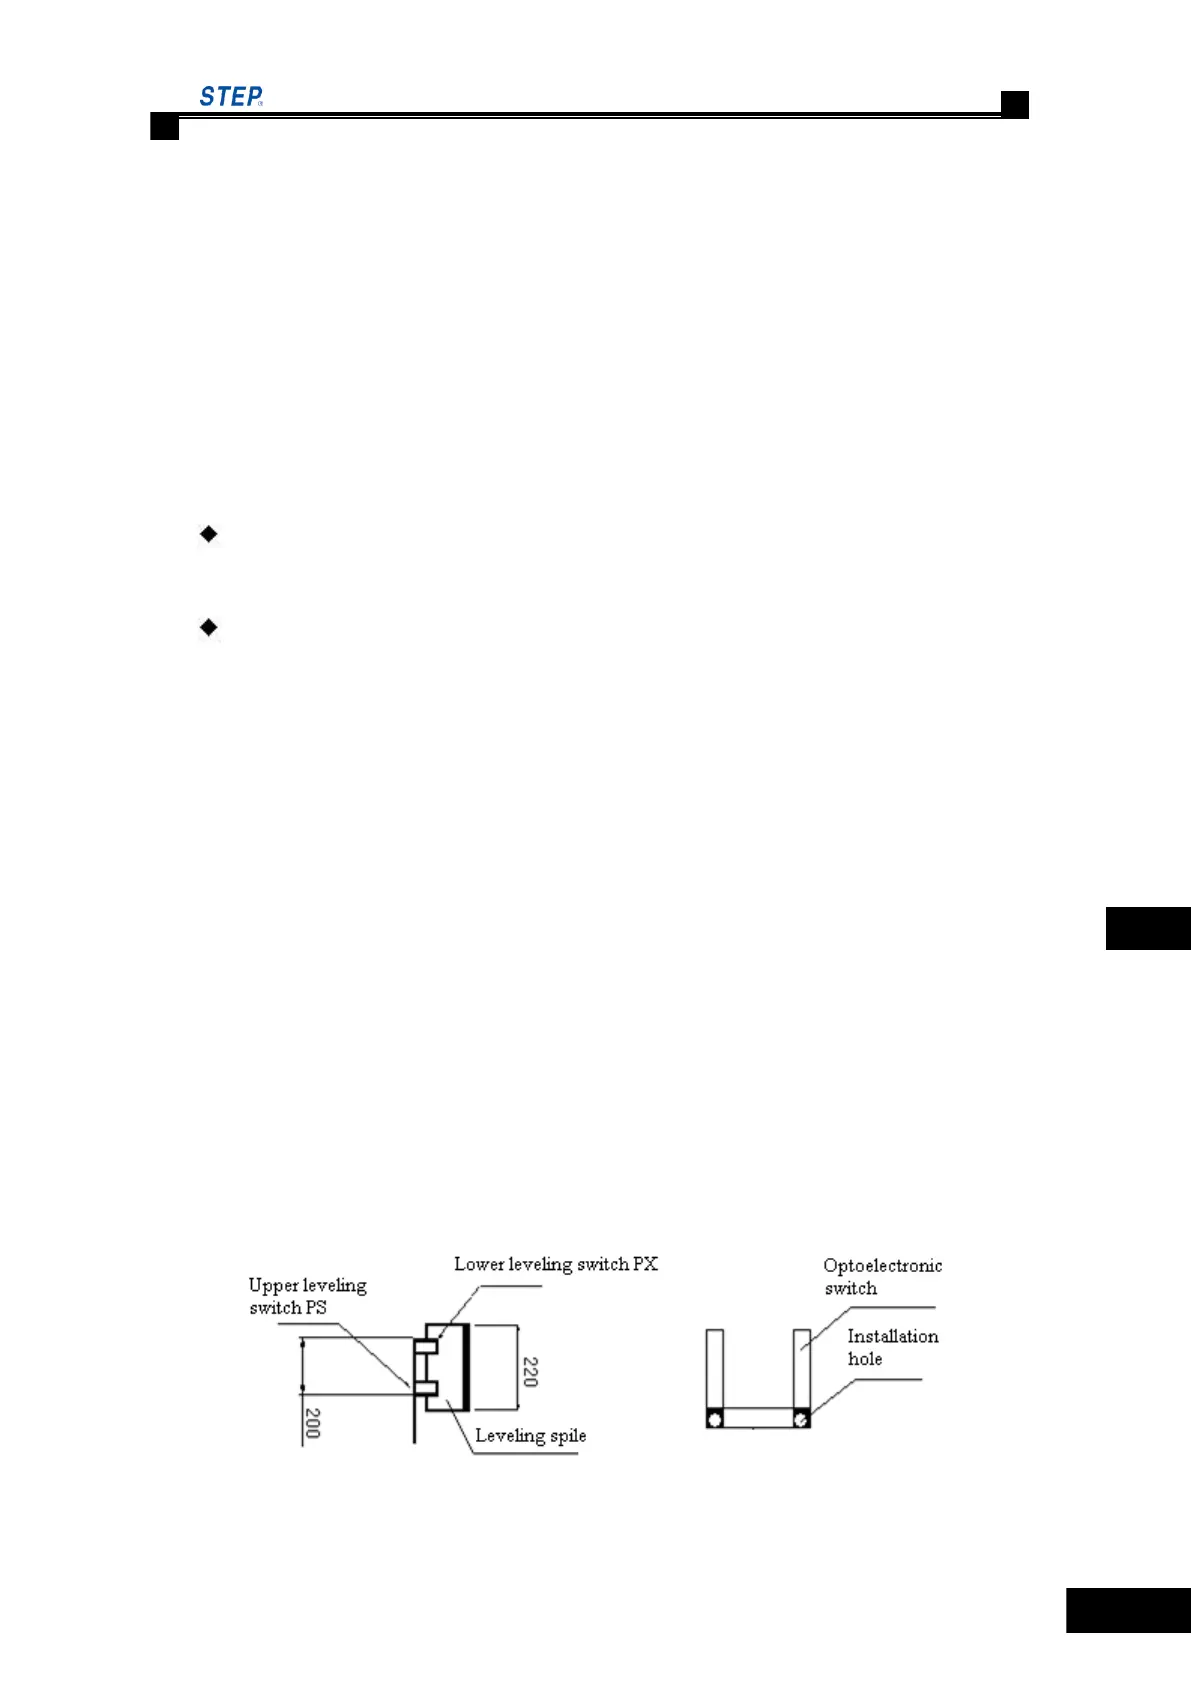
◆ Installation standard for leveling switch:
When the lift car sill and the hall door sill keep the absolute level, the upper surface of the
leveling spile is about 10mm higher than the lower leveling switch, and the lower surface of the
leveling spile is about 10mm lower than the upper leveling switch, which facilitates the
adjustment of comfort and leveling accuracy. The standard length of leveling spile is 220mm to
ensure that every spile is of the same length (the length error should be less than 3mm). (See
Diagram 8.5)
Fig 8.5 Installation standard for leveling switch
 Loading...