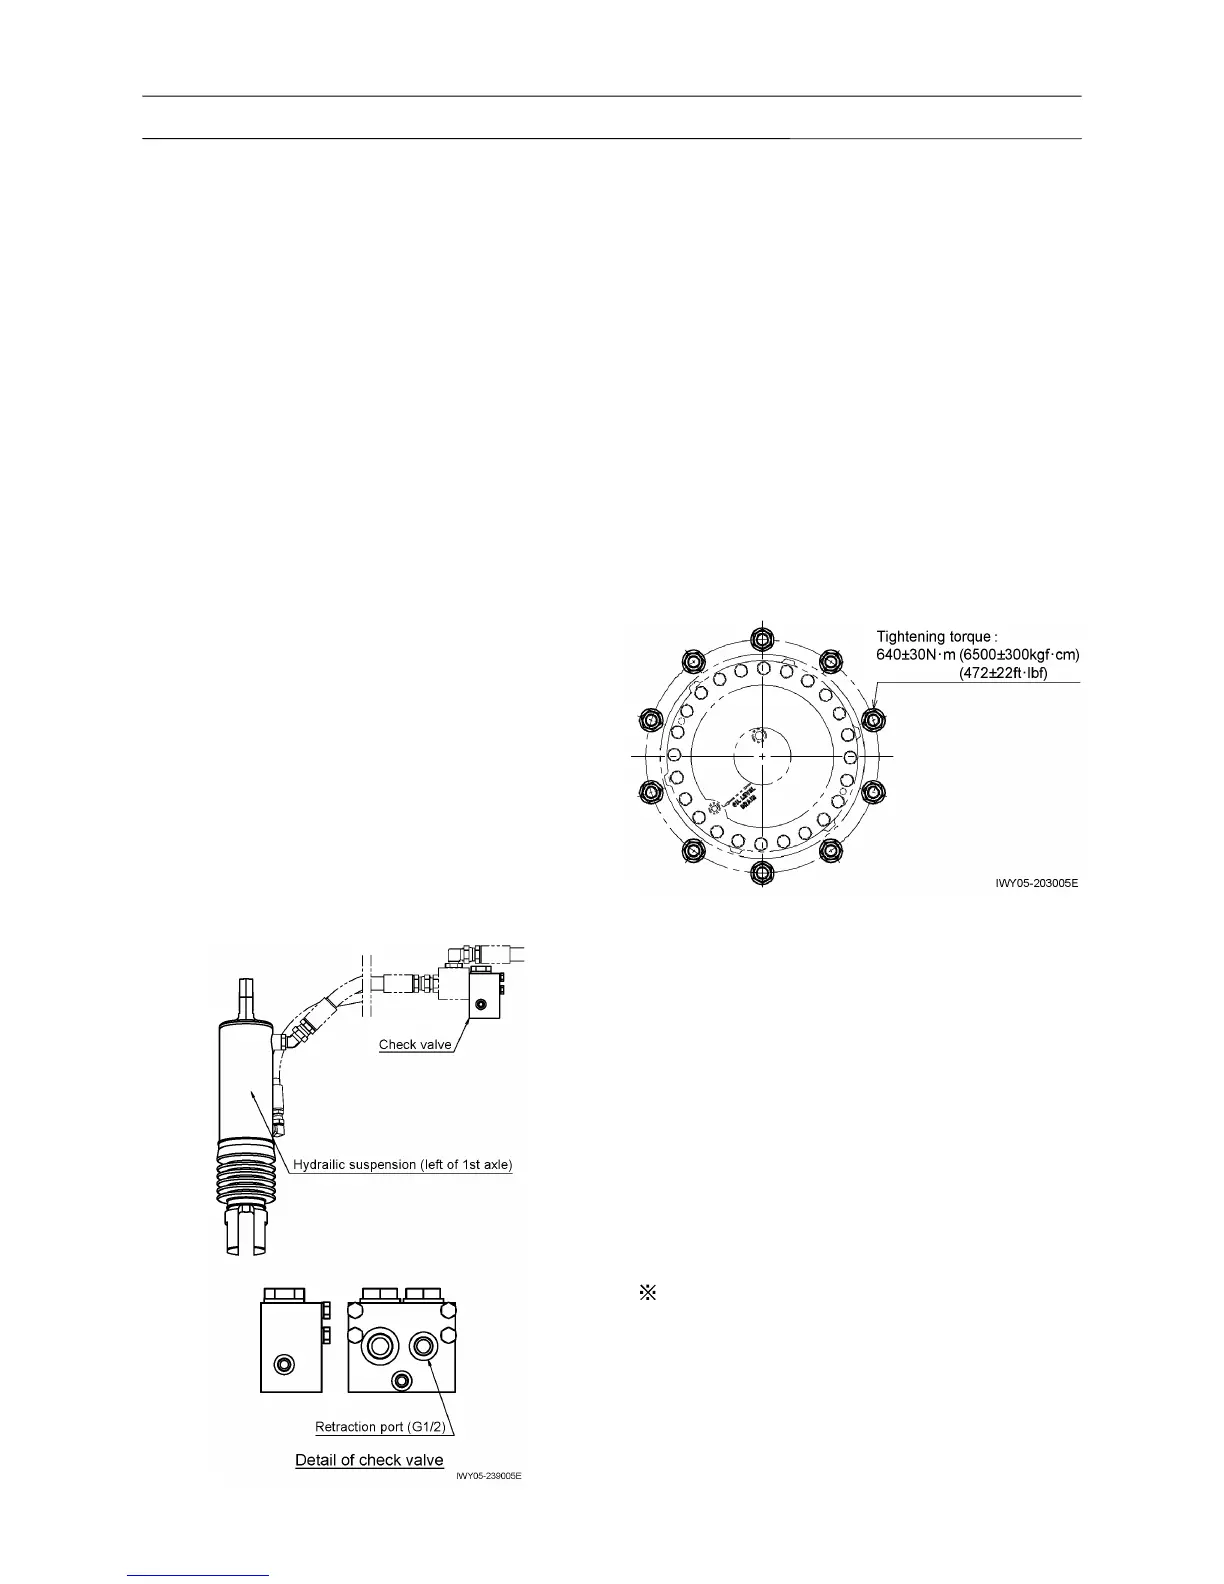
8. Hydraulic suspension
8.1 Releasing pressure in the accumulators for
hydraulic suspension
When disassembling the components and pipings
in the hydraulic suspension, release pressure in
the accumulators beforehand in the method
described below.
1. Perform vehicle height increasing operation of the
crane in on-rubber operation configuration. After
the suspension is extended to its stroke end, lock
the suspension.
2. Extend the outrigger jacks to make the 8 wheels
clear of the ground.
3. After setting the outrigger extension/retraction
selector to the neutral, press the suspension free
switch.
[NOTICE]
Before proceeding to the next step, wait at least 20
seconds after you press the switch.
4. Loosen the pipes connected to the retraction port
of each of 4 suspension cylinders carefully and
slowly. If no pressure remains, you can remove
the clasps. If pressure remains, repeat the step. 3.
9. Retightening the hub nuts
• Retighten the hub nut with the tightening torque
of 640 ± 30 N-m {6500 ± 300 kgf-cm} (472 ± 22
ft-lbf).
• Retighten hub nuts after checking the brake force
(See “6. Braking force”.), and before shipment.
(The hub nuts must be settled before retightening.
When the load is applied to the wheel mounting
sections during braking force check, the nuts
settle.)
• Put the retightening torque for the hub nuts (the
torque of the latest tightening) on the hub nut
torque check record.
10. Fuel air bleeding procedure
1. Keep the state of starter switch ON (electric lift
pump actuation) for 30 seconds, and then after
confirming that the electric lift pump is stopped,
turn OFF the starter switch. Repeat this operation
for 10 times.
2. Set the starter switch to START, then start the
engine.
At this time, maintain the cranking state for 10 to
15 seconds until the engine starts running.
If the engine does not start, repeat the procedure
of steps 1 and 2.