2 - Names and Functions of Parts
% MENU button
o When the Meter Screen is open, press to open the Home
Screen.
o When the MENU Screen or a menu item settings screen is
open, press to return to the Home Screen.
o When the Home Screen is open, press to open the MENU
Screen. (See “Menu structure” on page 17 and “Basic
MENU screen operations” on page 18.)
^ 8 button/indicator
Press to stop playback or recording.
This button lights when stopped.
Press this button when paused to return to the beginning of
the song or le.
& 7/9 button/indicator
Press this button to start playback.
Press to pause when playing.
This button lights during playback and recording.
This button blinks when paused.
* 0 button/indicator
Press this button to start recording.
This button lights during recording.
Press this button during playback to start recording (Manual
punch in).
( Output level indicators
These show the output levels of the MAIN OUTPUT jacks.
When the PFL/AFL indicator is lit, these show the output
levels from the PFL/AFL L/R bus.
) m/, buttons
o When stopped and during playback, press and hold these
buttons to search backward/forward.
o When the Home Screen is open, press the m button
to locate to the beginning of the current song (00:00:00,
which is the zero point).
o When the Home Screen is open, press the , button to
locate to the end of the current song.
o If the current song has auto punch in or out points set,
you can also locate to those points.
o If the current song has marks set, these can also be used
to locate to them.
o While pressing the 8 button, press the m button to
locate to the point where recording last started.
o While pressing the 8 button, press the , button to
locate to the point where recording last stopped.
o When the SD PLAY Screen is in playback state, press to
skip a le. (see "Playing WAV les on SD cards (SD PLAY
mode)" on page 53.)
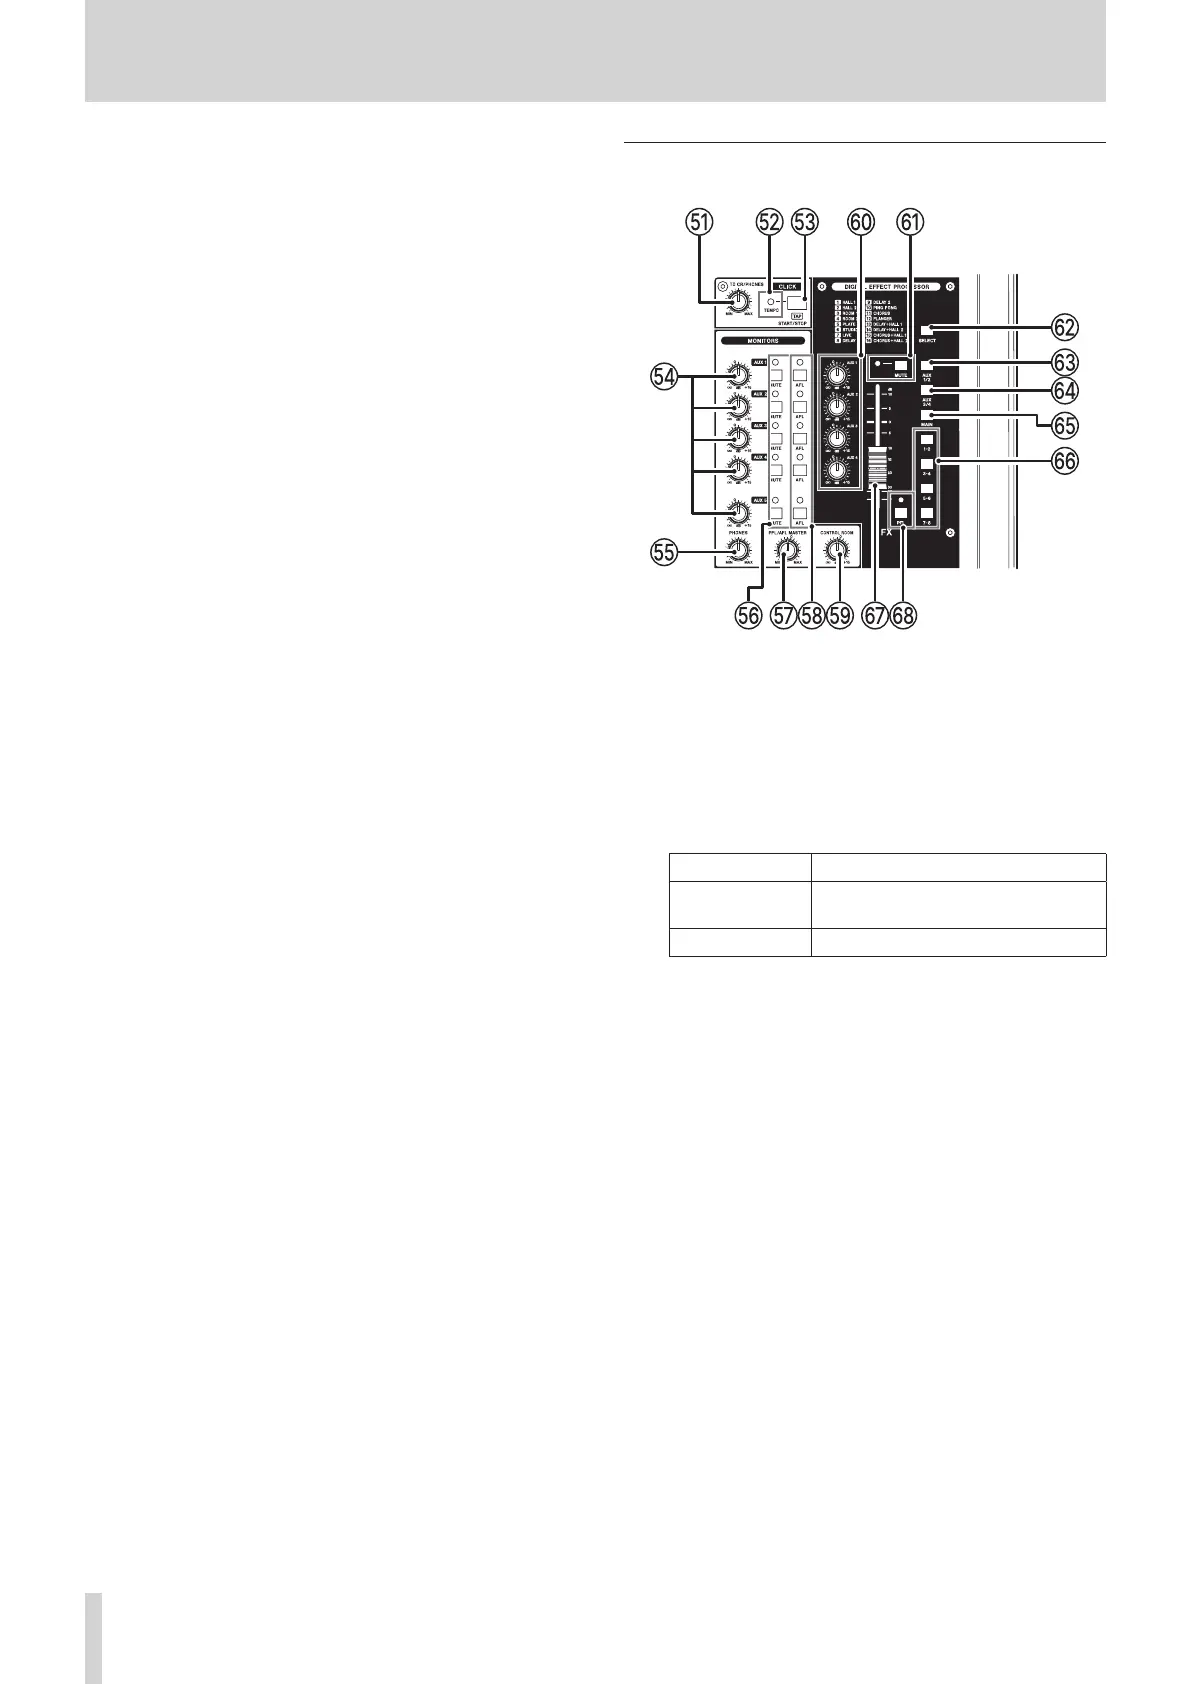
Monitoring section
Q TO PHONES knob
Use this to adjust the level of the click sound sent to the
headphone outputs.
W TEMPO indicator
o This lights green when a song that has click sound output
set is loaded.
o When the metronome is operating, it lights or blinks as
follows. (see "Metronome functions" on page 42.)
Indicator color Meaning
Red
This color lights on the rst beat of
the setting
Green This blinks at the set tempo
E CLICK button
o Press this button when the metronome is stopped to
start it at the set tempo. Press this button when the
metronome is on to stop it. (see "Starting and stopping
the metronome manually" on page 44.)
o When the TAP TEMPO screen is open, tap this button
repeatedly at the desired tempo to set the metronome.
(see "Making metronome settings" on page 43.)
o When the EFFECT screen is open, tap this button
repeatedly at the desired speed to set the delay of the
built-in eect. (see "Setting the built-in eect" on page
31.)
R AUX 1–5 knobs
Use these to adjust the output levels of the 1–5 AUX OUTPUT
jacks.
12 TASCAM Model 2400


 To Next Page