5 - Basic recording
SIG indicators and level meters
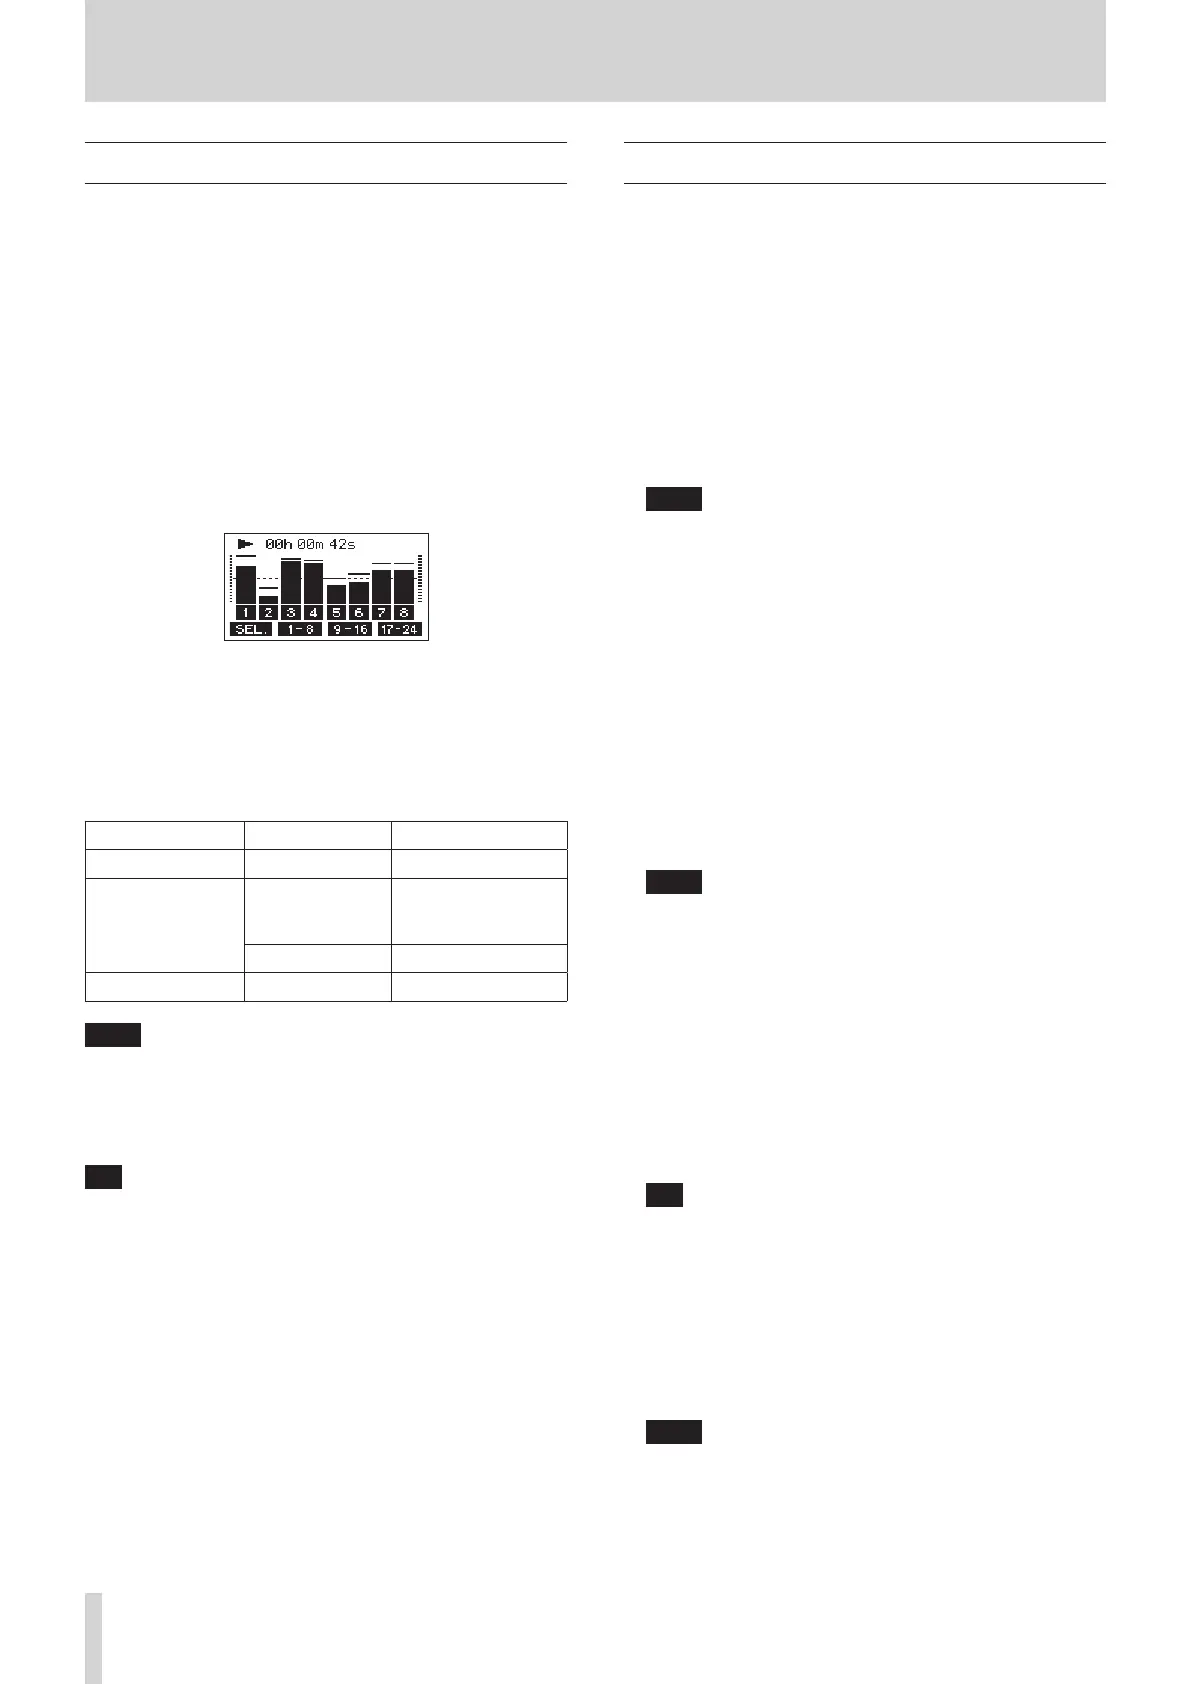
The channel 1–12, 13/14–21/22 SIG indicators and level meters
shown on the Meter Screen can be used to check the levels of
this unit’s audio signals.
In addition to using the level meters to visually check signal
levels, they can also be used to check whether signals are being
input to this unit. For example, even if no sound is output from
monitors, if the Meter Screen level meters are moving, signals
are being input to this unit.
The SIG indicators light green when signals (of at least −18 dB)
are input through their channels.
If a SIG indicator lights red, the input source signal is too loud or
the GAIN knob is turned up too far.
If the SIG indicator lights red even when the GAIN knob is turned
all the way to the left, the input source signal is to loud. Lower
its volume.
Track level meters (1–12, 13/14–21/22)
The show track playback signal or track input signal levels.
Channels for which the INPUT SEL switch is set to “MTR” will
show the following signal levels according to the operation
status.
REC button Transport status Level meter display
Unlit PLAY Track playback signal
Blinking
(recording standby)
PLAY
Playback signal Track
input + playback
signal
Stop Track input signal
Blinking (recording) Record Track input signal
NOTE
When the playback signal is shown, the level of the recorded
signal on the track is being shown, so the levels of the level
meters cannot be changed.
When the input signal is shown, adjusting channel 1–12, 13/14–
21/22 GAIN knobs will change the levels of the level meters.
TIP
Please see “Meter Screen details” on page 16 for details about
the Meter Screen.
MAIN MIX L/R level meters (MAIN)
These show the MAIN MIX L/R bus levels.
Recording
This unit can simultaneously record up to 24 tracks, including 22
channel inputs and the MAIN MIX L/R bus.
The following recording operations assume that mics, guitars
and other things to record have been connected to the unit,
input signals have been assigned as track recording sources,
monitoring equipment has been connected and a song has
been loaded.
1. Press the REC buttons for channel to record.
Press the REC button to start recording standby. It will blink
red.
When a INPUT SEL switch is set to “MTR”, the signal from the
input jack on that channel will be recorded. (see "Setting
the INPUT SEL switch" on page 29.)
NOTE
i The MAIN MIX L/R bus does not have a REC button, but
it is always in recording standby. The signals of the MAIN
MIX L/R bus will always be recorded if the 0 button is
pressed.
i The MAIN MIX L/R bus signals are recorded as channel
23/24 tracks on the SD card.
i When the REC buttons of tracks that already have
recordings is blinking, press them to make them unlit.
2. Set the recording levels.
Use the GAIN knobs of each channel to adjust their input
levels.
Watch the SIG indicators above and to the right of the GAIN
knobs, and set the levels suitably.
At the same time, check that the sound heard through
headphones or a monitoring system is not distorted and
that an unintended eect has not been set.
NOTE
If an input is too loud, the SIG indicator will light red.
If the SIG indicator lights red even when its GAIN knob is
turned all the way to the left, lower the volume of the input
source.
3. Press the 0 button.
Recording will start and the 0 and 7/9 buttons will
light.
The REC buttons for tracks to record will stop blinking and
stay lit.
4. When recording has completed, press the 8 button.
5. Use the m/, buttons and 8 button, for example to
locate to a position you want to check.
TIP
For details about the locate function, see “Locate function” on
page 34.
6. Press the 7/9 button to play the recorded tracks.
Use the channel and MAIN faders to adjust the playback
levels.
Use the volume of the monitoring system to adjust the nal
monitoring level.
Use the PAN knobs of each channel to set the position of
each track signal between left and right speakers.
NOTE
i The channel PAN knobs and channel faders control the
playback output signals of already recorded tracks or the
monitoring volume of input signals. They do not control
signals to be recorded.
i If you are not satised with a recording, repeat the above
procedure from the beginning.
30 TASCAM Model 2400


 To Next Page