Removal and Inst a l l a t i on Procedures
TDS5000B Series Se r vi c e Manual
6-- 41
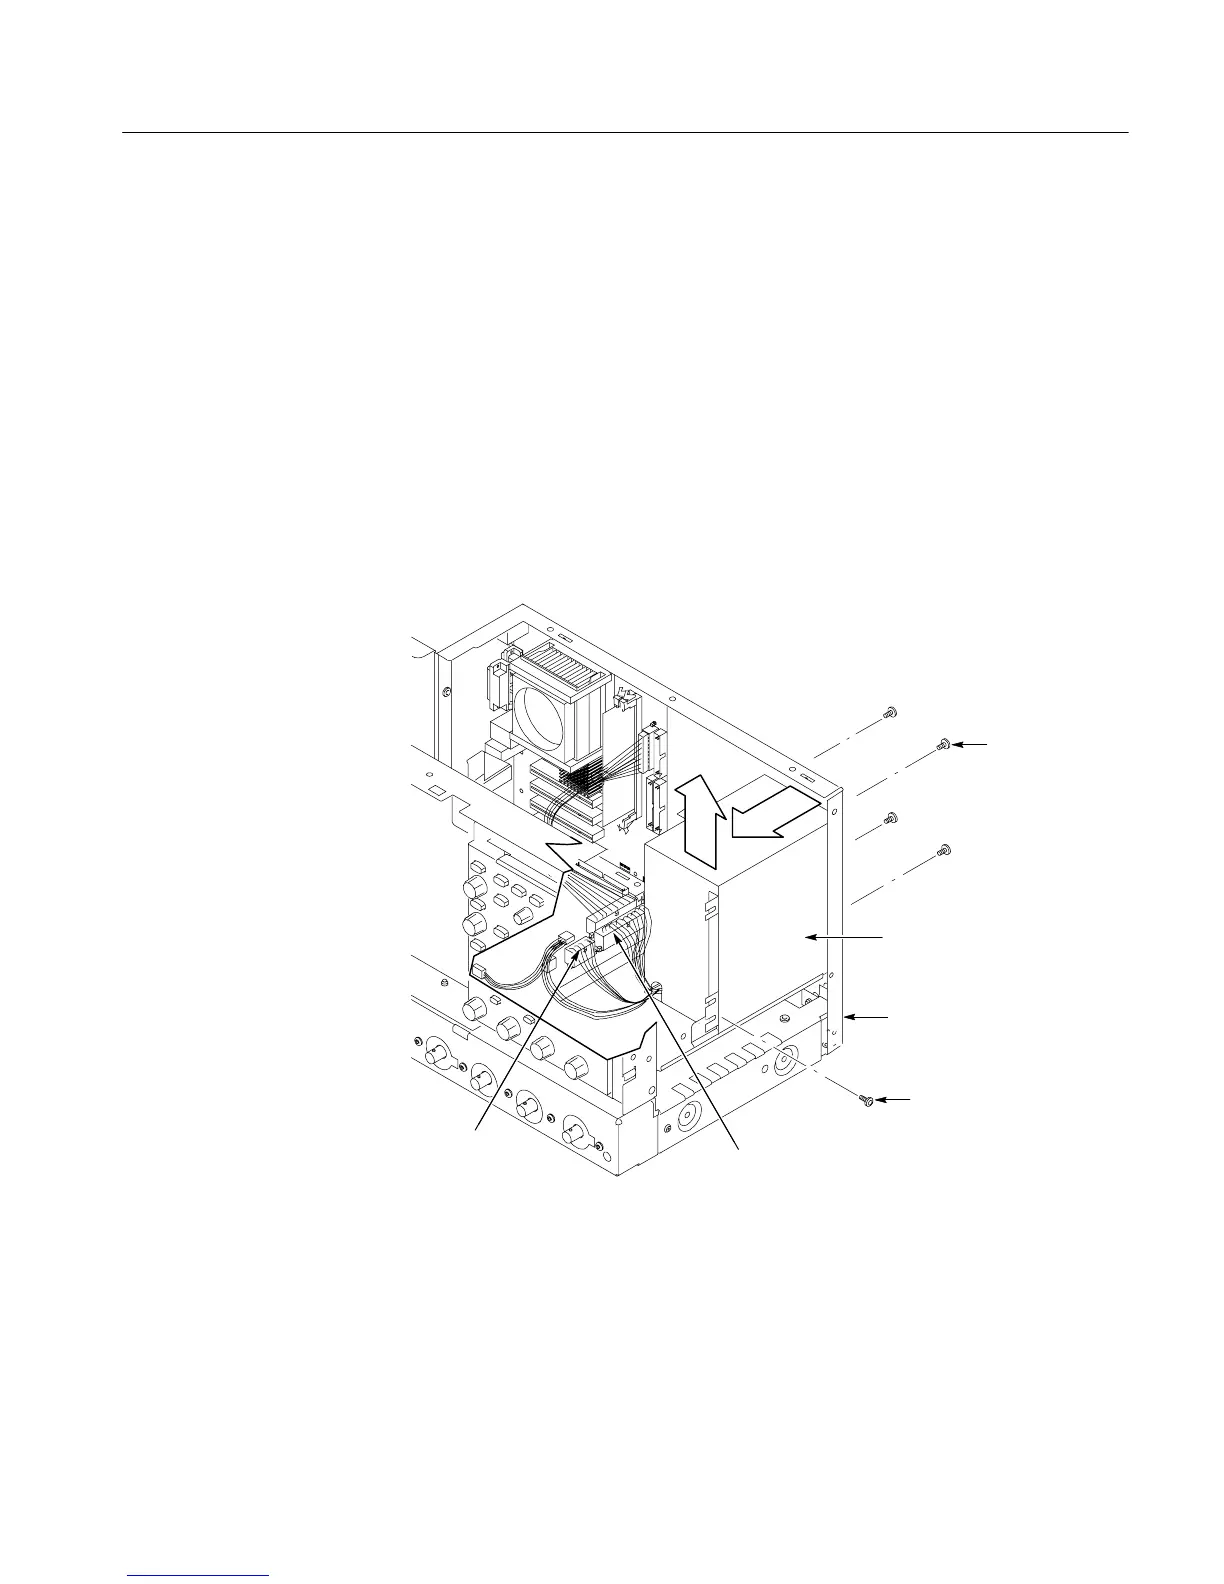
3. Remove the power supply: Se e Figure 6--23, on page 6--41.
a. Remove the four T-15 TORX drive screws that secure the power supply
to the back of the chassis.
b. Re m ove the T-15 TORX drive screw that secures the power supply to the
right side of the chassis.
c. Move the power supply towards the back of the instrument to access the
cables and unpl ug the two power supply ca bl e s from the PC interface
board.
d. L i f t the power supply away from the chassi s and guide the cables out.
4. Reinstallation: Do in reverse st e ps a through d to reinst a l l the power supply.
Power supply
T-15 TORX
drive screw (1)
Disconnect from the
PC interface board
Disconnect from the
PC interface board
T-15 TORX
drive screw (4)
Right side of
the instrument
Figure 6--23: Power supply rem ov a l

 Loading...


