136
8 SETTING THE PRISM / NON-PRISM CONSTANT CORRECTION VALUE
*2) The prism constant correction values automatically set according to the selected prism are
as listed below.
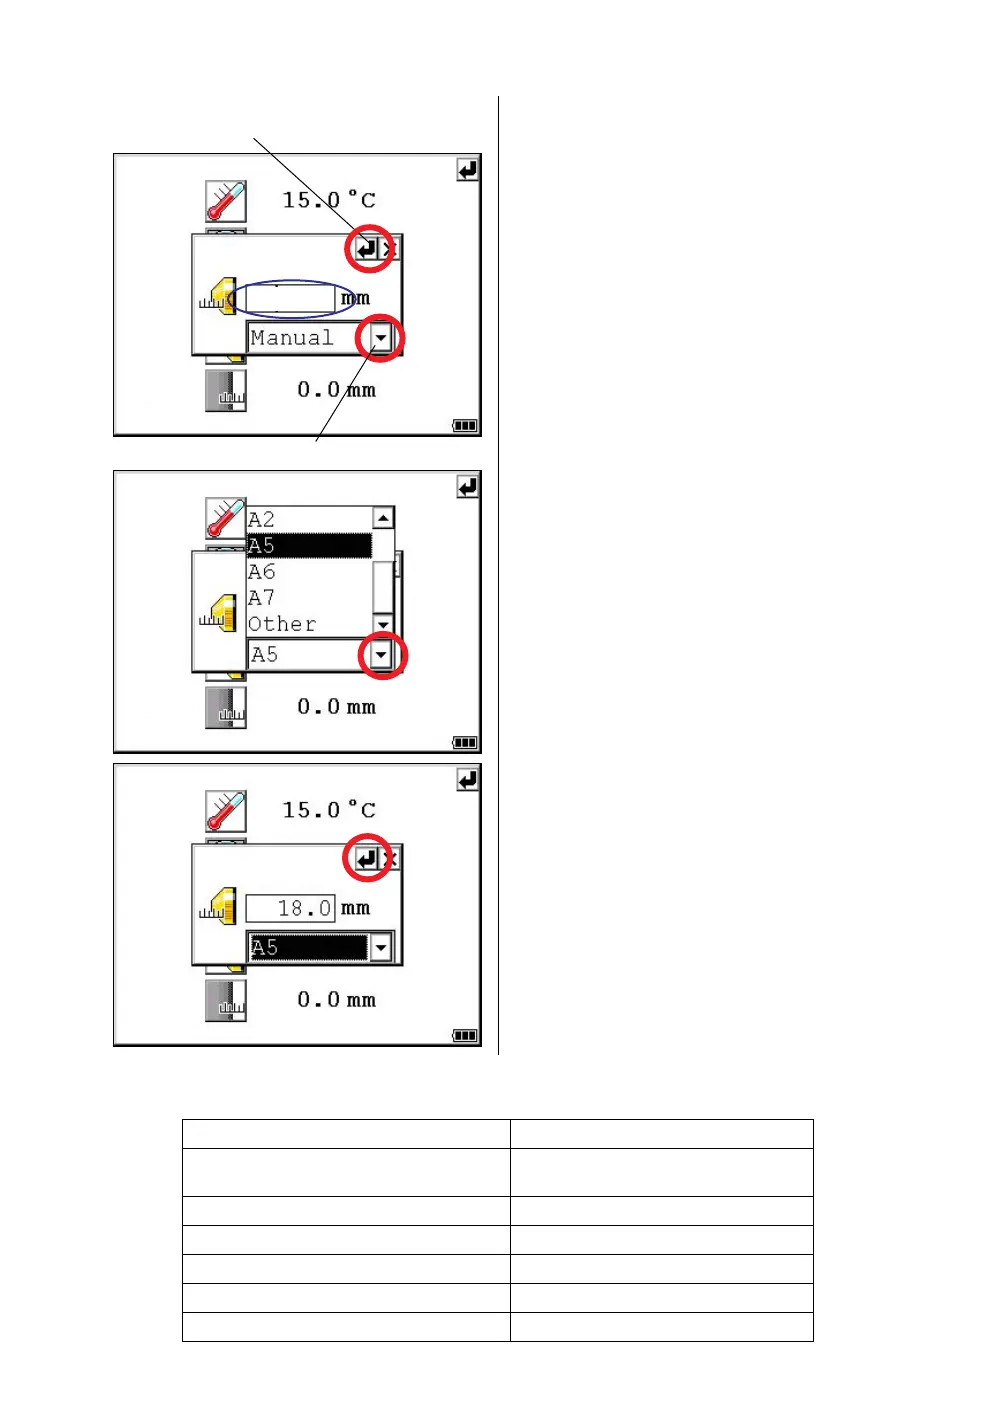
There are two ways to enter a prism constant
correction value as described below:
[Directly entering the prism constant correction value]
5
Press the prism selection switch and select
[Manual].
6
Enter the prism constant correction value. *1)
[Example] +14mm
When the prism constant value is -14mm, the
prism constant correction value will be +14mm.
*1) Input range : -99.9mm to +99.9mm (0.1mm step)
7
Press the [ENTER] key.
The prism constant correction value has been
set.
[Selecting prism to use]
(Example: Selecting prism unit A5)
8
Press the prism selection switch and select
[A5]. *2)
9
Press the [ENTER] key.
The prism constant correction value will be set
automatically.
Prism selection Prism constant correction value
Pinpole prism set L1
Pinpole prism holder L1
-22mm
Prism unit A2
+14mm
Prism unit A5
+18mm
Prism unit A6
0mm
Prism unit A7
-2mm
Other
-30mm
[ENTER] key
14
Prism selection switch
 Loading...