32
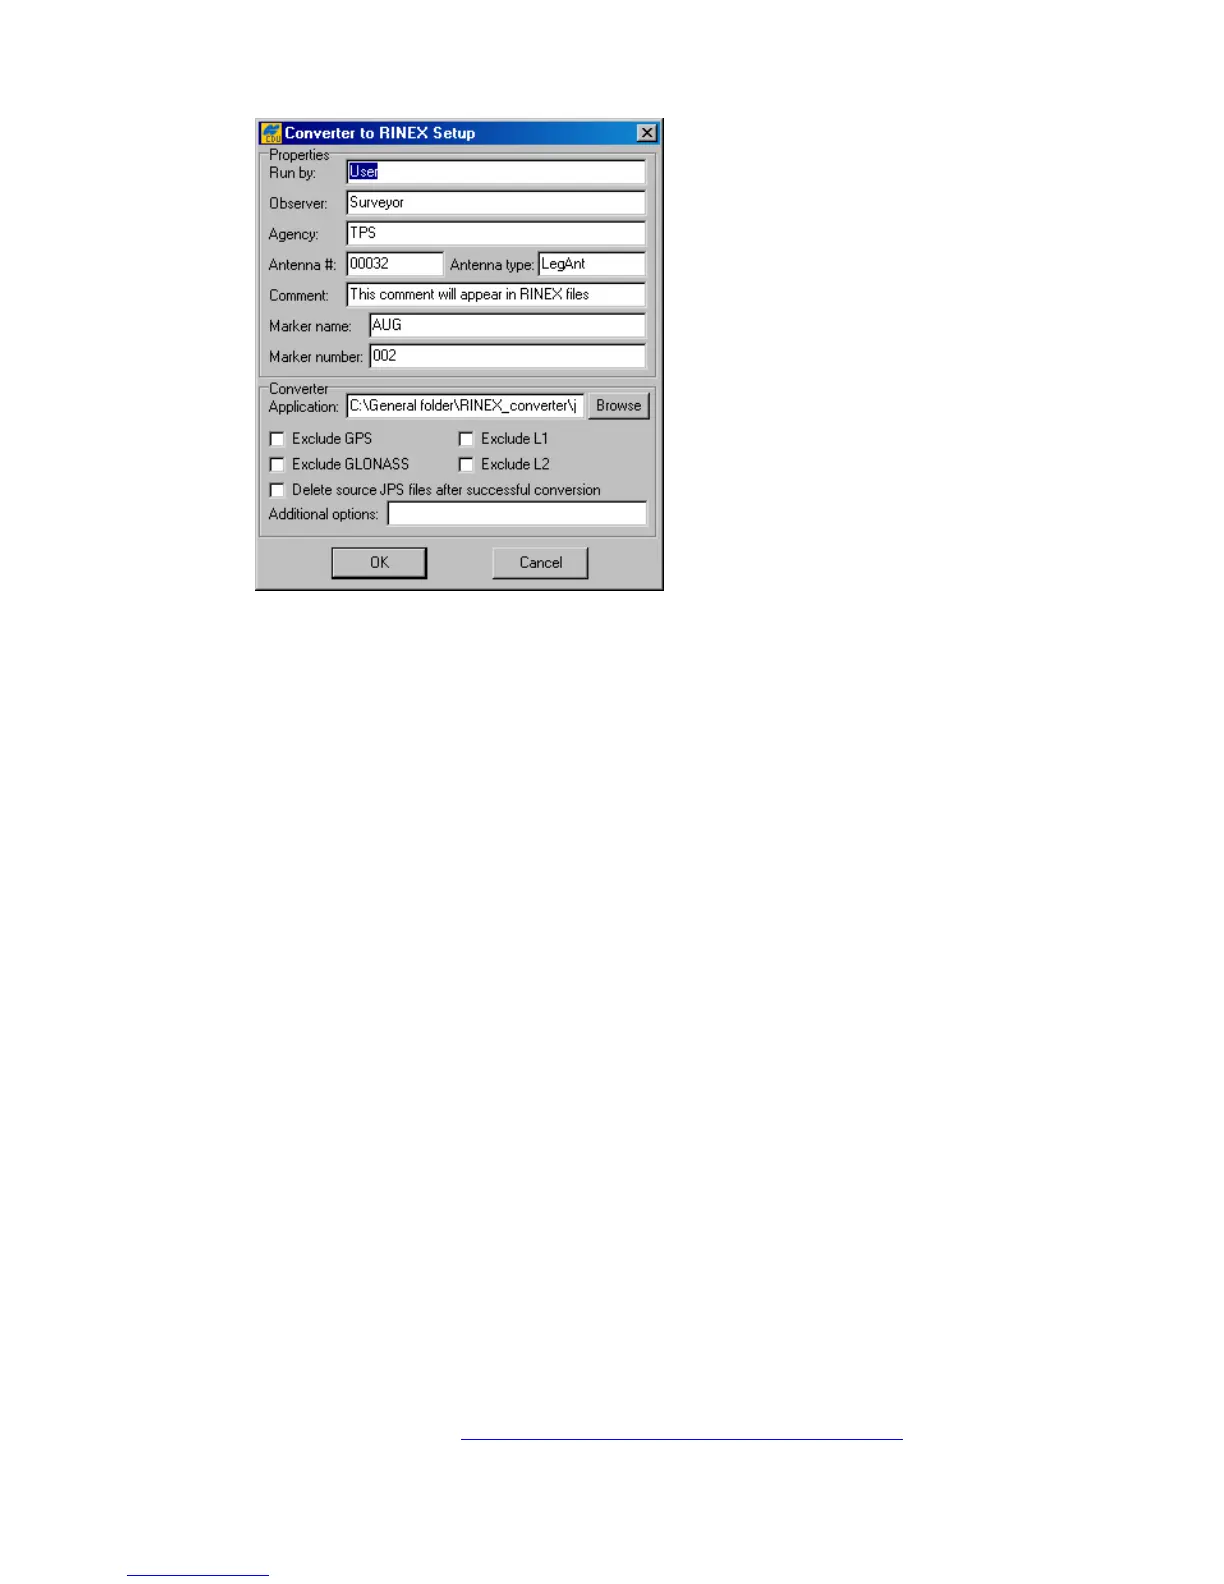
Figure 24. “Converter to RINEX Setup” window
The information specified in the Properties panel will be put in the header of the corresponding
RINEX observation file:
• Run by – name of the person or agency launching the jps2rin.exe converter.
• Observer – name of the person who collected the data.
• Agency – name of the agency responsible for collecting the data.
• Antenna # - antenna number to be copied in the RINEX observation file.
• Antenna type – antenna type to be copied in the RINEX observation file.
• Comment – comment line(s).
• Marker name – name of the antenna marker.
• Marker number – number of the antenna marker.
In the Application edit box, the full path to jps2rin.exe must be entered. Use the button
Browse to select the desired filename path instead of typing it.
Use the checkbox Exclude GPS (Exclude GLONASS) to exclude from the resulting RINEX
files all raw data measurements/ephemeris data corresponding to GPS (GLONASS).
Use the checkbox Exclude L1 (Exclude L2) to exclude from the resulting RINEX files all L1
(L2) raw data measurements.
The checkbox Delete source JPS files after successful conversion means exactly
what its name implies.
In the Additional options edit box you can enter any of the switches available for the win-
dows console application jps2rin.exe. For more information about the switches, refer to the Free
Software section at http://www.topcongps.com/software/utilities.html
.