Multi Pro 1750Page 7 − 42Drive Train
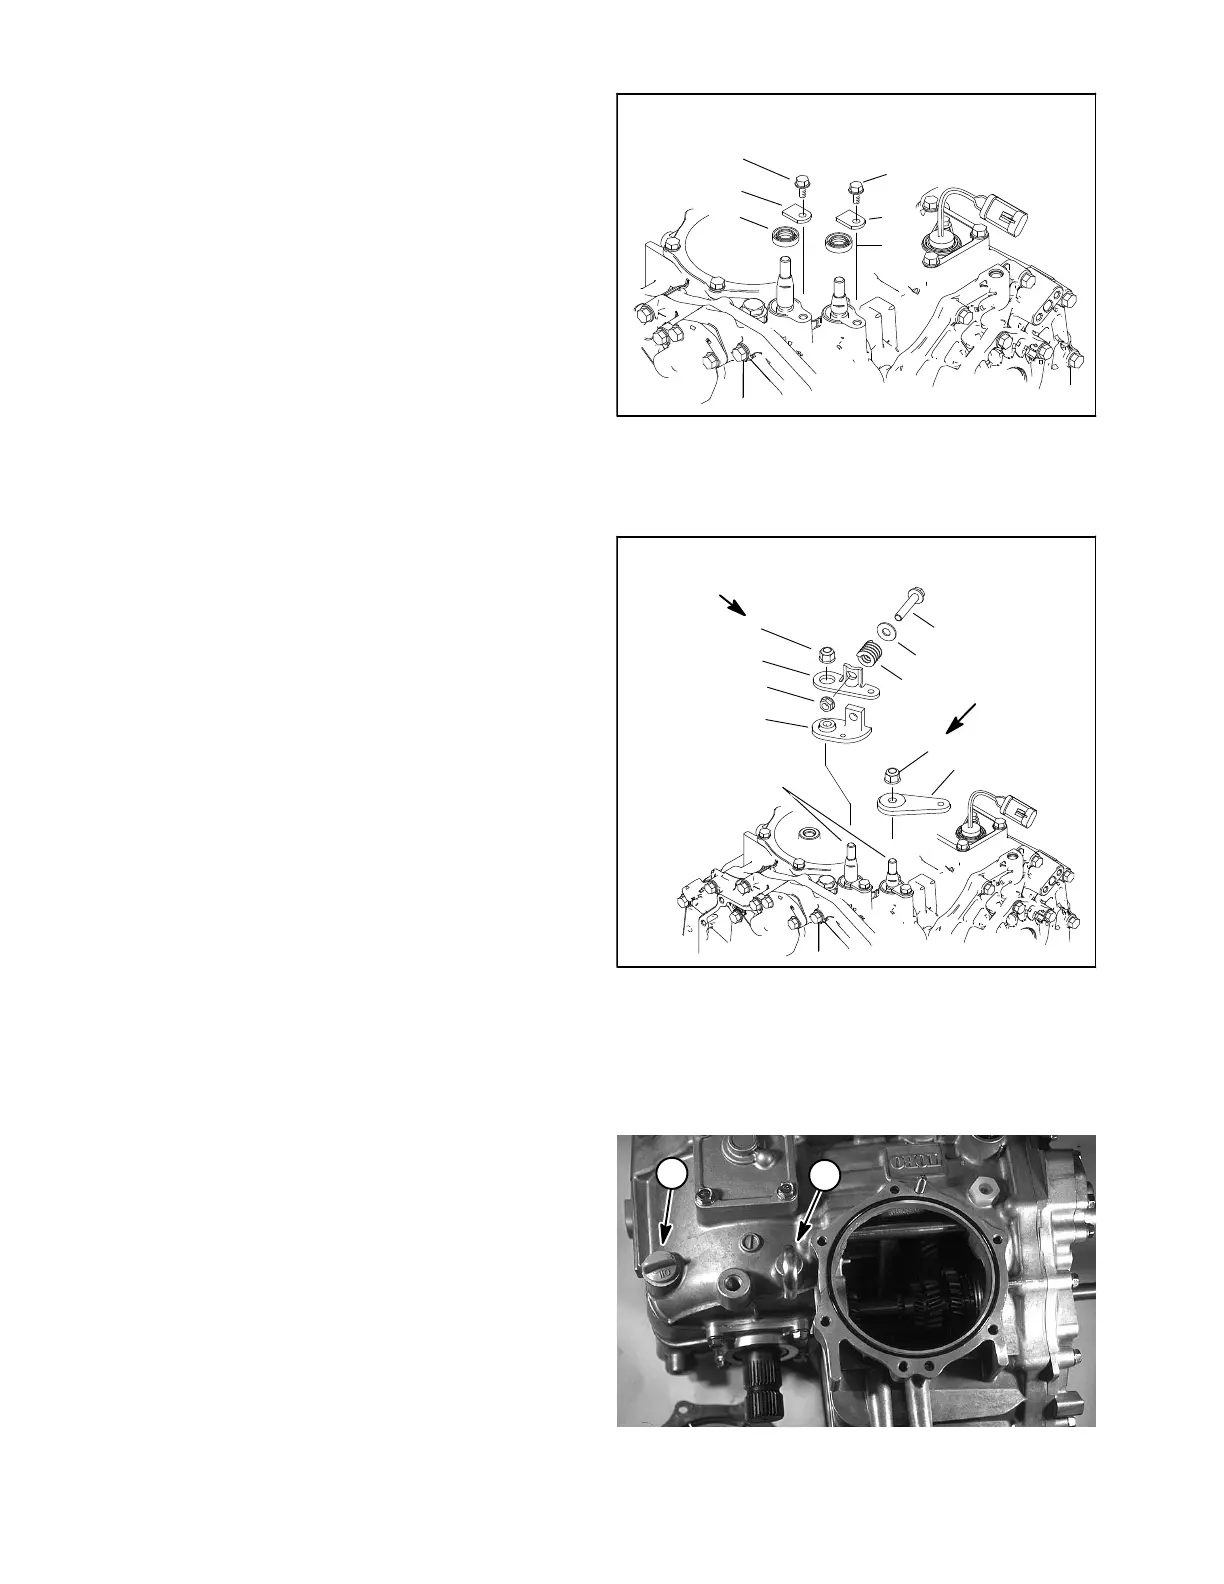
12.Assemble shift arms:
A. Apply multi−purpose grease on lips of oil seals
and install new shift arm oil seals in transaxle case.
B. Install keeper plates and tighten flange head
screws to a torque from 11 to 13 ft−lb (15 to 17
N−m).
C. Apply high strength bonding compound (ie. Loc-
tite #680) to tapers of shift fork arms.
D. Install shift arms. Install shift arm assembly.
E. Install lock nuts. Tighten shift arm retaining lock
nuts to a torque from 230 to 240 in−lb (26 to 27
N−m).
1. Cap screw (2)
2. Keeper plate (2)
3. Oil seal (2)
Figure 72
3
1
2
3
1
2
11 to 13 ft−lb
(15 to 17 N−m)
230 to 240 in−lb
(26 to 27 N−m)
Figure 73
1. Nut
2. 2
nd
−3
rd
shift arm
3. Shift arm plate
4. Spring
5. Lock nut
6. Washer
7. Cap screw
8. Lock nut
9. 1st−Rev shift arm
Apply Loctite #680
to threads and tapers
3
1
2
4
5
6
7
8
9
230 to 240 in−lb
(26 to 27 N−m)
13.Install oil cap with O−ring. Apply multi−purpose
grease to O−ring.
14.If removed, install air breather. Use sealing tape on
threads of air breather.
1
2
1. Oil cap 2. Air breather
Figure 74