4. Click Apply to save the settings to the Flash.
Note: This step saves all configuration changes to the NV-RAM to ensure that if the
switch is rebooted or power cycled, the configuration changes will still be applied.
VLAN
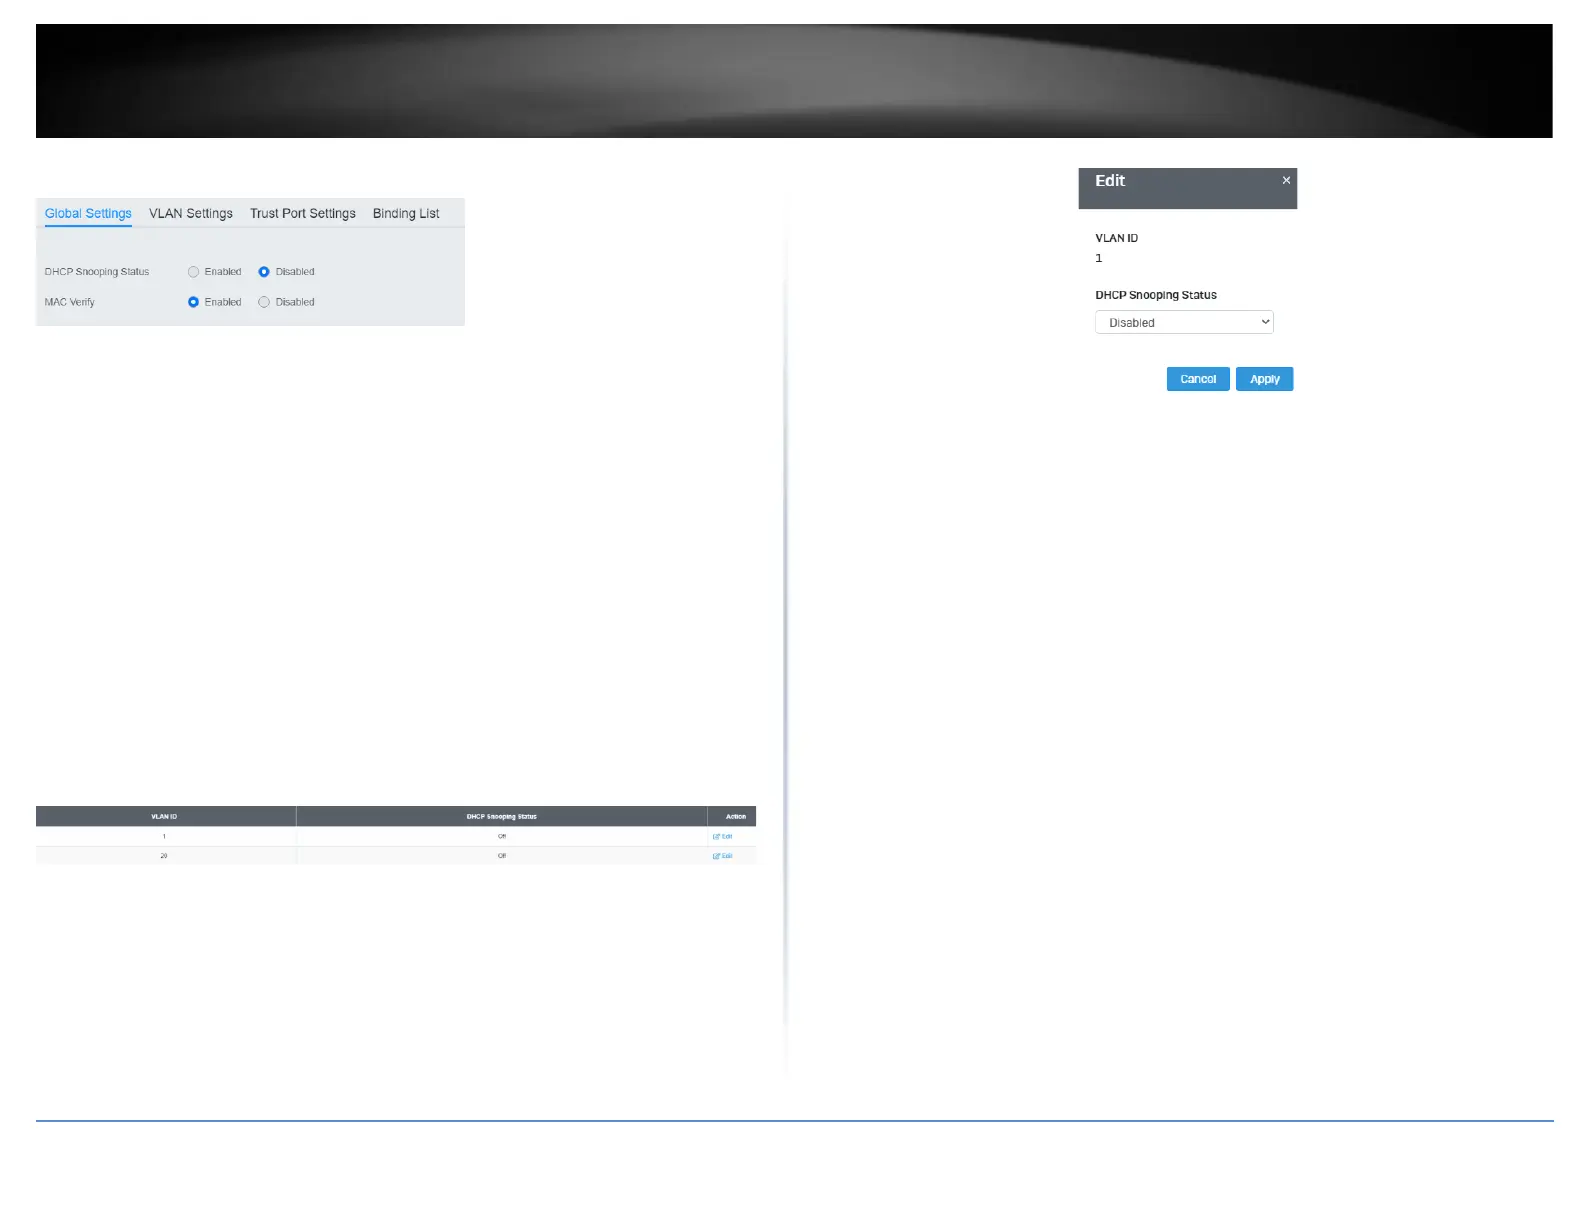
Security > DHCP Snooping > VLAN Settings
In this section, you can define an existing VLAN to apply DHCP snooping.
1. Log into your switch management page (see “Access your switch management page”
on page 5).
2. Click on Security, click on DHCP Snooping, and click on VLAN Settings.
3. Select the VLAN ID to edit. You can click Edit to modify an entry.
4. From the drop down menu, select Enabled to enable DHCP Snooping, or Disabled to
disable this feature. .
4. Click Apply to save the settings to the Flash.
Note: This step saves all configuration changes to the NV-RAM to ensure that if the
switch is rebooted or power cycled, the configuration changes will still be applied.
Trusted Port Interfaces
Security > DHCP Snooping > Trust Port Settings
This section allows you to set trusted port interfaces where DHCP servers can be
connected allows or denies DHCP server information to be received on those ports.
1. Log into your switch management page (see “Access your switch management page”
on page 5).
2. Click on Security, click on DHCP Snooping, and click on Trust Port Settings.
3. Next to each port, click on the bubble to select the port to modify and click Edit.
4. Review the settings:
• Untrusted: This parameter defines the port as untrusted for the DHCP
Snooping feature.
• Trusted: This parameter defines the port as trusted for the DHCP Snooping
feature.
Note: You can select the row labeled ALL to apply settings to all ports.