1. Log into your switch management page (see “Access your switch management page”
on page 5).
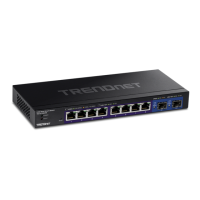
2. Click on Tools and click on Cable Diagnostic.
3. Select the Port from the switch to run the cable diagnostic and click Test to run the
test.
The results will be displayed in the Cable Diagnostic Table below.
• Test Results: Displays the diagnostic results for each pair in the cable. One of
the following cable status parameters is displayed:
o OK: There is no problem detected with the cable.
o Open in Cable: There is an open wire within the cable.
o Short in Cable: Two wires are shorted together within the cable.
o Cross talk in Cable: There is crosstalk detected between one pair
o of wires and another pair within the cable.
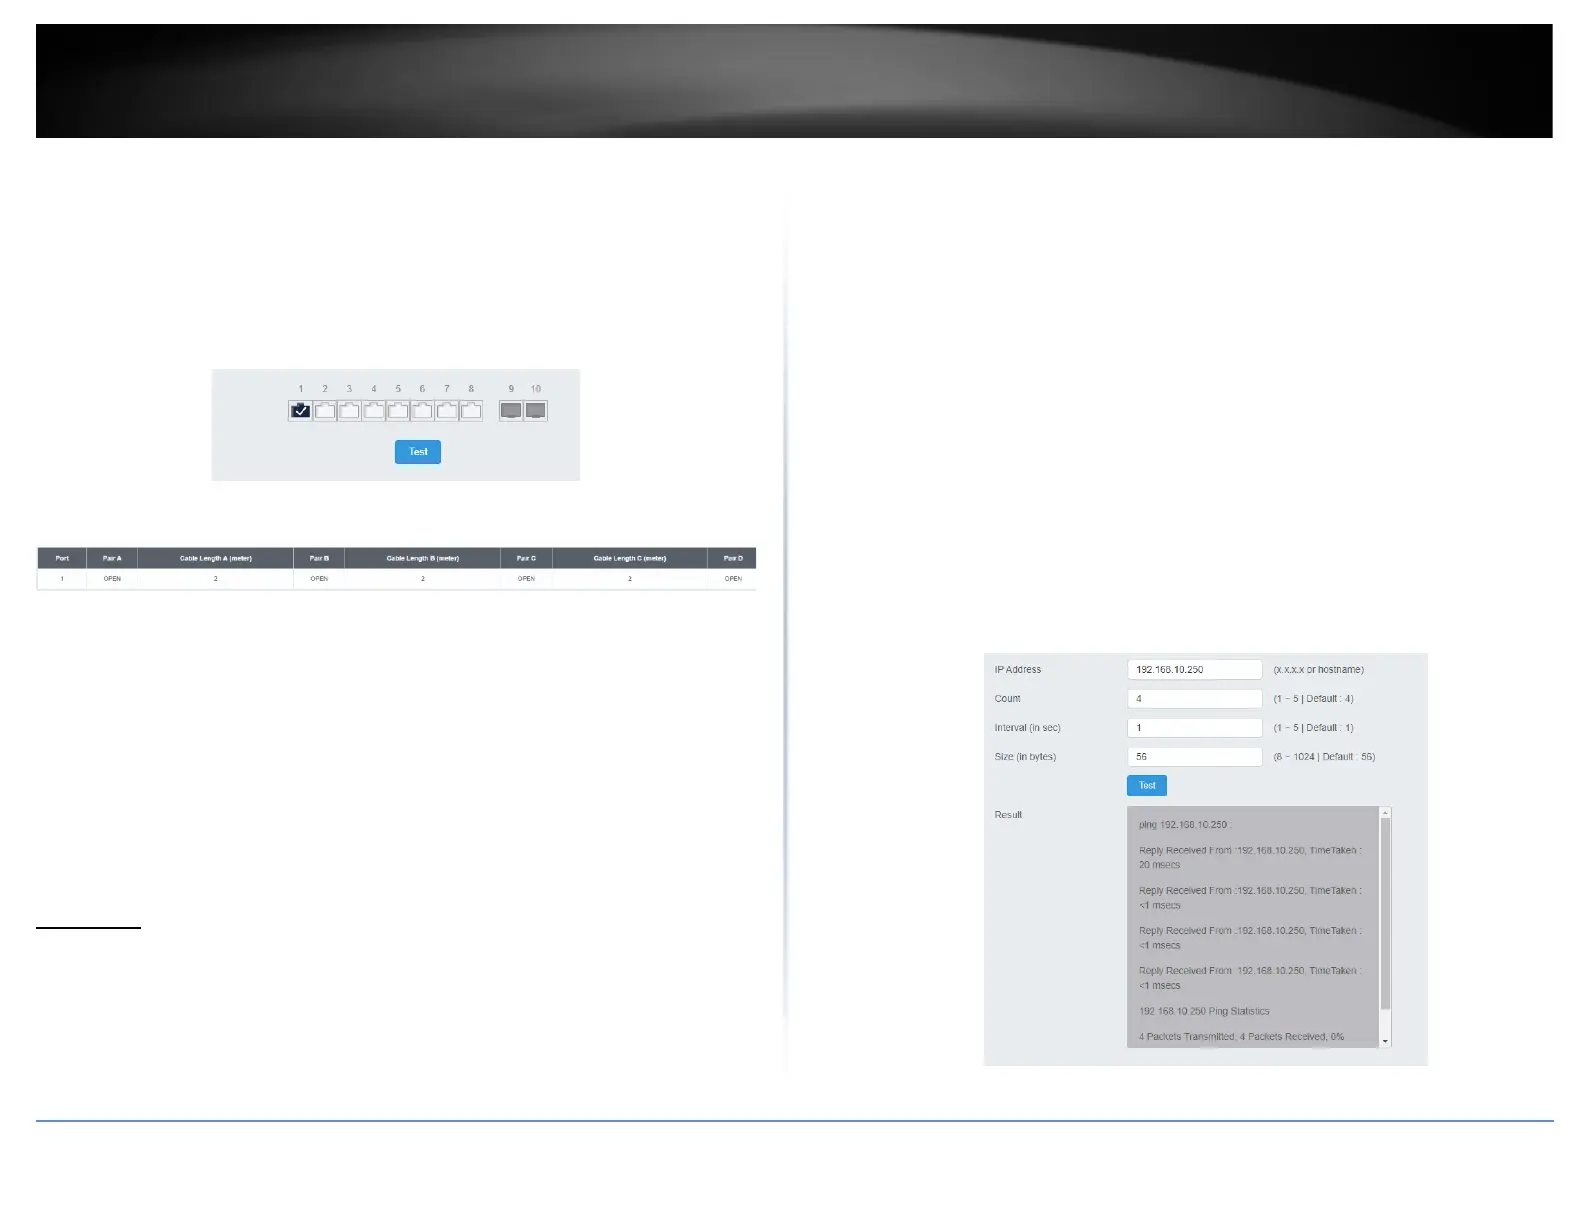
Ping Test
Network Connectivity Test (Ping Tool)
Tools > Diagnostics > Ping Test
This chapter provides the procedure to ping a node on your network from the switch.
This procedure is useful in determining whether an active link exists between the switch
and another network device.
The device you are pinging must be a member of the Default VLAN and within the same
local area network as your switch. In other words, the port on the switch through which
the node is communicating with the switch must be an untagged or tagged member of
the Default VLAN.
1. Log into your switch management page (see “Access your switch management page”
on page 5).
2. Click on Tools, click on Diagnostics, and click on Ping Test.
3. Review the settings. Click Start to start the network connectivity ping test. After the
ping test is activate, you can click Show Ping Results to check the ping test result.
• IP Address - The IP address of the node you want to ping in the IPv4 or IPv6
format.
• Count – Specifies the number of ping requests you want the switch to perform.
• Interval – Specifies the time between each ping request.
• Size – Specifies the size of the packet sent with each ping.