Using the built in slitter for the T2-C press
94 T2-C User Guide
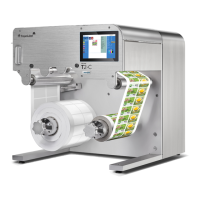
4 Move the slitter blades manually to the position where you want to slit the rolls along the
pre-diecut lines on the label roll.
• The blades which are currently not intended to be used can be pulled on the sides.
• Turn the brass knob (marked with a red circle on above picture) clockwise to tighten a
blade into position and counter-clockwise to loosen and move it.
• Blue lines indicate the pre-diecut lines where the slitter blades will slit the roll.
Note: On above picture it is a continuous roll loaded, but imagine the blue lines as
pre-diecut lines, where only the liner is going under the slitter blades.
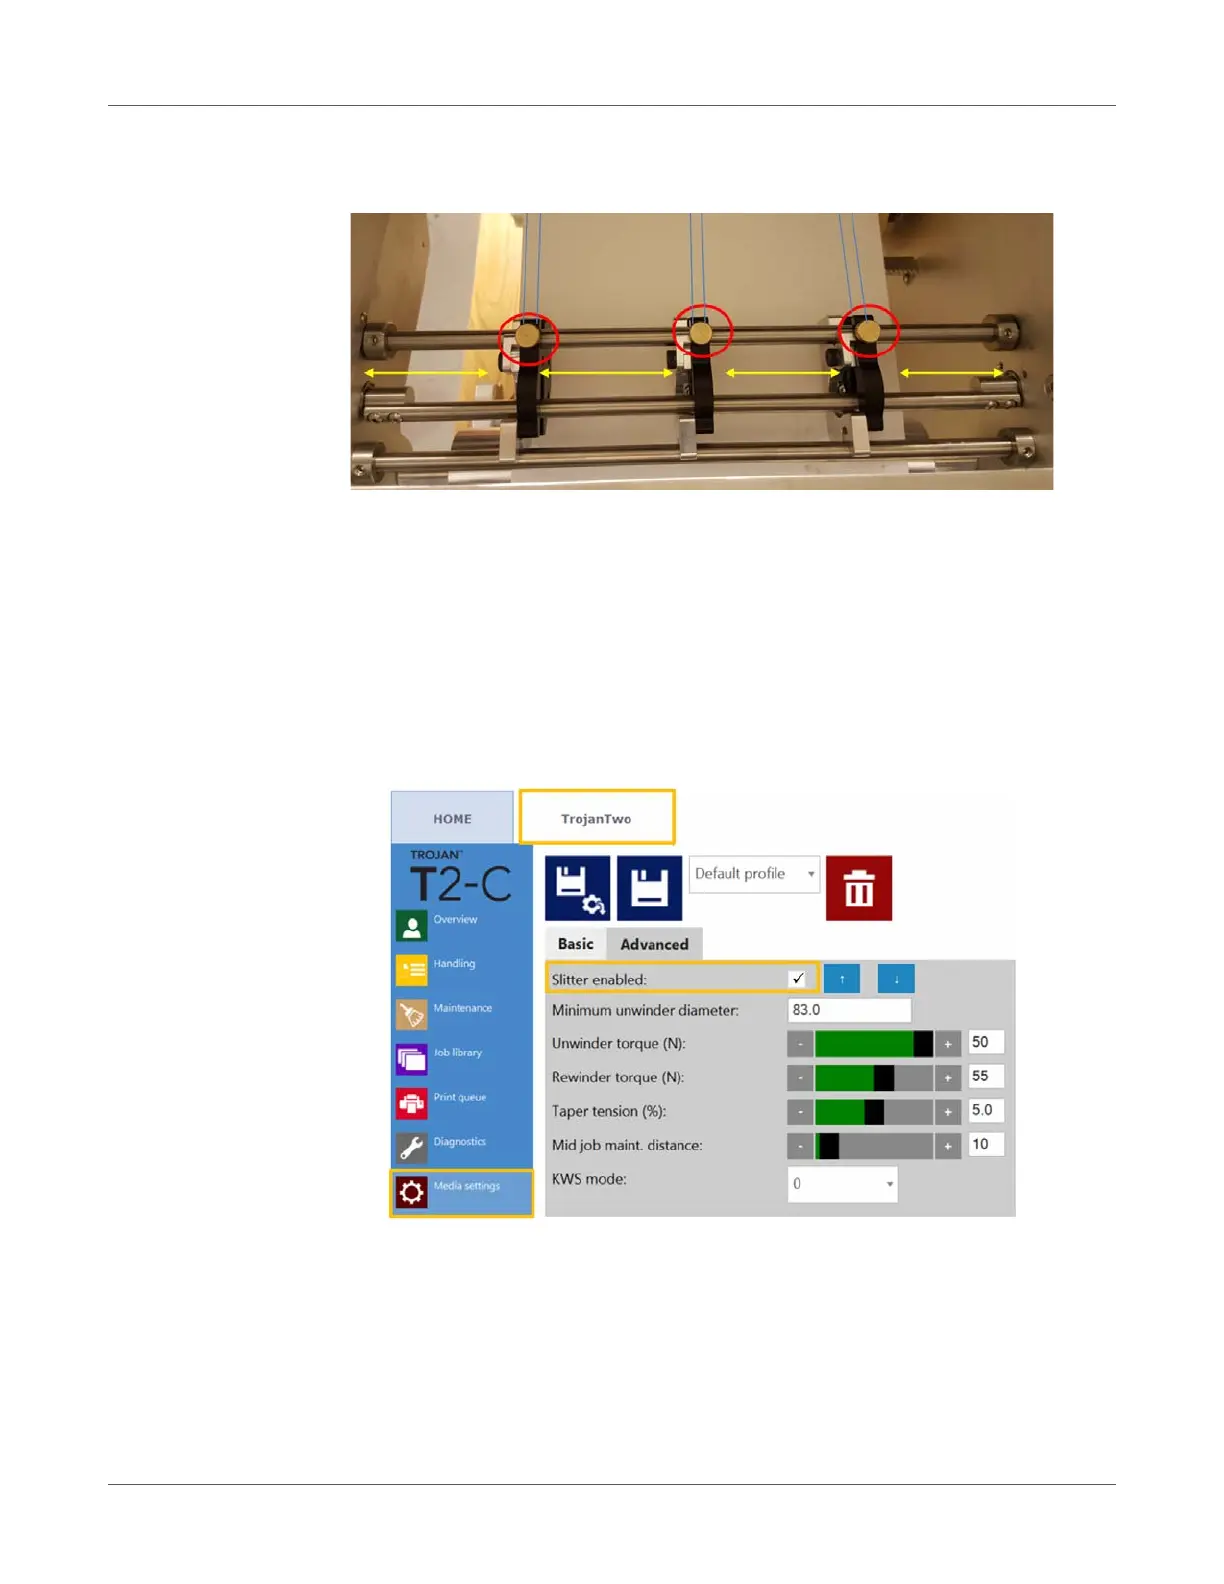
5 Enable the slitter blades in TrojanTwo tab > Media Settings > Advanced menu by
selecting the Slitter enabled checkbox and pressing the Save and Apply button.
6 The slitter blades will move down into the cut position when the Save and Apply button is
pressed and slitter is enabled. Also 2 additional buttons will appear to be able to move the
slitter blades up or down to check the cutting position and adjust blades position up or down
if needed.
7 Start printing and slitter blades will start cutting as soon as the media starts moving.