6.4 Mounting blocks and block hold-
ers in the w orking chamber
6.4.1 Mounting blocks to the block holder
You can mount up to 6 blocks to the block holder.
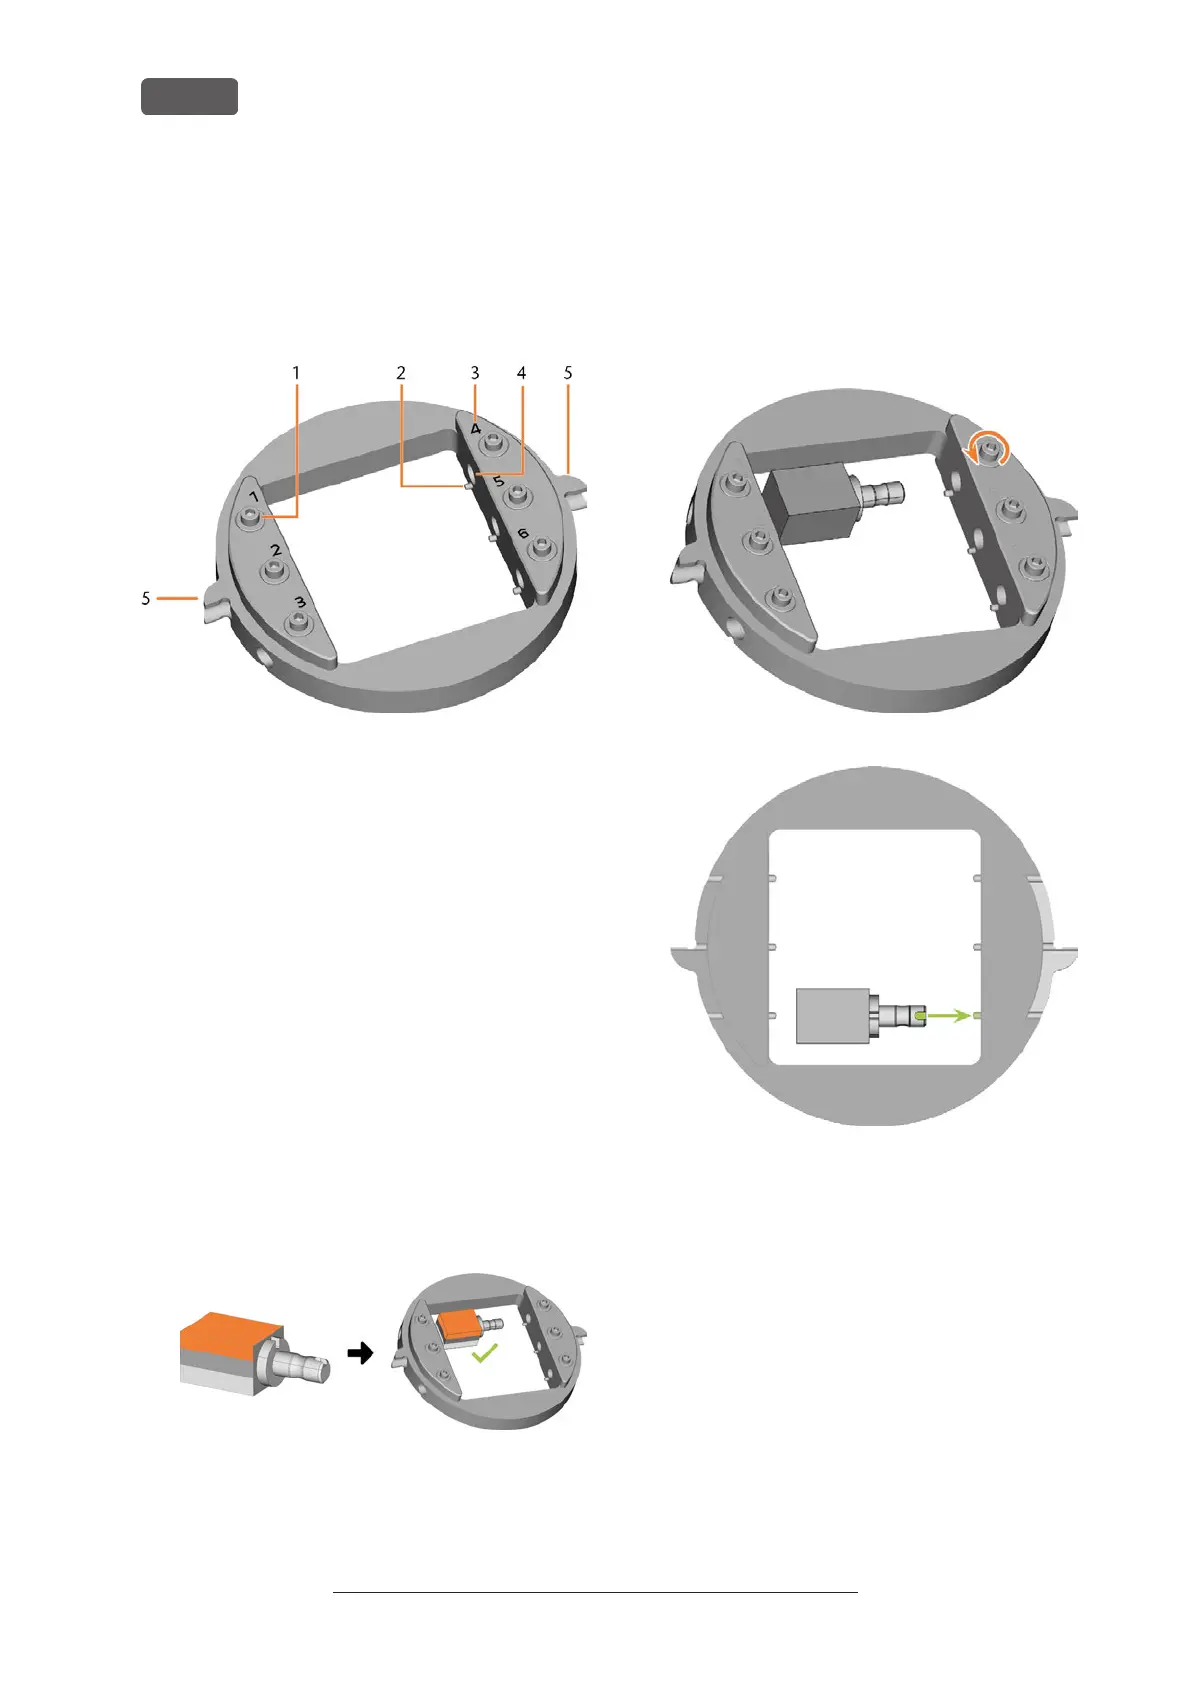
FIG. 45 THE E5 BLOCK HOLDER
1. Fixing screws
2. Positioning pins
3. Item numbers
4. Holes for block shafts
5. Positioning aids of the block holder
1. ⚠ CAUTION! Wear gloves.
NOTICE! Tool breakages and defective
machining results due to incorrect block
assignment
2. The block type, the number of blocks and the block
positions must correspond to the corresponding
job in DENTALCAM.
3. Loosen the fixing screw at the desired position with
the torque screwdriver supplied.
4. If the block is multilayered, align the blank so that
the top layer of color is on top.
FIG. 46
5. Position the block so that the positioning pin at the
block holder lies in the groove in the block shaft.
6. Insert the shaft of the block into the desired posi-
tion in the block holder until it is firmly seated.
7. Use the torque screwdriver supplied to fix the block
with the corresponding fixing screw. Tighten the
screw firmly.
FIG. 47
FIG. 48
Original Operating Instructions:E5
Version: 4/27/2023
Operating the machine
EN 30