7.22 Exchanging the w orking cham-
ber door
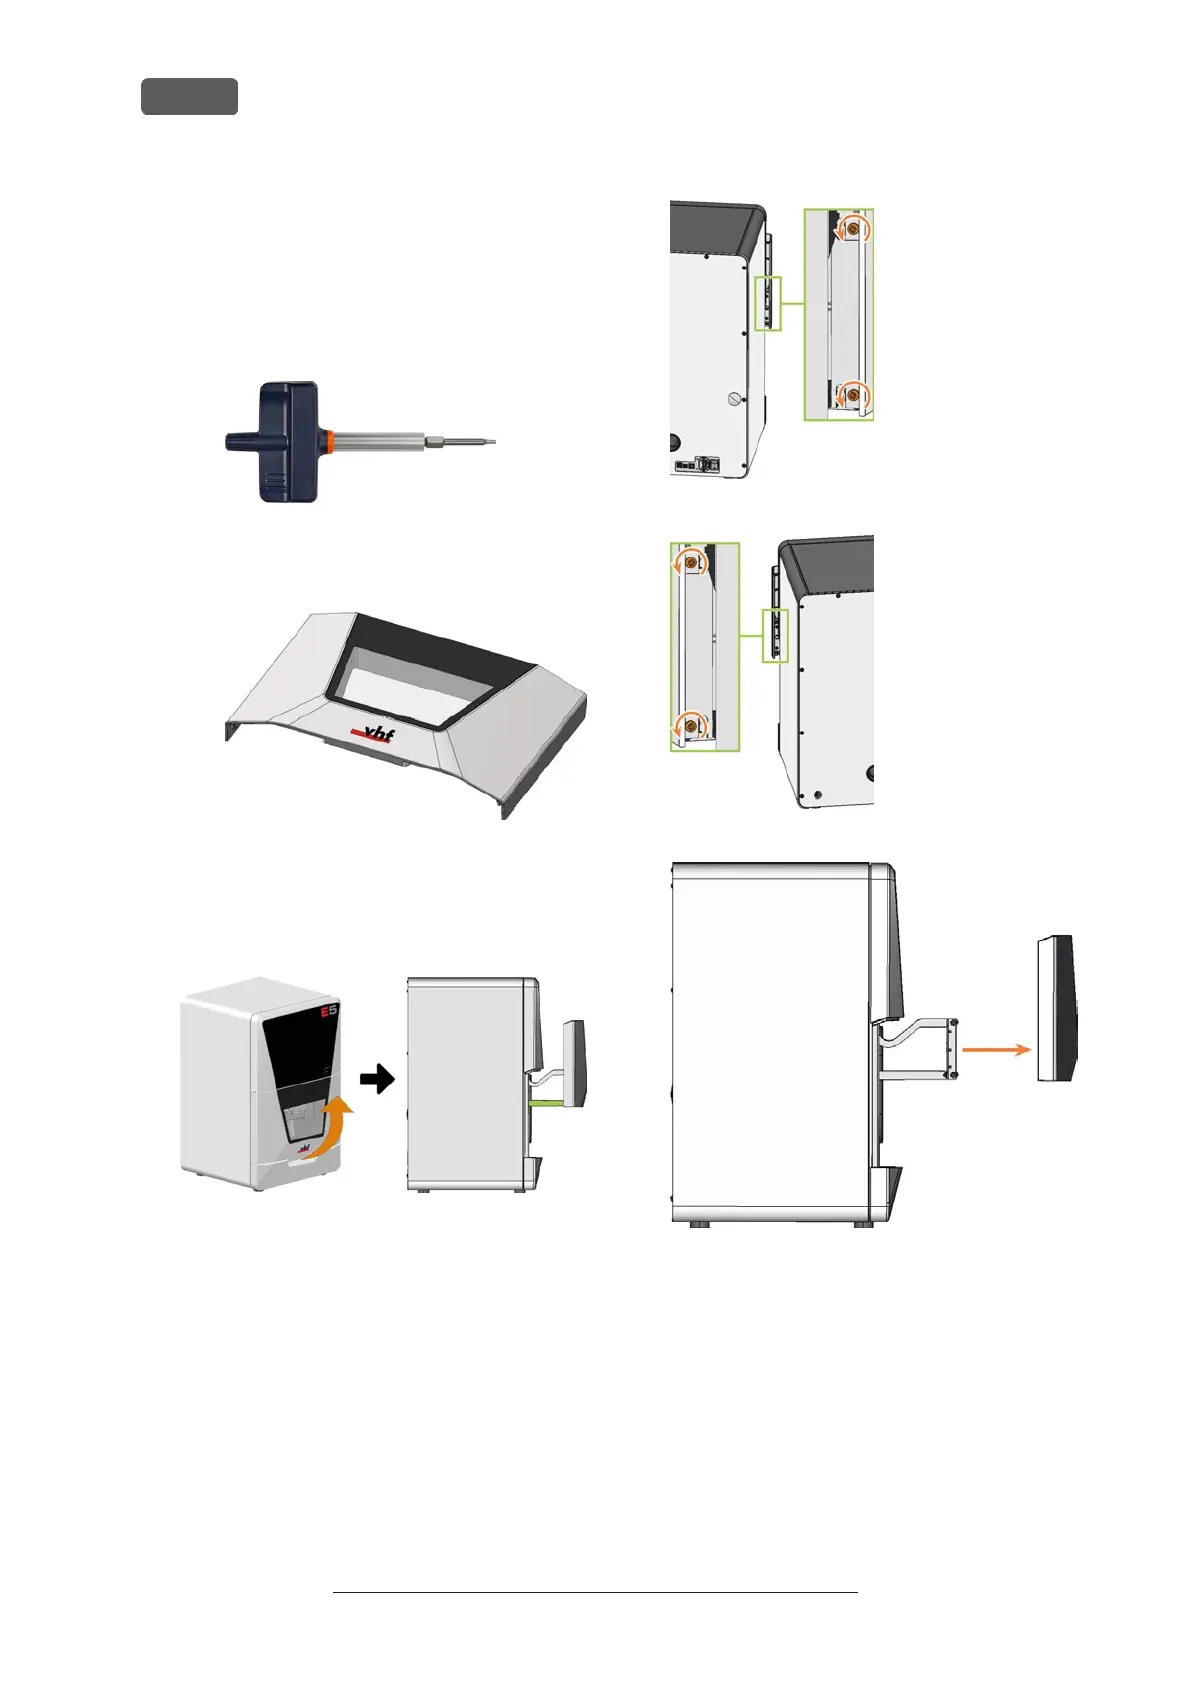
1. Have ready:
n
1x Torque screwdriver 1.5 Nm with TX20
bit
FIG. 247
n
1x Spare working chamber door
2. Open the working chamber door so that the lower
working chamber door handles (marked green) are
aligned parallel to the machine floor.
FIG. 248
3. Hold the working chamber door in place. Use the
1.5 Nm torque screwdriver to loosen the 4 screws
(marked orange) that secure the working chamber
door to the working chamber door bracket.
4. Remove the working chamber door.
FIG. 249
FIG. 250
FIG. 251
5. Position the spare working chamber door so that
the 4 screw holes on the rear of the working
chamber door (marked orange) align with the 4
screw holes in the working chamber door bracket
(marked green).
Original Operating Instructions:E5
Version: 4/27/2023
Maintenance
EN 88