7.9 Cleaning or replacing the collet
chuck of the spindle
The collet chuck is cleaned and replaced in different
steps:
Step Cleaning Replacing
Removing the collet chuck Yes Yes
Cleaning the collet chuck Yes No
Greasing the collet chuck Yes Yes
Inserting the collet chuck Yes Yes
NOTICE
Damaging of the spindle when cleaning
with compressed air
If you clean the collet chuck with compressed air, the
spindle bearings can be damaged.
Clean the collet chuck only with the appropriate
service set.
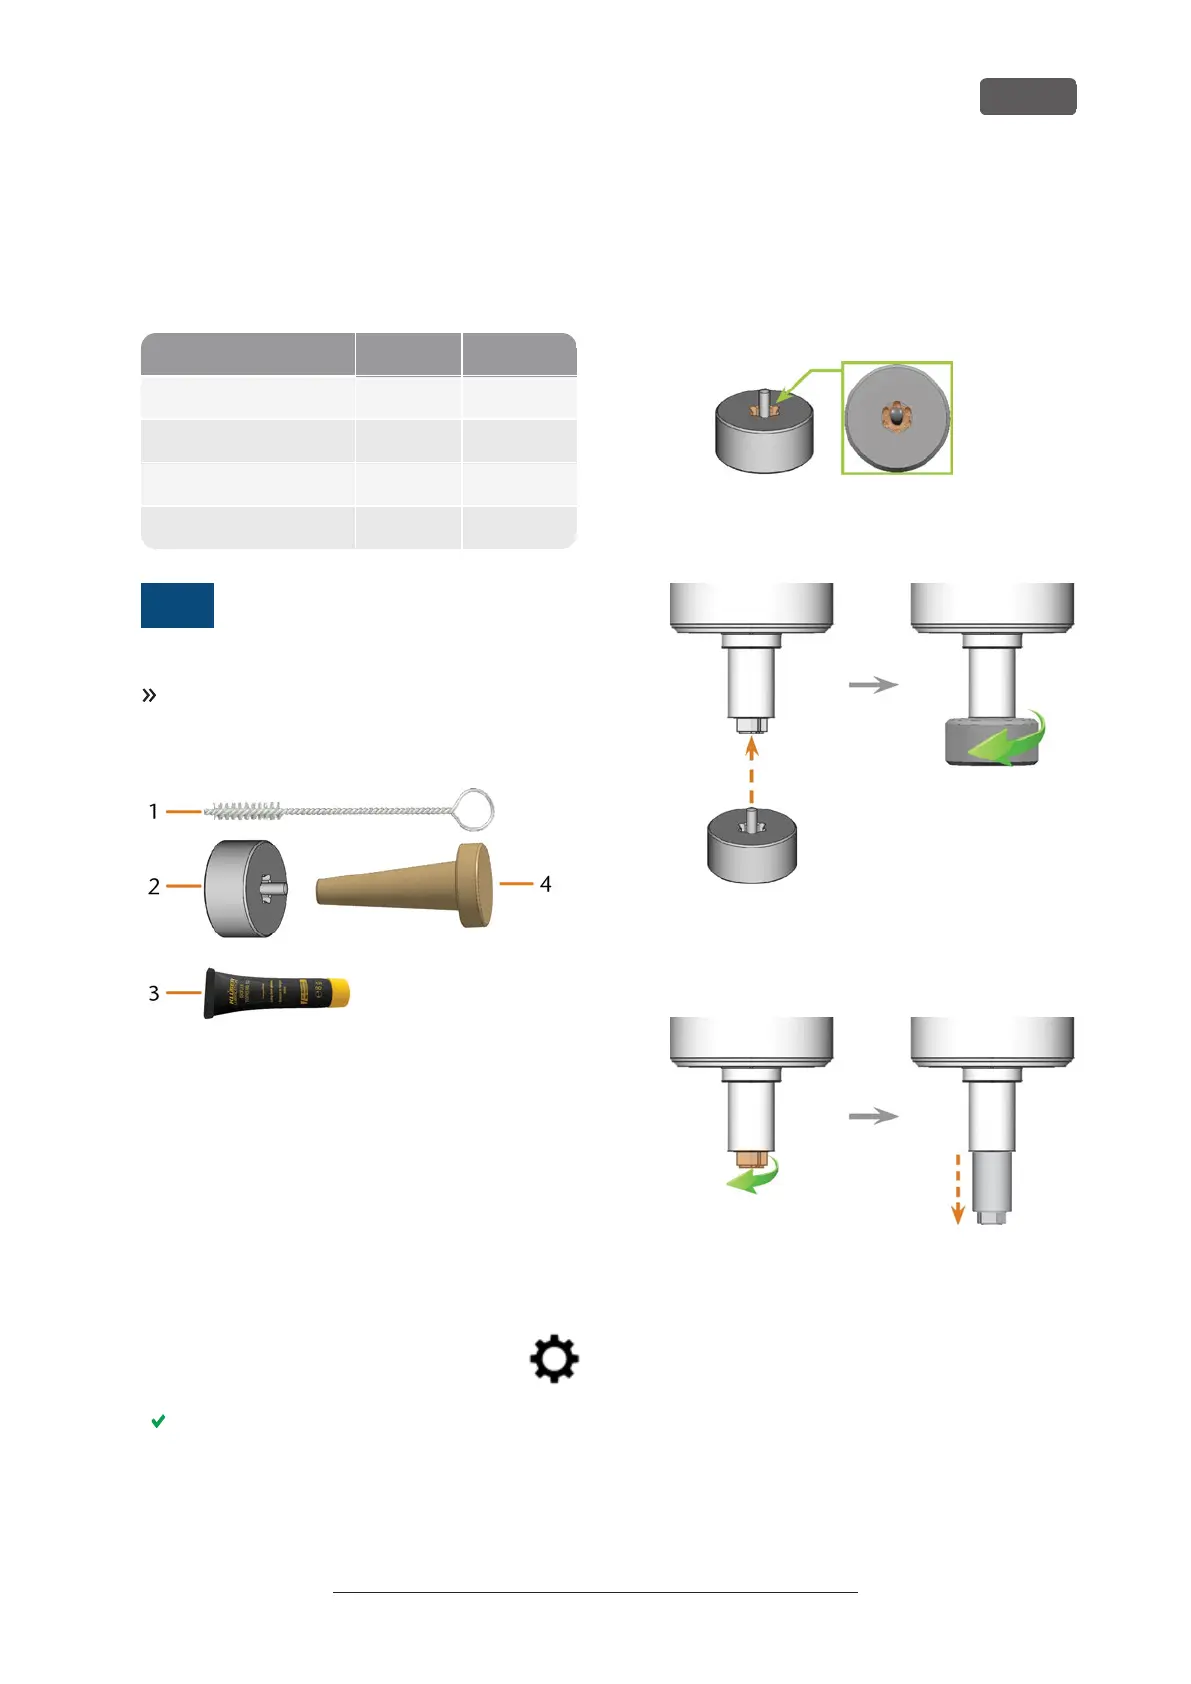
FIG. 78 CURRENT SPINDLE SERVICE SET
1. Cleaning brush
2. Knurled nut
3. Tube of collet chuck grease
4. Cleaning cone
7.9.1 Removing the collet chuck
1. Have the spindle service set ready.
2. Close the working chamber door.
3. Open DENTALCNC‘s general application
settings with the depicted icon in the
main icon bar.
The spindle moves into the position for collet
chuck removal.
4. Open the working chamber door.
5. ⚠ CAUTION! Wear gloves.
6. Untighten the collet chuck with the knurled nut:
a. Insert the pin of the knurled nut into the
collet chuck.
b. Ensure that the collet chuck is properly seated
in the recess of the knurled nut.
FIG. 79
c. Twist the knurled nut counterclockwise.
FIG. 80
7. Unscrew and remove the collet chuck with your
hand.
FIG. 81
8. Put the knurled nut and the collet chuck aside
within reach.
9. Clean the inner cone of the spindle with the clean-
ing cone of the service set.
Maintenance
EN 47
Original Operating Instructions: E5
Version: 4/27/2023