7.10 Exchanging clamping devices
and blank holders
You can change the blank holder and the clamping
devices on the blank holder independently of one
another.
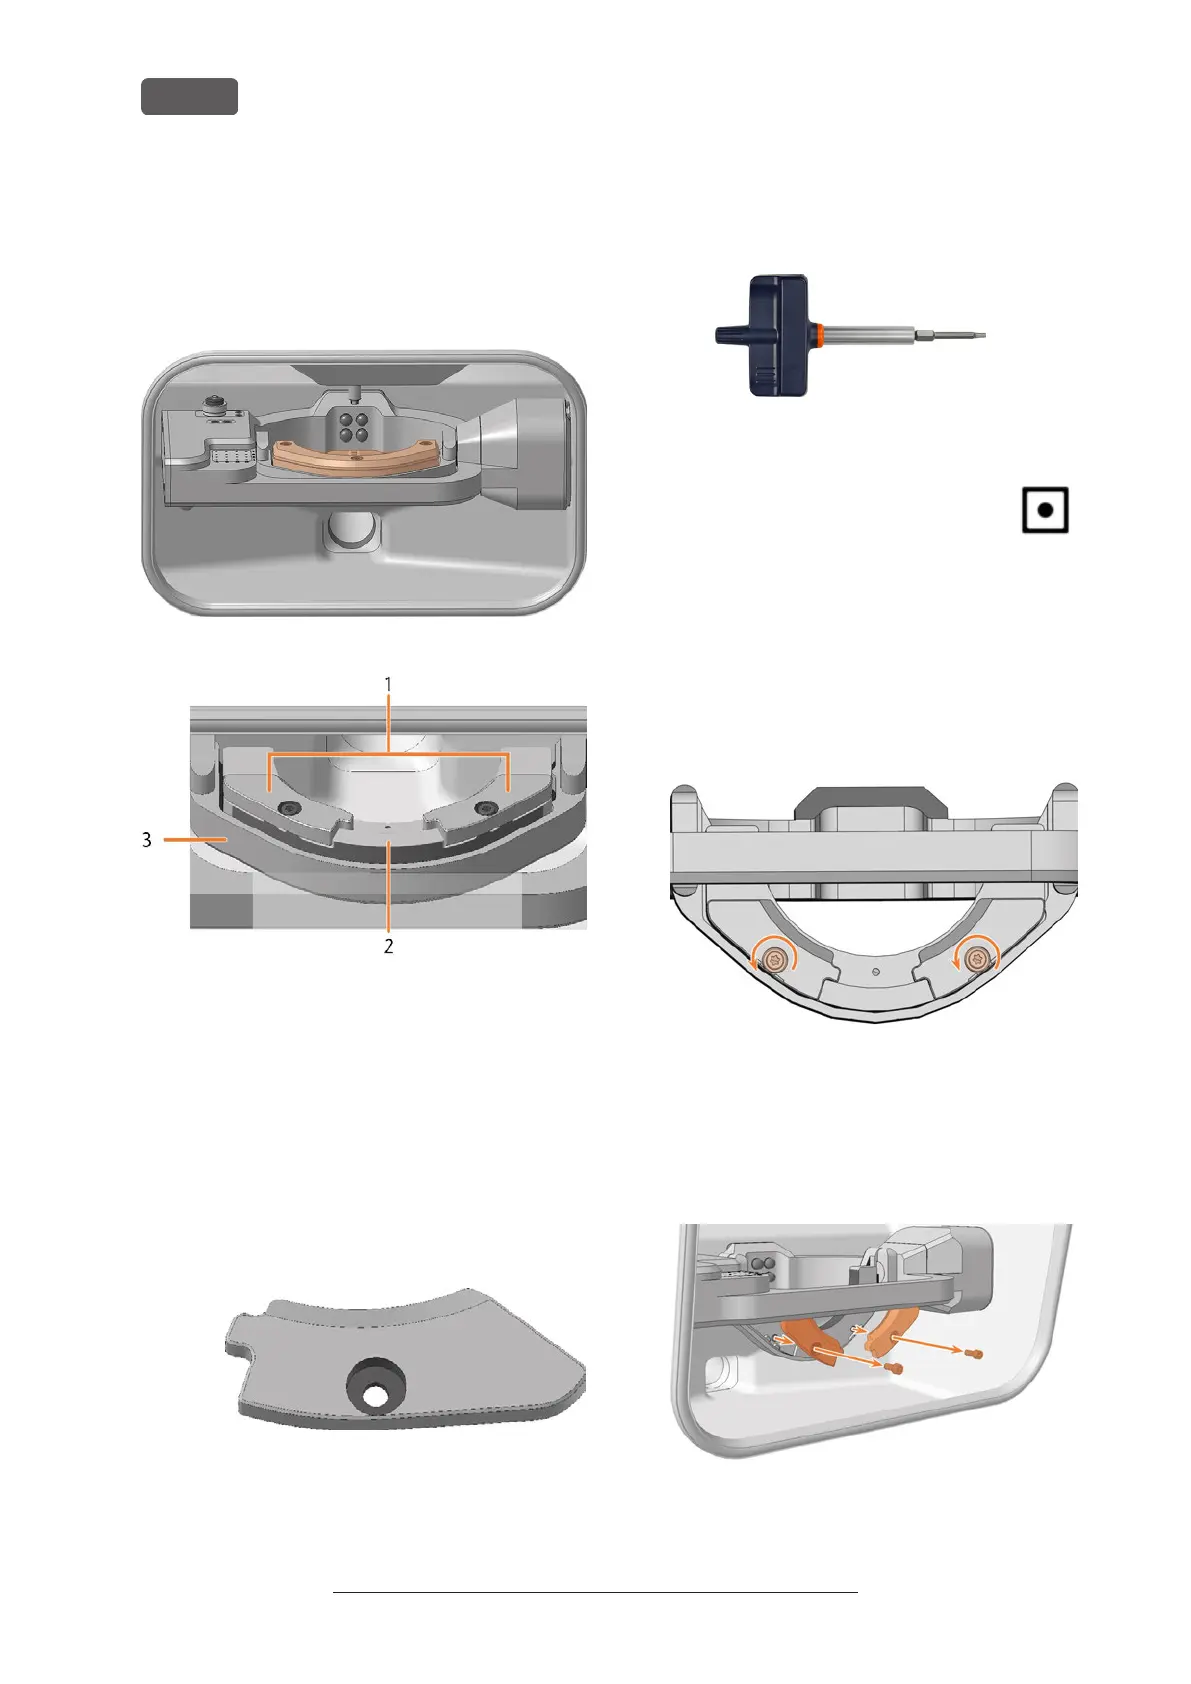
FIG. 90 THE BLANK HOLDER IN THE WORKING CHAMBER (MARKED ORANGE)
1. Clamping devices
2. Blank holder
3. Blank holder support
7.10.1 Exchanging clamping devices
Different clamping devices are available for different
blank sizes.
1. Have ready:
n
2x Spare clamping device
FIG. 91 STANDARD CLAMPING DEVICE – OTHER DESIGNS
POSSIBLE
n
1x Torque screwdriver 1.5 Nm with TX20
bit
FIG. 92
2. Close the working chamber door.
3. Move the axes into the default position by
selecting the depicted icon in the Machin-
ing view in DENTALCNC.
4. Open the working chamber door.
5. ⚠ CAUTION! Wear gloves.
6. Remove the blank from the blank holder if present.
Mounting & removing blanks – on page27
7. Unscrew and remove the 2 fixing screws from the 2
clamping devices.
FIG. 93
8. Remove the 2 clamping devices.
9. Position the 2 spare clamping devices on the blank
holder. The screw holes in the holder and in the
clamping devices shall be superimposed.
10. Insert the 2 fixing screws into the screw holes.
FIG. 94
Original Operating Instructions:E5
Version: 4/27/2023
Maintenance
EN 50