10. Move the axes into the default position by
selecting the depicted icon in the Machin-
ing view in DENTALCNC.
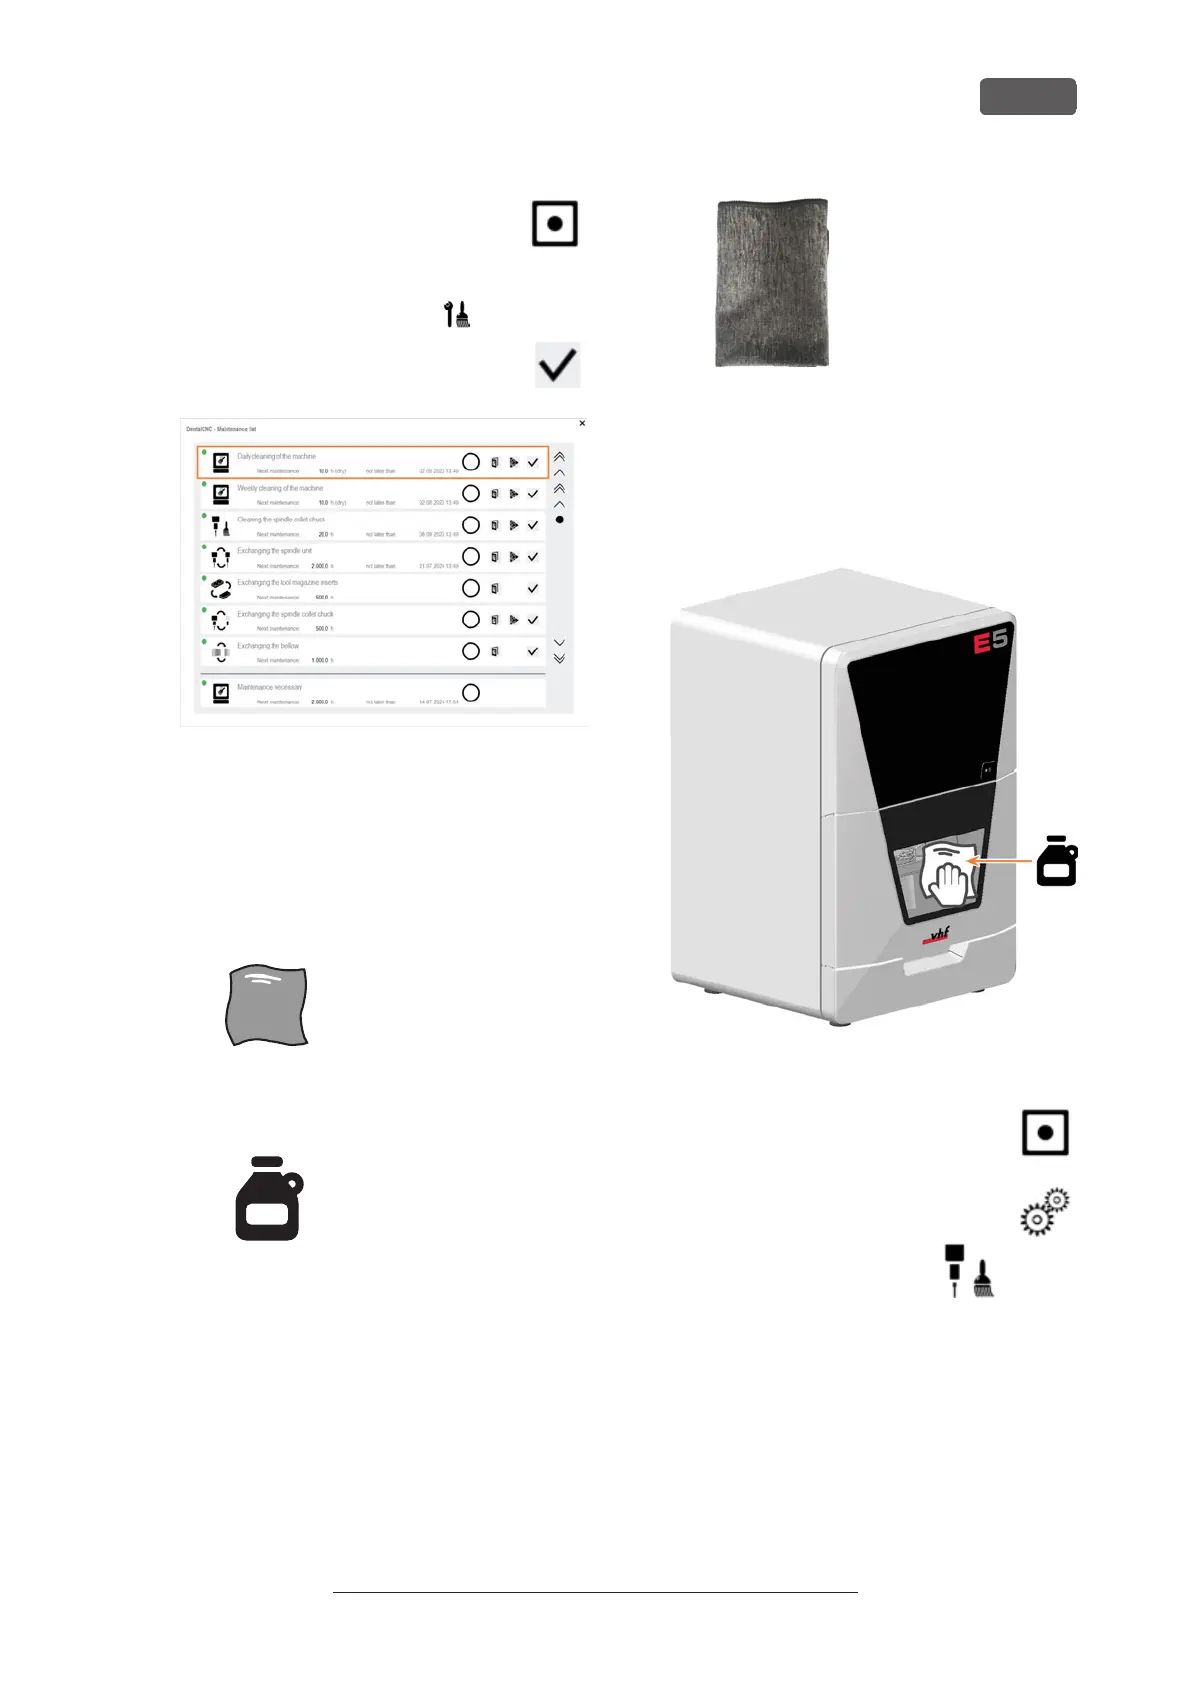
11. Open the Maintenance section window with the fol-
lowing icon in the main iconbar:
12. Select the icon shown for the Daily machine
cleaning entry.
FIG. 73
7.8.2 Performing the w eekly cleaning
1. Perform the daily maintenance.
2. Have ready:
n
1x Cleaning cloth
FIG. 74
n
1x Mild cleaning agent (optional)
FIG. 75
n
1x Microfiber cloth
3. Clean all surfaces and cracks in the working
chamber thoroughly with the dry cloth. Use a mild
cleaning agent if necessary.
4. Close the working chamber door.
5. If necessary, clean the view window with a cloth.
Use a mild cleaning agent if necessary.
FIG. 76
6. Move the axes into the default position by
selecting the depicted icon in the Machin-
ing view in DENTALCNC.
7. Open the Machining parameters view with
the depicted icon in the local icon bar.
8. Move the axes into the tool
change position by selecting
the depicted icon in the Machin-
ing view in DENTALCNC.
9. Clean the housing:
NOTICE! Housing damage caused by
incorrect aids and cleaning
a. Clean the surface with a dry microfiber cloth.
Be careful not to detach the symbol stickers.
The adhesive foil is especially sensitive to fric-
tion and harsh cleaning agents.
Maintenance
EN 45
Original Operating Instructions: E5
Version: 4/27/2023