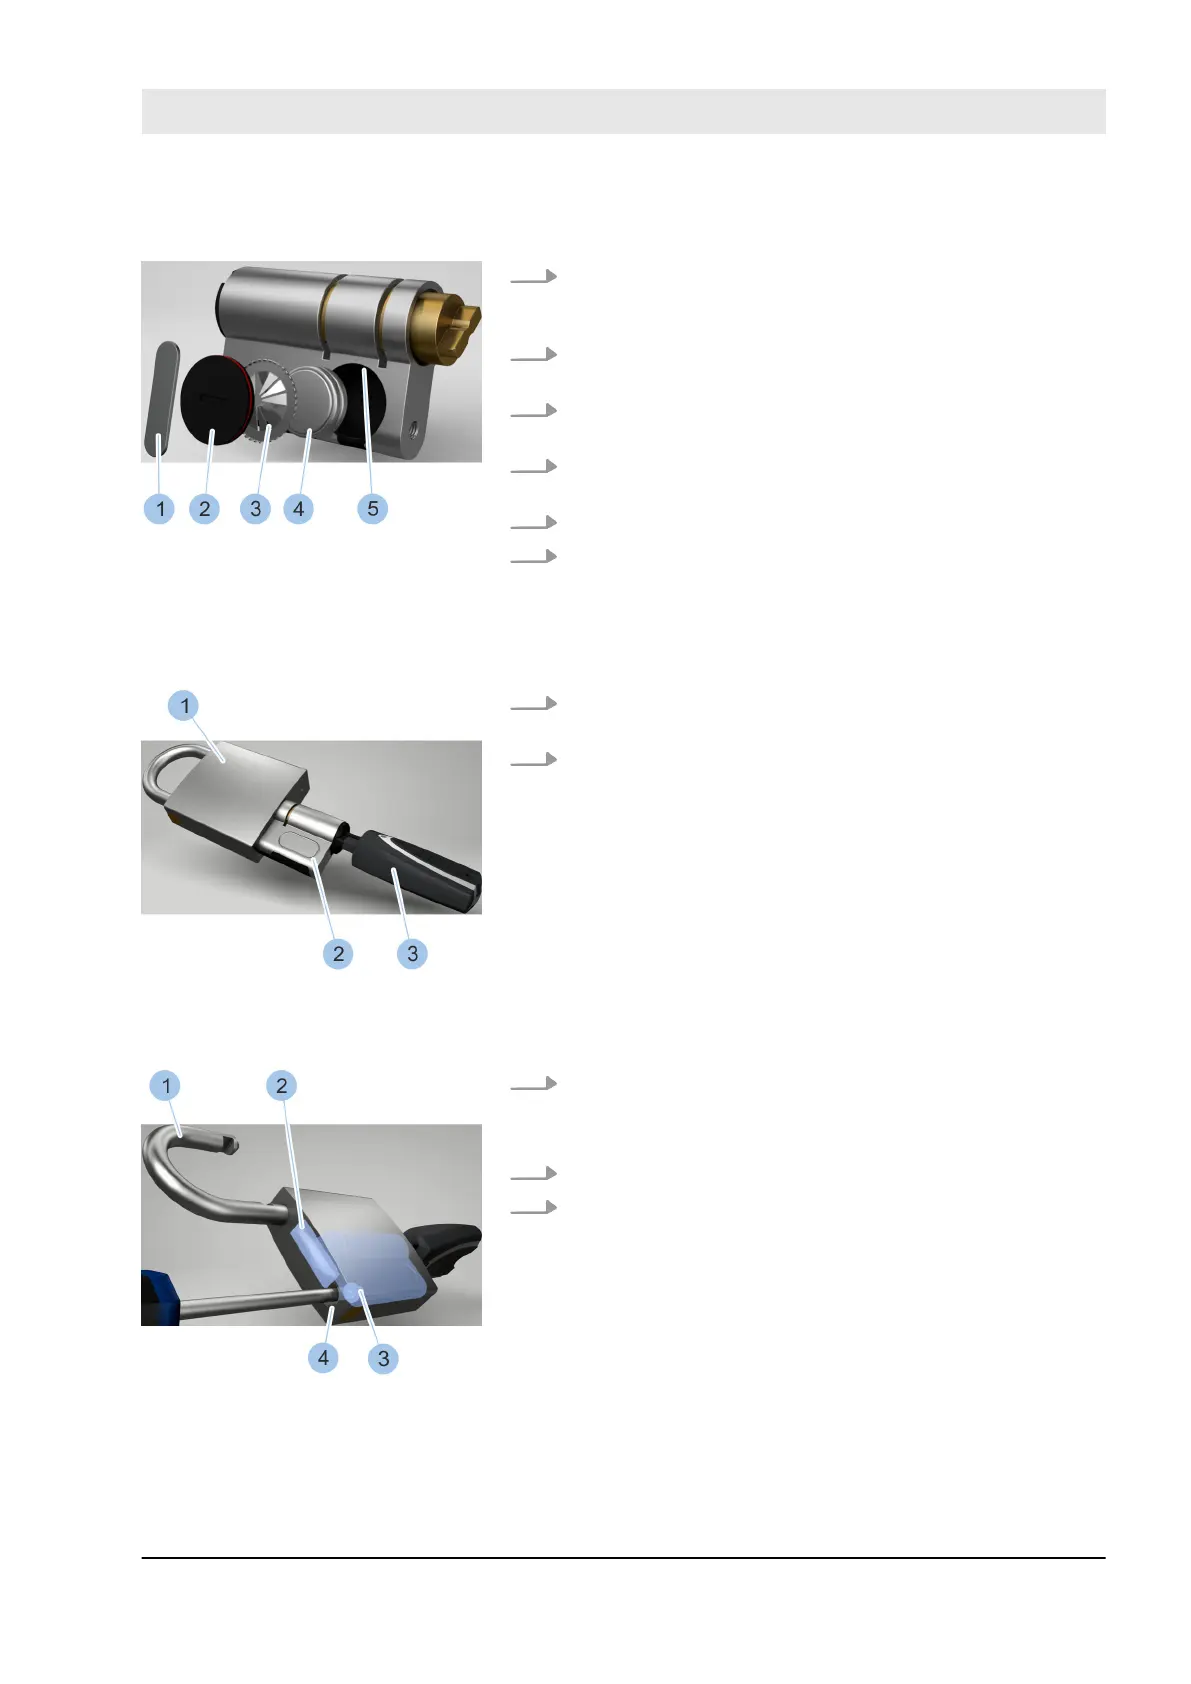
14. Insert two new batteries (4) from the battery replace-
ment set with their positive terminal pointing down-
wards.
15. Insert new contact strip (3) into the battery compart-
ment with toothed ring pointing outwards.
16. Insert battery compartment lid (2) into the battery
compartment.
17. Insert retaining spring (1) into the battery compart-
ment groove (5).
18. Place replacement tool onto the retaining spring (1).
19. Use the replacement tool to turn retaining spring (1)
90° in the groove (5).
ð
The batteries (4) have now been replaced and
secured in the battery compartment.
20. Push cylinder (2) with inserted key (3) into the pad-
lock (1).
21. Activate active key (3) by pressing on the button.
ð
The LED display on the active key lights up green
and the cylinder can be locked.
22. Unlock cylinder.
ð
The cross bar (2) releases the shackle (1) and the
lock opens.
23. Swing shackle (1) to the side.
24. Insert fixing screw (3) into the shackle hole (4) and
screw firmly into place.
Insert new batteries
Fig. 149: Replace batteries
Insert cylinder
Fig. 150: Insert cylinder
Insert fixing screw
Fig. 151: Tighten fixing screw into
position
Cleaning and maintenance
23.03.2020 blueCompact electronic locking system 167