7. Insert two new batteries (4) from the battery replace-
ment set with their positive terminal pointing down-
wards.
8. Insert new contact strip (3) into the battery compart-
ment with toothed ring pointing outwards.
9. Insert battery compartment lid (2) into the battery
compartment.
10. Insert retaining spring (1) into the battery compart-
ment groove.
11. Place replacement tool onto the retaining spring (1).
12. Use the replacement tool to turn retaining spring (1)
90° in the groove (5).
ð
The batteries (4) have now been replaced and
secured in the battery compartment.
13. Fit cylinder.
Ä
Chapter 4.6 “Install cylinder type 01, type 02 and
type 05” on page 57
14. Synchronise the time of the cylinder with the Mas-
terkey.
Ä
Chapter 7.4.3 “Identify cylinder” on page 89
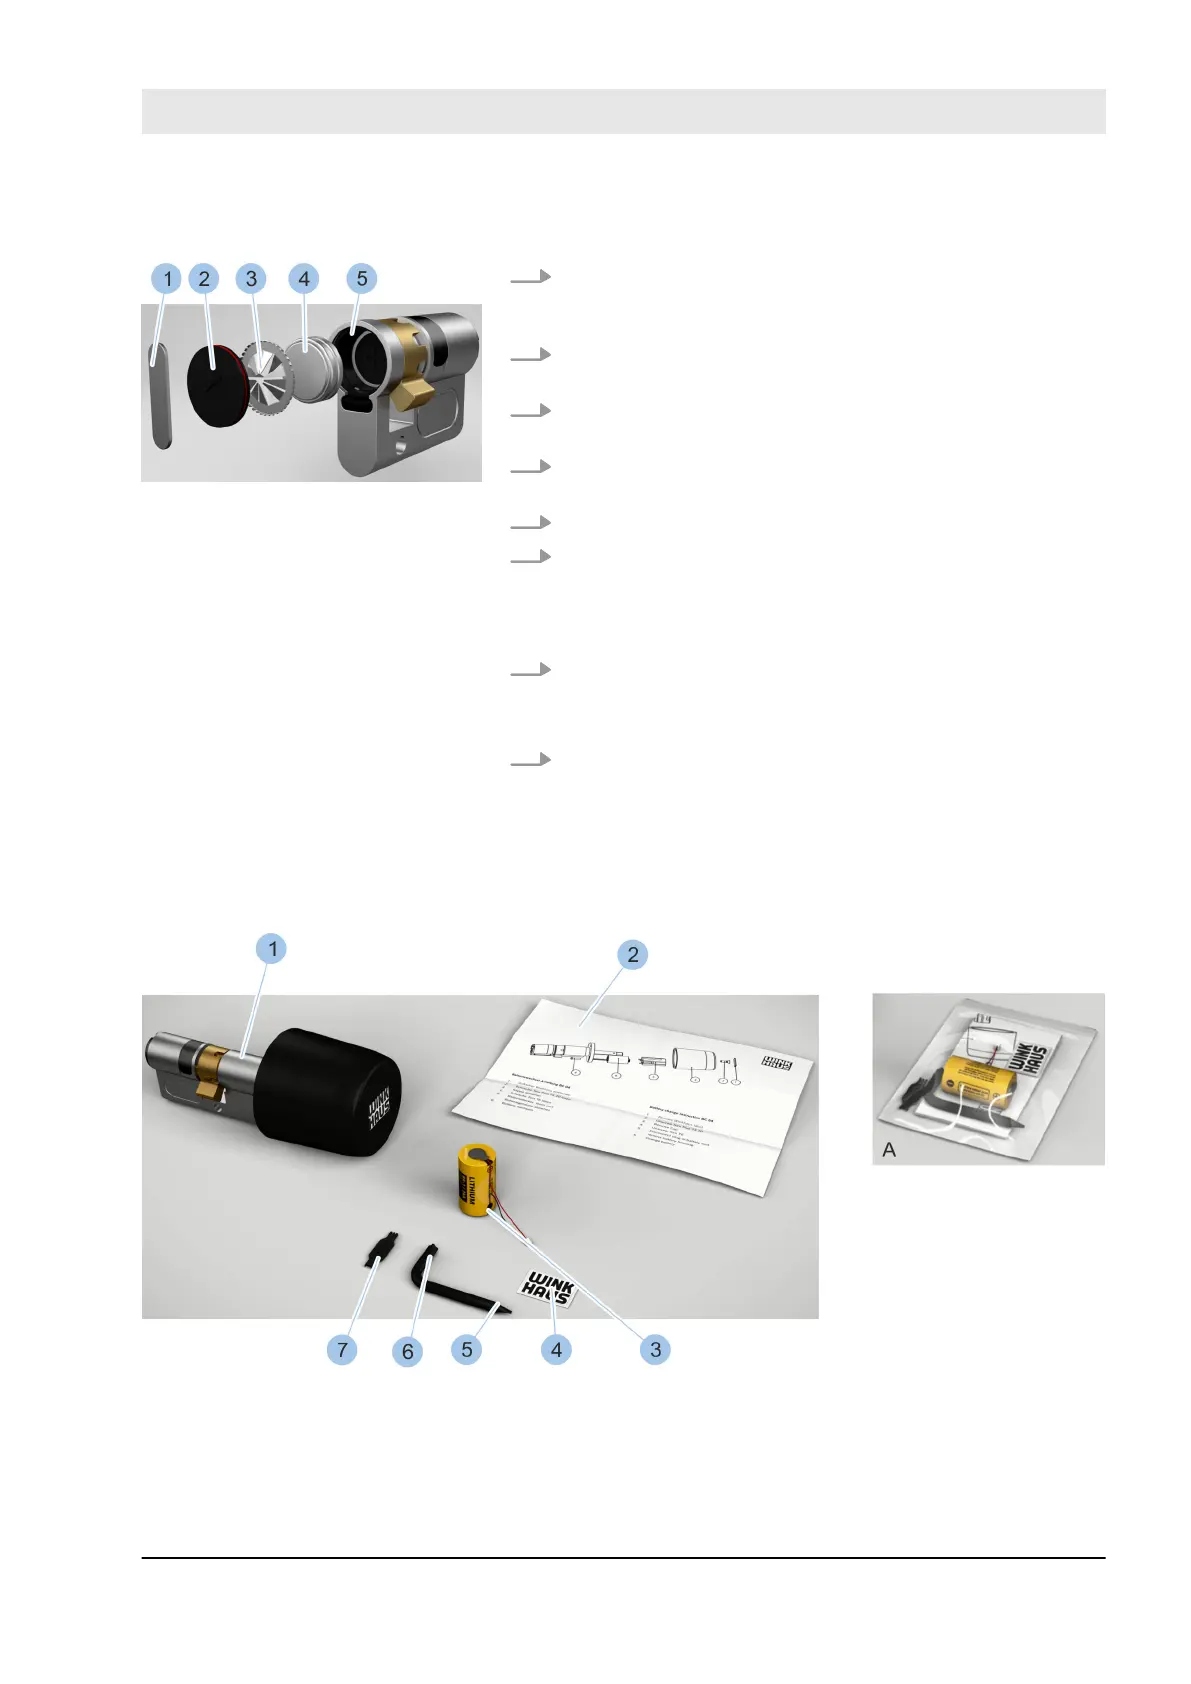
10.3.4 Replace batteries in cylinder type 04
Fig. 132: Battery replacement set (type 04)
1 Cylinder (type 04) (not part of the battery
replacement set)
2 Replacement instructions
3 Battery
4 Label
5 Screwdriver (T6)
Insert new batteries
Fig. 131: Insert batteries
Cleaning and maintenance
23.03.2020 blueCompact electronic locking system 159