July 2019
4-8
Xerox® B205/B215 Multifunction Printer Service Manual
REP 1.5, REP 1.6
Initial Release
Repairs / Adjustments
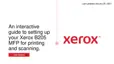
2. Remove the Document Feed Roll Assembly, Figure 2:
a. Remove three E-Rings.
b. Slide the drive shaft out of the Feed Roll Assembly.
Figure 2 Feed Roll E-rings
Replacement
The replacement is the reverse of the removal procedure.
NOTE: Install the E-rings in the following order:
1. The E-ring next to the gear.
2. The E-ring (center) next to the spring.
3. The E-ring at the end of the shaft.
REP 1.6 ADF Drive Motor
Parts List on PL 1.2
Removal
1. Switch off the printer, then disconnect the power cord.
2. Remove the ADF, RE
P 1.3.
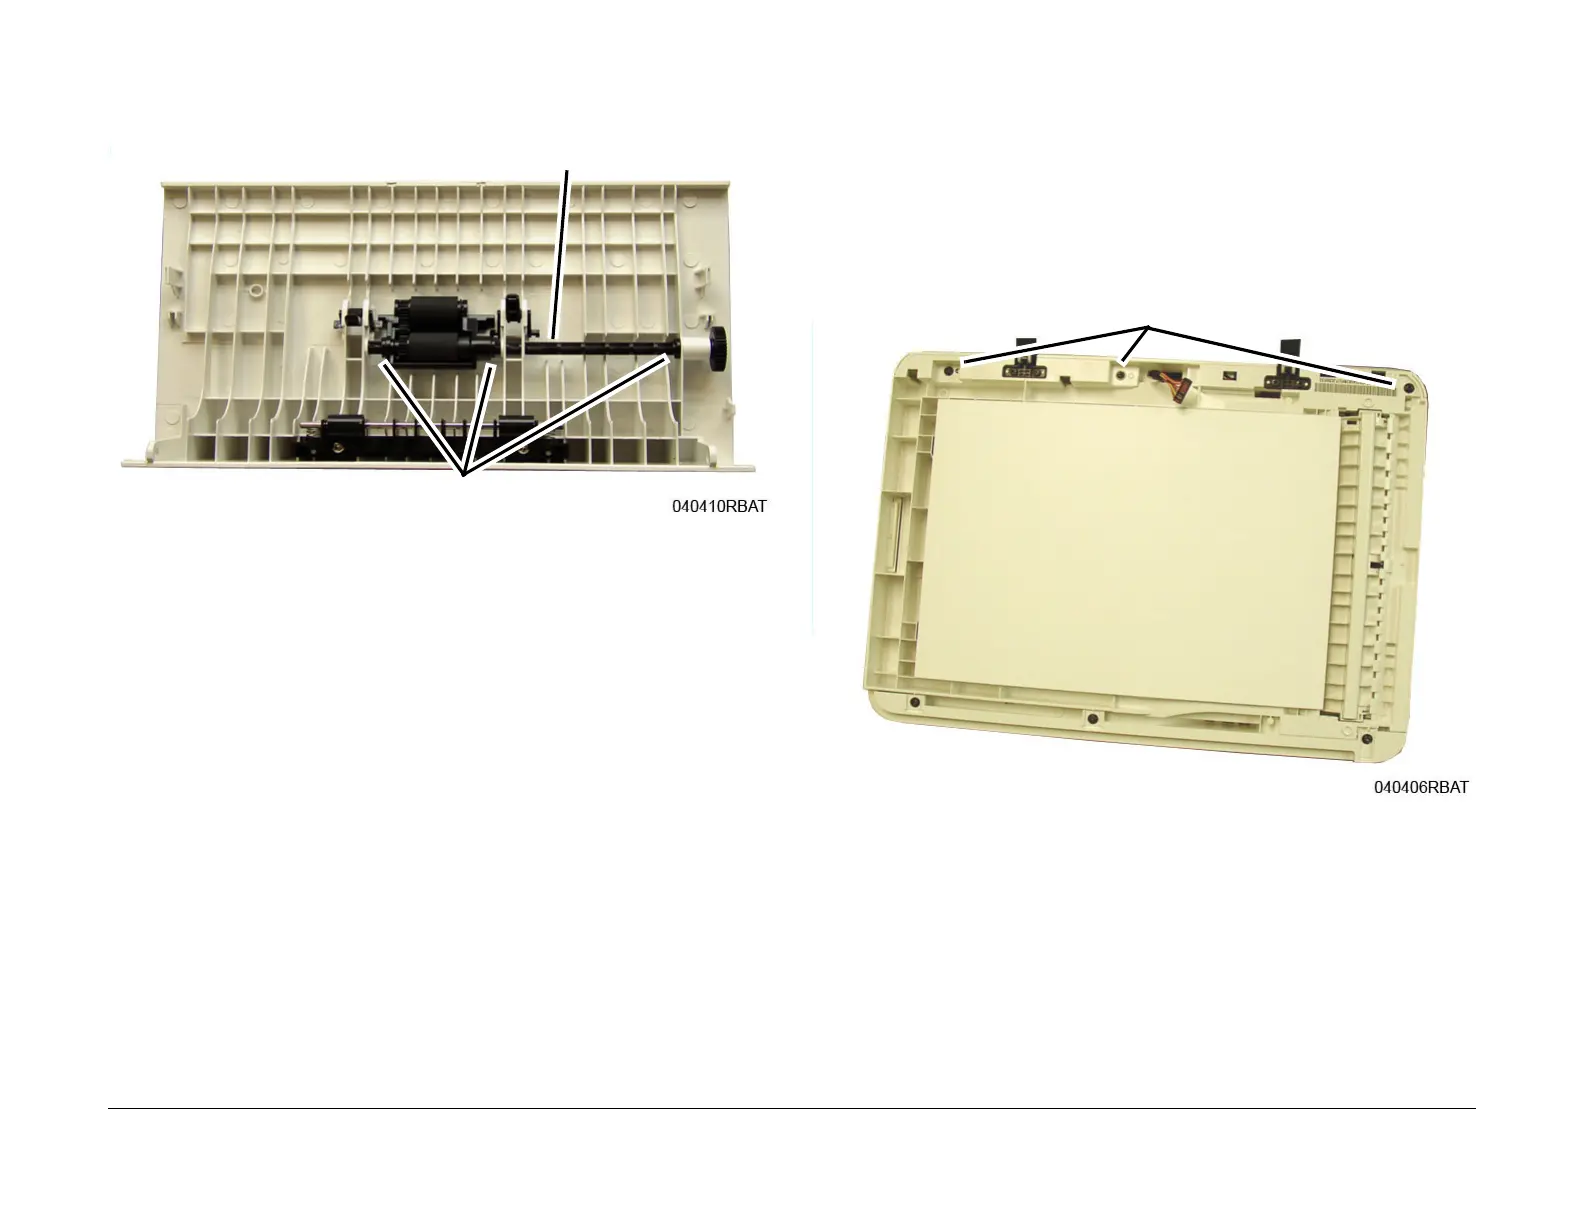
3. Remove the ADF Rear Cover, Figure 1:
a. On the underside of the ADF, remove three Rear Cover screws.
b. Lift the top of the cover away from the ADF, then pull the bottom away to release t
he
lat
ches.
Figure 1 Rear Cover Screws (Bottom View)

 Loading...