July 2019
4-21
Xerox® B205/B215 Multifunction Printer Service Manual
REP 4.3, REP 4.4
Repairs / Adjustments
Initial Release
REP 4.3 Feed and Registration Clutches / Paper Feed PWB
Parts List on PL 4.1
Removal
1. Switch off the machine, then disconnect the power cord.
2. Remove the Left Side Cover, RE
P 2.2.
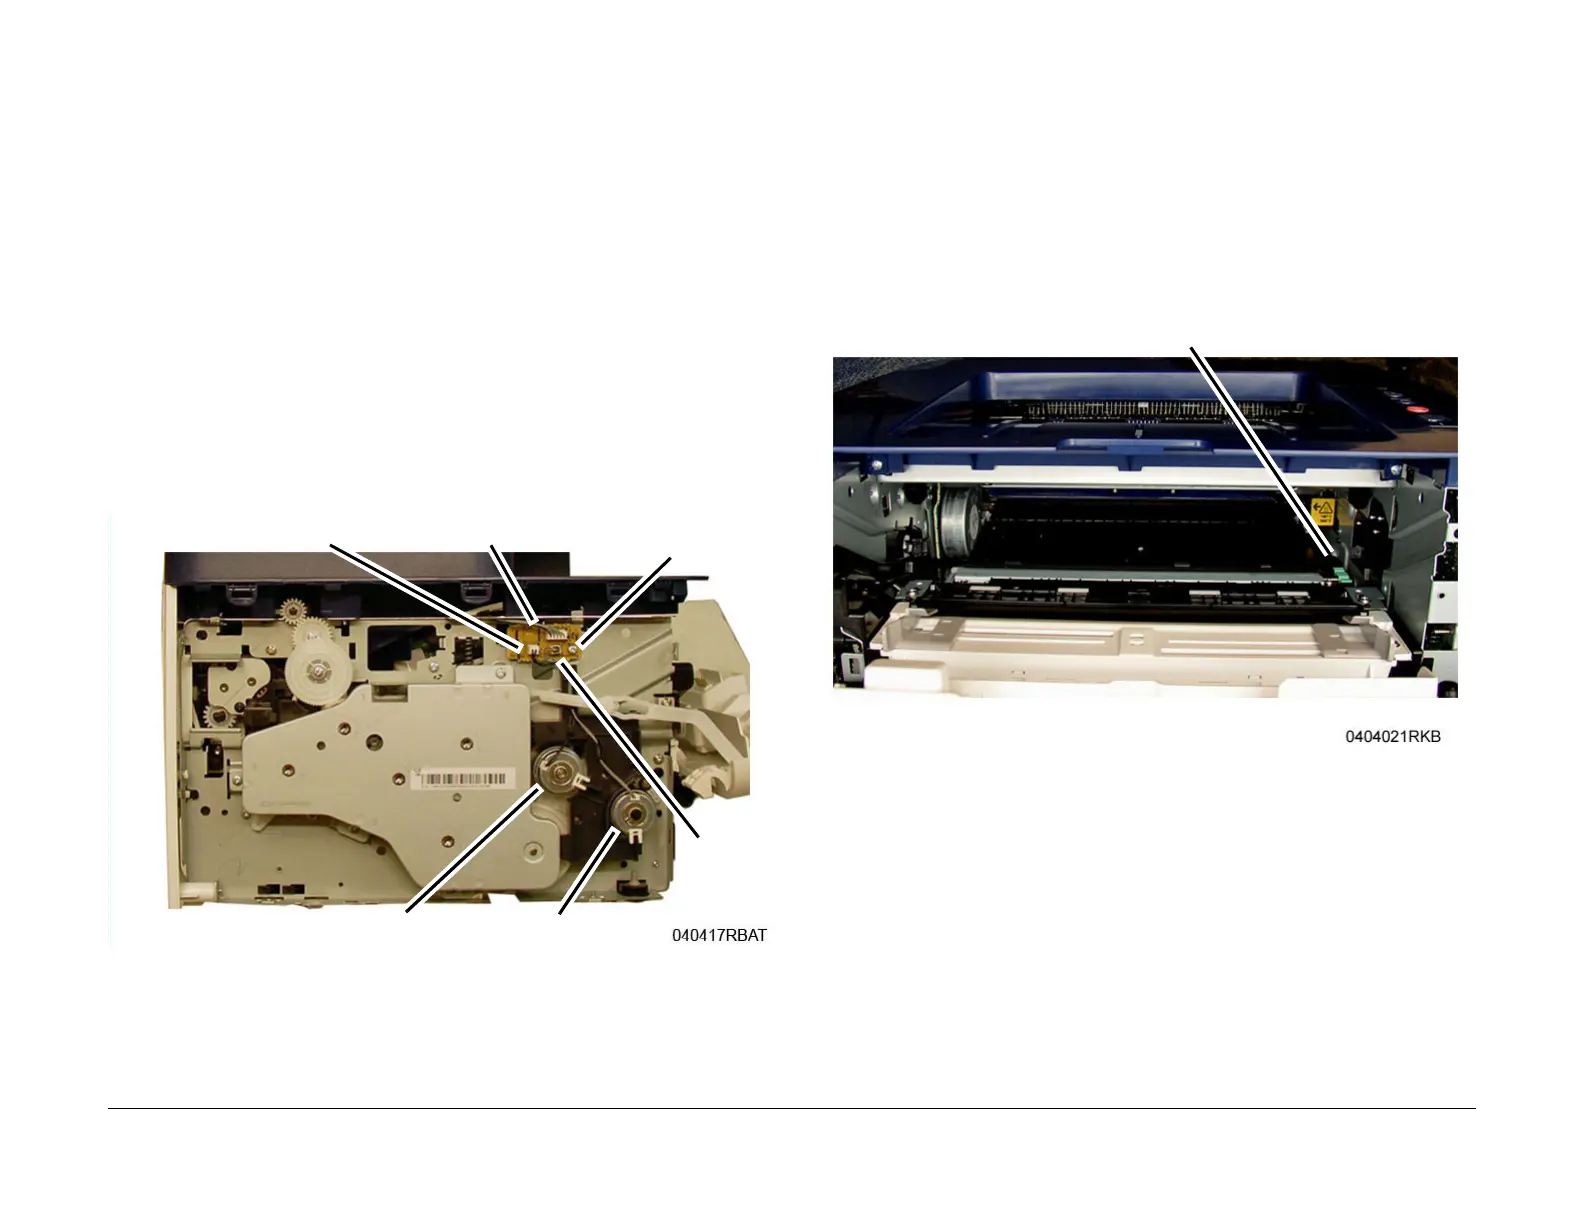
3. Removing the Joint PWB, Figure 1:
a. Disconnect the Connectors (3) on the Joint PWB.
b. Remove the Screw (1) and the PWB.
4. Removing the Feed Clutch, F
igure 1:
a. Disconnect the Feeder Clutch Connector (CN2) on the Joint PWB and release the
wires f
rom the wire clamps.
b. Remove the E-ring and Washer from the Feeder Clutch.
c. Remove the Feeder Clutch.
5. Removing the Registration Clutch, F
igure 1:
a. Disconnect the Registration Clutch Connector (CN1) on the Joint PWB and release
t
he wires from the wire clamps.
b. Remove the E-ring and Washer from the Registration Clutch.
c. Remove the Registration Clutch.
Figure 1 Feed and Registration Clutches / Joint PWB
Replacement
The replacement is the reverse of the removal procedure.
REP 4.4 Transfer Roll
Parts List on PL 4.1
Removal
1. Switch off the printer, then disconnect the power cord.
2. Open the Front Cover.
NOTE: Cover the Drum Cartridge with several sheets of paper to prevent it from being light
shoc
ked.
3. Remove the Toner Cartridge and the Drum Cartridge.
4. Remove (squeeze and lift) the Transfer Roll Retainer Clip, F
igure 1.
Figure 1 Transfer Roll Retainer Clip (Front View)
Joint PWB
CN2
CN1
Screw
Registration Clutch
Feed Clutch

 Loading...