July 2019
4-40
Xerox® B210 Service Manual
REP 4.17
Initial Release
Repairs - Adjustments
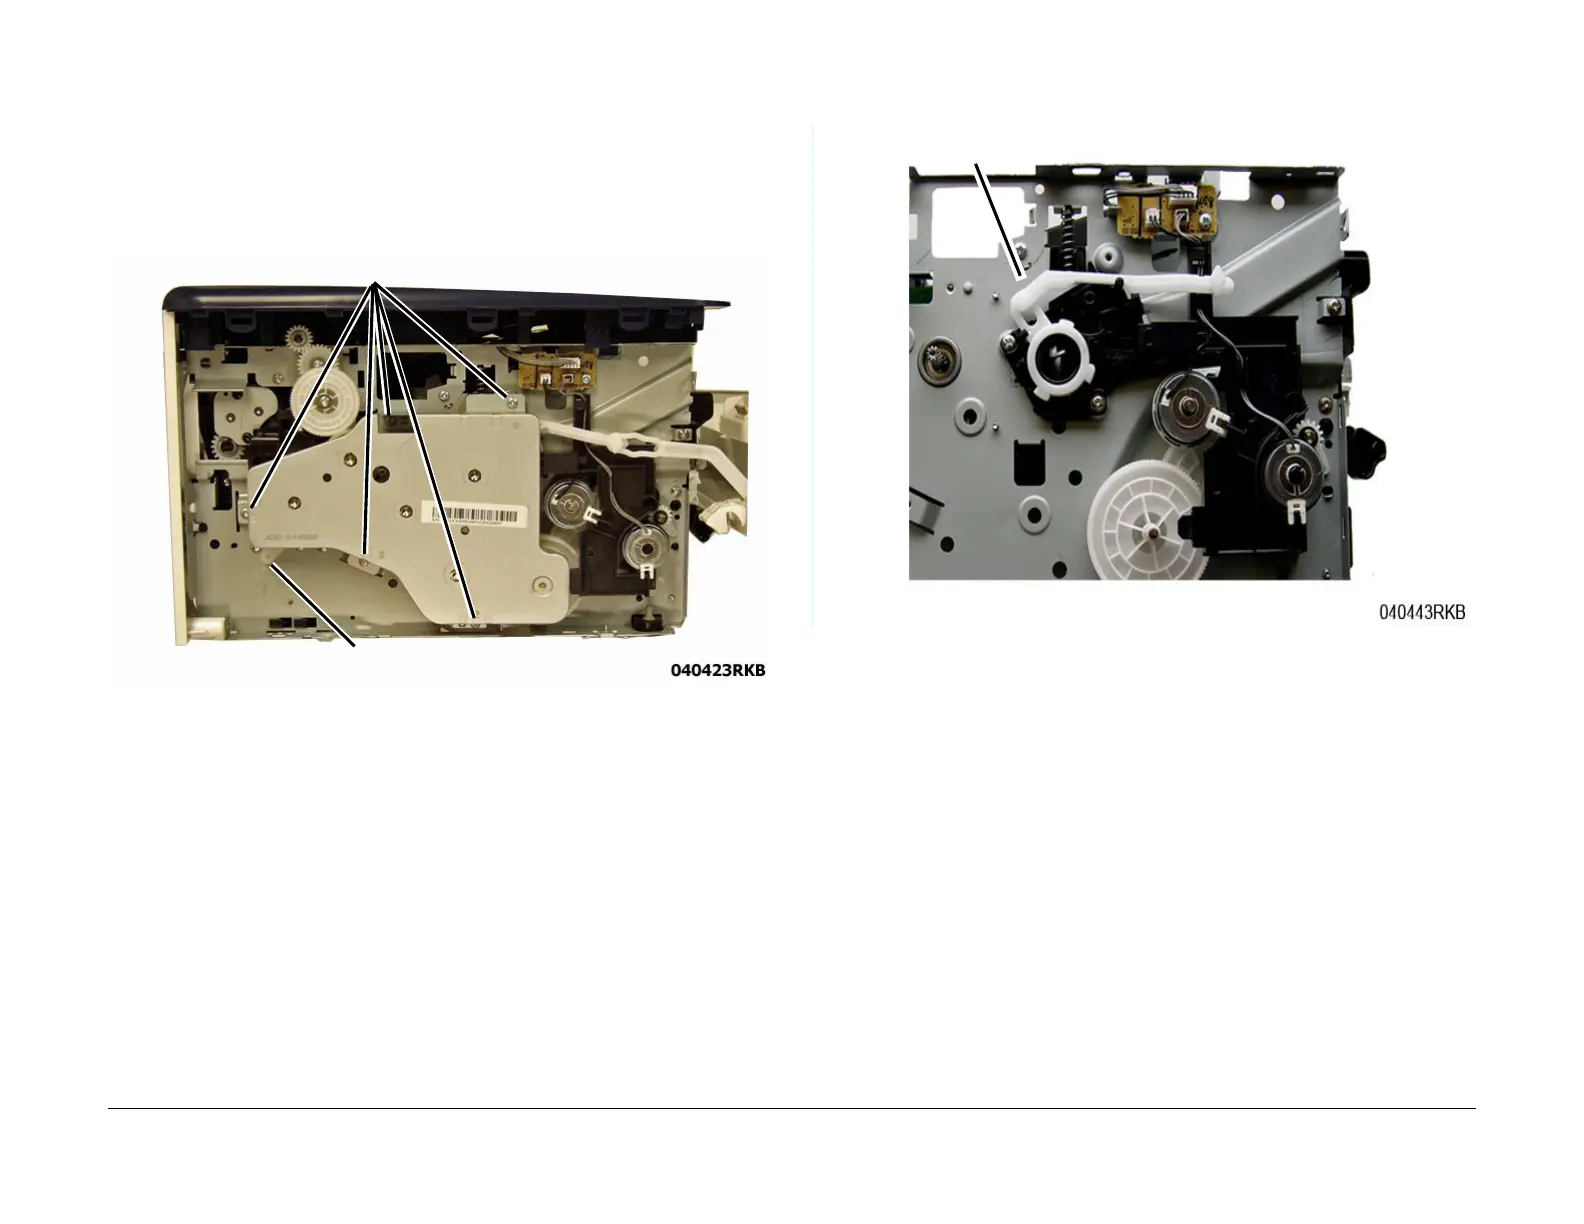
REP 4.17 Main Drive Unit
Parts List on PL 4.6
Removal
1. Switch off the machine, then disconnect the power cord.
2. Remove the Left Side Cover, RE
P 2.2.
3. Remove five screws, then remove the Main Drive Unit, move the Fuser Drive Locking
Le
ver to the unlock position (right), then remove the Main Drive Unit, Figure 1
.
Figure 1 Main Drive Unit Removal
Replacement
1. Place the Front Cover Support Arm on the Stop Bracket, Figure 2.
Figure 2 Front Cover Support Arm Placement
2. Install the Main Drive Unit, Figure 1
NOTE: Make sure the two tabs on the locking lever are inside the frame cutouts bef
ore
mov
ing the fuser drive locking lever to the lock position.
 Loading...