System Administrator Functions
Assigning the IP Address Manually
You can assign a static IP address to your printer from the printer control panel. After an IP address is
assigned, you can change it in the Embedded Web Server.
To assign a static IP address to the printer, ensure that you have the following information:
• An IP address that is configured properly for your network
• The Network Mask address
• The default Router/Gateway address
If you are on a network that is managed by a network administrator, contact your network administrator
to obtain the network information.
For a home network using routers or other devices to connect the printer to the network, refer to the
device instructions on assigning network addresses. The router or device documentation can give you a
range of acceptable address numbers you can use. It is important that the addresses be similar to the IP
addresses used by other printers and computers on the network, but not the same. Only the last digit
must be different. For example, your printer can have the IPv4 address 192.168.1.2 while your computer
has the IP address 192.168.1.3. Another device can have the IP address 192.168.1.4.
The router can assign the static IP address of the printer to another computer that obtains its IP address
dynamically. To avoid having the IP address reassigned, provide the printer an address at the higher end
of the range that the device or router allows. For example, if your computer has IP address 192.168.1.2,
and your device allows IP addresses to 192.168.1.255, select an address between 192.168.1.200 and
192.168.1.254.
Note: It is recommended when setting a static IP address, that at the same time, set a DHCP reservation.
For details, refer to your router documentation.
In IPv6 network configurations, the IPv6 address is assigned automatically.
To assign a static IP address to the printer:
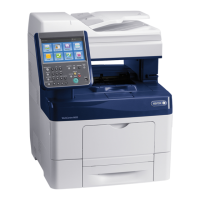
1. At the printer control panel, press the Home button.
2. Touch Device > Connectivity > Ethernet > IPv4.
3. Touch STATIC.
4. At the restart system prompt, touch Continue.
5. Touch the IPv4 Address field.
6. Using the keypad, enter the address as X.X.X.X, where X is a number from 0–255, then touch Enter.
7. Touch the Subnet Mask field.
8. Using the keypad, enter the address as X.X.X.X, where X is a number from 0–255, then touch Enter.
9. Touch the Gateway Address field.
10. Using the keypad, enter the address as X.X.X.X, where X is a number from 0–255, then touch Enter.
11. Touch Restart.
12. Two minutes after the printer restarts, verify that the printer has retained the IP Address. For details,
refer to Finding the IP Address of Your Printer on page 33.
For reference:
Online Support Assistant at: www.xerox.com/office/WC6515support
Xerox
®
WorkCentre
®
6515 Color Multifunction Printer 231
User Guide
 Loading...

