Installation and Setup
Connecting to a Network with a Wi-Fi Protected Setup
Wi-Fi Protected Setup (WPS) is a network standard for setting up a wireless network. The WPS protocols
enable you to set up devices in a secure wireless network without having wireless networking experience.
With a WPS-certified router, you can use tools in the router and the printer to connect the printer to the
network. To use the tools, ensure that the wireless router is configured properly and is compliant with the
WPS.
• Push Button Connection (PBC) is the easiest way to connect the printer to a wireless network.
It automatically connects when you push a button on the router and on the printer. After the router
and printer exchange information, the printer accepts the security and configuration information
from the router and connects to the network. The PBC is a moderately secure way to connect the
printer to the network. You do not need to enter any information to make the network connection.
• PIN (Personal Identification Number) automatically connects the printer to a wireless router using a
common PIN. The printer generates and prints a PIN for use in the setup process. When you enter
the PIN into the router, the router broadcasts network information using the PIN. When both
devices recognize the PIN, the router provides the security and configuration information to the
printer, which uses it to connect to the network.
To connect to a WPS wireless network using the PBC method:
Note: Before you install the device, ensure that the wireless router is configured properly and is
connected to the network.
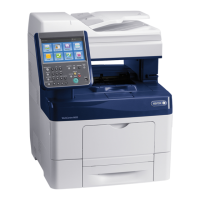
1. At the printer control panel, press the Home button.
2. Touch Device > Connectivity > Wi-Fi.
3. If Wi-Fi is Off, turn it on.
a. To toggle Wi-Fi from Off to On, touch the Wi-Fi toggle button.
b. To activate your Wi-Fi setting changes, press the Home button.
c. At the prompt, touch Restart Now.
d. After the printer restarts, touch Device > Connectivity > Wi-Fi.
4. Touch Manual Setup.
5. Touch Wi-Fi Protected Setup (WPS).
Note: If Wi-Fi Protected Setup (WPS) is not visible, at the top of the screen, touch Manual Setup.
6. Touch PBC.
7. Touch OK.
8. On the wireless router, press the WPS button.
The router broadcasts setup information for 120 seconds.
Note: If the wireless router does not have a physical PBC button, use your computer to select the
virtual button in the router control panel. For details, refer to your router documentation.
9. To activate your Wi-Fi setting changes, restart the printer.
a. Press the Home button.
b. At the prompt, touch Restart Now.
10. After the printer restarts, wait two minutes, then to get the network information that includes the
IP address, print a Configuration Report. For details, refer to Printing the Configuration Report on
page 32.
48 Xerox
®
WorkCentre
®
6515 Color Multifunction Printer
User Guide
 Loading...

