System Administrator Functions
Enabling HTTPS Communication
1. At your computer, open a Web browser. In the address field, type the IP address of the printer, then
press Enter or Return.
2. In the Embedded Web Server, log in as a system administrator. For details, refer to Logging In as
the Administrator on page 265.
3. Click Connectivity > HTTP.
4. To enable HTTPS, click the HTTPS (SSL) toggle button.
Note: A check mark on the toggle button indicates that the setting is enabled.
5. Click OK.
6. To activate your changes, at the prompt, click Restart Now.
Configuring SMTP Domain Filtering
1. At your computer, open a Web browser. In the address field, type the IP address of the printer, then
press Enter or Return.
2. In the Embedded Web Server, log in as a system administrator. For details, refer to Logging In as
the Administrator on page 265.
3. In the Embedded Web Server, click System > Security.
4. For Network Security, click Domain Filtering.
− To allow specific domains, select Allow Specific Domains. Type the domains to allow.
− To block specific domains, select Block Specific Domains. Type the domains to block.
− To disable domain filtering, select Off.
5. Click OK.
USB Port Security
To prevent unauthorized access to the printer through the USB port on the front of the printer, disable
the port.
To enable or disable the USB port:
1. At your computer, open a Web browser. In the address field, type the IP address of the printer, then
press Enter or Return.
2. In the Embedded Web Server, log in as a system administrator. For details, refer to Logging In as
the Administrator on page 265.
3. Click Permissions.
4. For Guest Access, click Edit > Device User Role.
5. For Control Panel Permissions, click Custom Permissions, then click Setup.
6. Click USB.
7. For each USB access option, click Allow, Restrict, or Hide.
8. To apply the new settings, click OK.
9. To return to the Permissions window, click Close, then click OK.
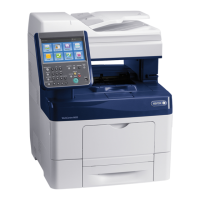
274 Xerox
®
WorkCentre
®
6515 Color Multifunction Printer
User Guide
 Loading...

