Installation and Setup
Assigning the IP Address Automatically
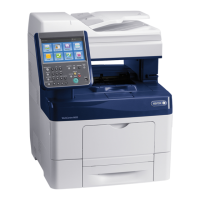
1. At the printer control panel, press the Home button.
2. Touch Device > Connectivity > Ethernet > IPv4.
3. To enable IPv4, touch the Enable IPv4 toggle button.
4. To allow your DHCP server to assign an IP address to the printer, touch DHCP, then touch OK.
Note: For best results on most networks, enable DHCP. This option enables Dynamic DNS
Registration.
5. To save the settings, touch OK.
6. Press the Home button.
7. For the settings to take effect, at the prompt, touch Restart Now.
8. Two minutes after the printer restarts, verify that the printer has obtained a valid IP Address.
For details, refer to Finding the IP Address of Your Printer on page 33.
Xerox
®
WorkCentre
®
6515 Color Multifunction Printer 55
User Guide

 Loading...

