Directions for Use of Image Creator
110
Operation Manual
4 Directions for Use of Image Creator
Using Image Creator in order to set up the image acquisition mode, acquire images,
formulate panoramic images, adjust the tomographic setting of panoramic images, and
transferimagestotheViewer.
NOTE : If the software needs to be reinstalled due to replacement of computers, etc., the
installation procedure needs to be done by professional service personnel only.
* Caution
• The contents of this software product are subject to change for improvement at any time
in the future and without notice.
• Use of this software product is solely licensed to the user of our corresponding product.
• Donotinstallanysoftwareproductsonthecomputeroutsidethespecications.
• Do not connect the computer to the Internet.
• Responsibly manage the computer so that it does not get infected with viruses. In case
of viral infection, there are possibilities of serious failures including radiation exposure
due to malfunctions during image acquisitions. Anti-virus software or virus detecting
software cannot be installed on the computer.
• The performance of the Image Creator software can be lowered when it is run concur-
rently with other pieces of software on the computer.
4.1 About the Patient Selection Screen
WhenImageCreatorisactivated,atrst
the patient selection screen appears. In the
patient selection screen, narrow search and
registrations of patients can be conducted.
Select a patient and the launcher screen will
display.
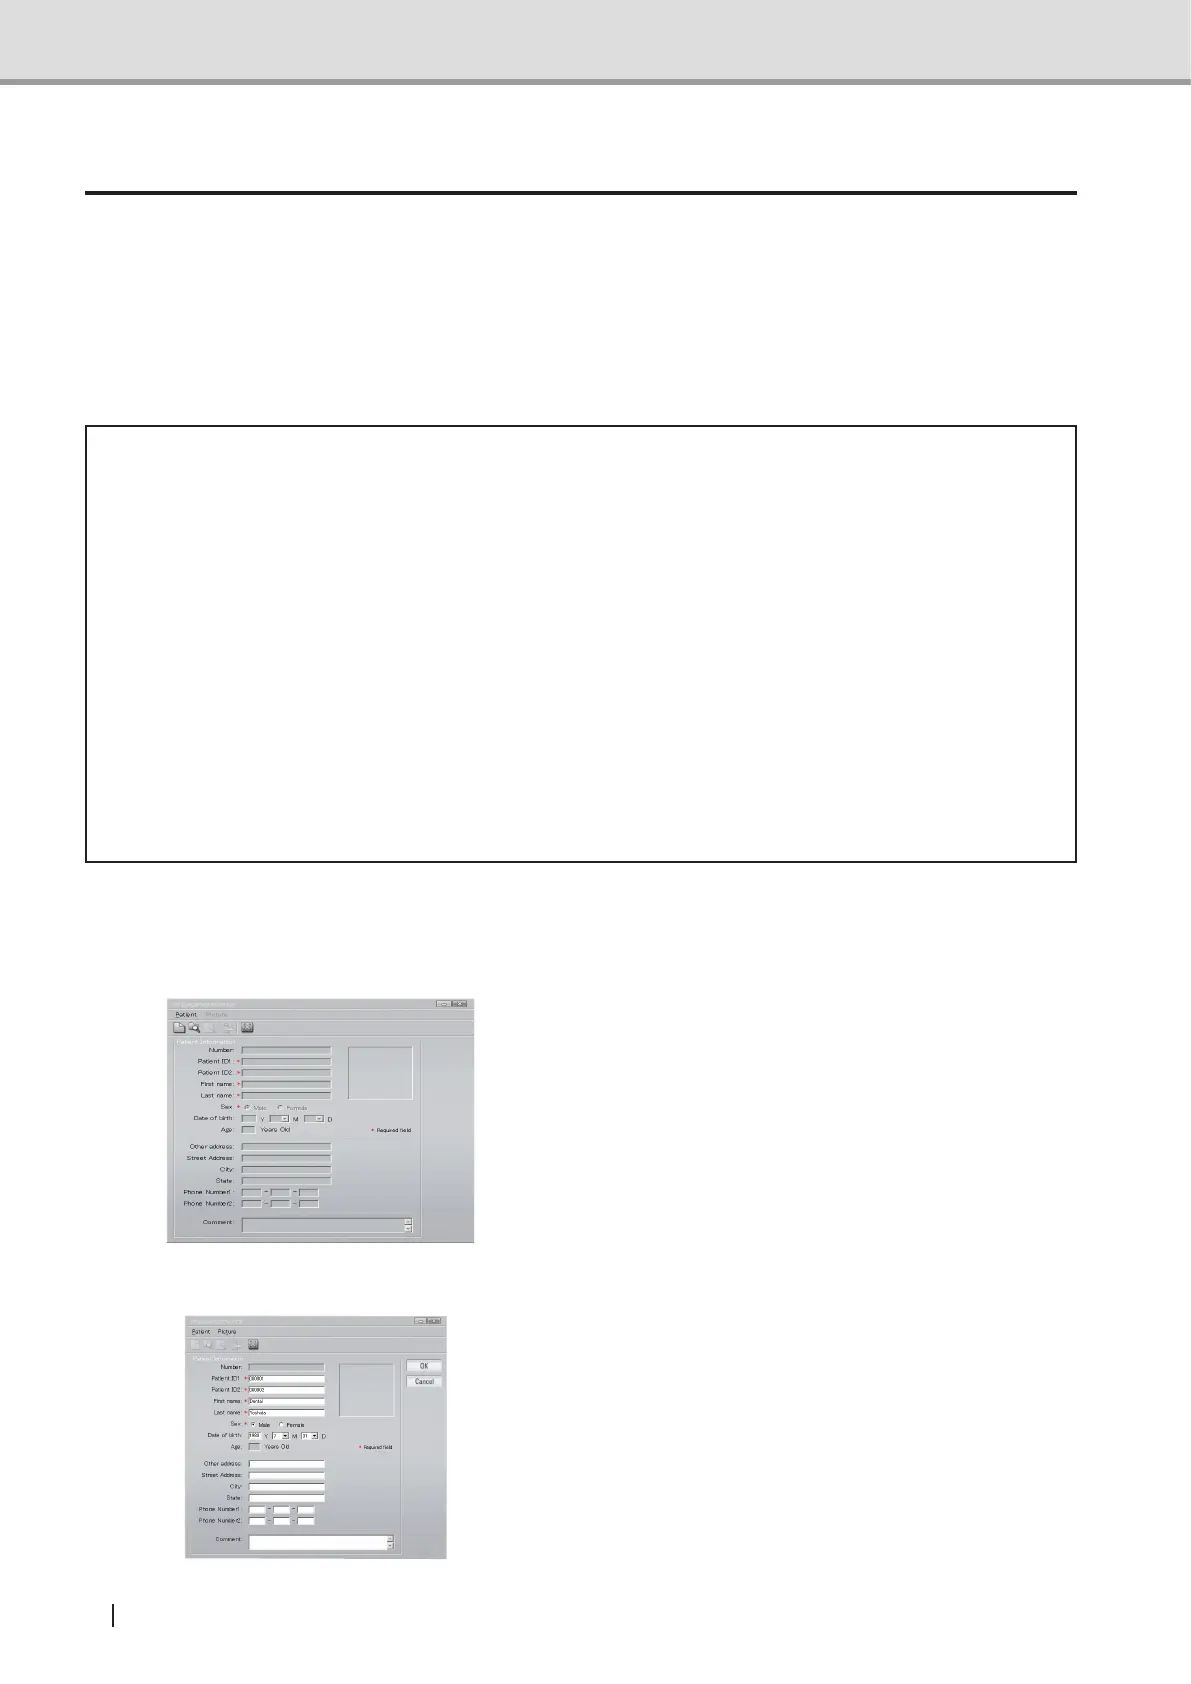
4.2 About the Patient Registration Screen
Press the "Patient Registration" button, and
the patient registration screen appears.
Register a Patient ID. Select the patient's
name, date of birth, and sex. Press the
"Register" button, and the new patient is
registered